the feed
Our Top Adventure Travel Gear Picks from Arc'teryx
Adventure is life. Whether it is something planned or when plans go awry, life will always come at you in the form of adventure. Sometimes that's for the better, and at times notsomuch. You can control what you can, and roll with what you can't.
Half of my life is spent in the wilderness, most likely with a backpack full of my outdoor essentials. The other half is traveling around the world photographing resorts. These are pretty polar opposites and being prepared for each respectively is super important so I can focus on my creative process and enjoy where I am.
Adventure can live anywhere and having the right gear can go a long way. I'm a huge fan of Arc’teryx, both on the trail and in my everyday travel life. My 3-Day backpacking checklist has many of my favorite pieces that I highly recommend for anyone looking to flesh out their kit.
But let's talk about the days when we aren't on the trail - the everyday essentials. One of my absolute favorite brands, Arc'teryx, has you covered. Their versatile Coast Mountain-inspired collection of casual clothing is ready for every day and everything.
About Arc'teryx
Arc'teryx is a technical high-performance outerwear and equipment company located at the foot of the Coast Range mountains. They design and test their products in true wilderness, with an unwavering commitment to design, craftsmanship, and performance.
Now, to be honest, when I think of Arc'teryx, I think of 2 things: quality and costly. Their pieces can be quite expensive, but is it worth it? Hands down, without a doubt - a resounding yes! A quick feel of the fabrics that they use, or a glance at the attention to detail will tell you all you need to know. I have personally used a rain jacket from them for 12 years. It still performs like it did the day I bought it.
They have awesome customer service and stand by their products. In fact, they have something called the ReBird Service center in New York that repairs pieces on site (when possible). In their own words, this service center is one of the ways "to increase planetary repair and acts of reciprocity." That's pretty dang cool!
Arc'teryx Everyday Collection
With their Everyday Collection, you will find high-performing designs that are comfortable, practical, and can take you anywhere you want to go. Being prepared and comfortable while traveling or when experiencing new places is essential to maximizing the experience. Here are some of our favorite pieces for the days off the trail.
Arc'teryx Everyday Essentials for Men
The Eris Polo Shirt - Simple, refined, and smart – style requirements for travel and city. This shirt delivers precision Arc’teryx design and performance. Made from fabric blending the cool, natural comfort of organically grown cotton with the moisture-wicking performance of polyester.
- Provides comfort in warm weather
- Easily handles spontaneous urban adventures
- The regular fit and gusseted sides add freedom and comfort
- Built for daily wear
- Merrow stitch seams minimize chafing
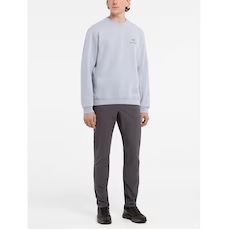
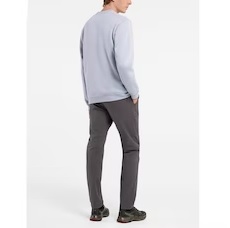
The Atlin Chino Pant - Designed with the Arc’teryx attention to detail and craft, the trim-fitting pant is a versatile option for relaxed city life, adventure travel, and casual weekends.
- Midweight cotton/nylon stretch canvas
- Comfortable, hardwearing fit
- Stretches for a clean fit that moves with the body
- Gusseted crotch
- Subtle articulation at the knees adds freedom of movement.
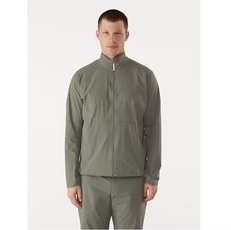
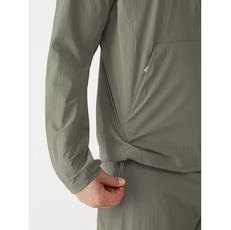
The Acrople Jacket - The ability to move effortlessly across varied landscapes and shifting conditions requires versatility. With its minimalist design and performance material, this jacket helps protect you from transitional weather and moves easily from mountain to camp to a local trail.
- Stretch nylon fabric cuts the wind’s chill while allowing enough airflow for comfort on the move
- DWR finish helps repel moisture
- Packability is key – this jacket is easy to bring anywhere.
Arc'teryx Everyday Essentials for Women
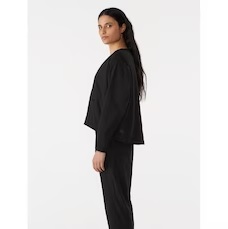
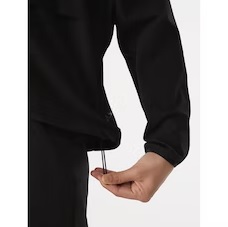
The Contenta Pullover - On a beautiful city day, take a break, step outside, and enjoy the sun. Made from 100% recycled content, the sustainable Diem™ polyester is silky soft, stretchy, airy, and cool, and delivers UPF 50+ protection.
- The boxy fit is flattering and comfortable
- Drawcord at the hem lets you shift the style
- Fabric resists wrinkles
- Stows in its own hidden zip pocket for easy packing
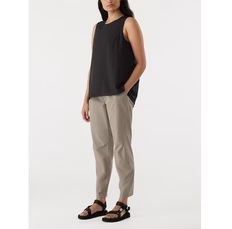
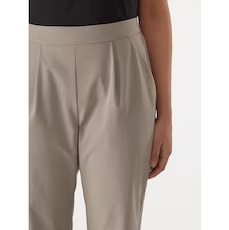
The Contenta Pant - Confident, sleek, contemporary, and comfortable - pure city style combined with serious freedom and comfort on the move.
- High waistband, tapered legs, and pleated front create a flattering streamlined silhouette
- Light stretch polyester - moves with you and holds the fit
- One of the slash hand pockets hides a zippered pocket that secures your smartphone, keys, or cash
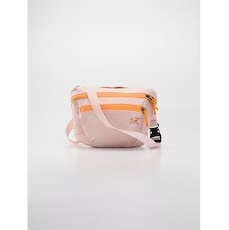
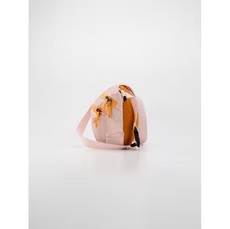
The Mantis 2 Waistpack - A simple, intelligently designed 2.5 litre pack sized for quick errands or traveling the globe.
- Rides comfortably on the waist or over the shoulder
- Carries your wallet, passport, and digital devices
- Zippered front pocket has a clip for keys and a range of internal pockets
- Easy-access stash pocket and zippered security pocket
- A smart, discreet pocket on the back panel stashes a smartphone or transit pass.
Head over to Arc’teryx to view their entire collection of everyday essentials and be prepared for anything.
Browse Women’s Everyday Collection
Some Not So Basic Car Camping Tips
The weekend is coming and you have an epic car camping trip lined up. Check out these car camping tips to make sure it's the best one yet!
I love car camping. You get to bring all the luxuries and still get to enjoy the best of nature. You know what I don't love - the packing, forgetting things, FOMO. We put together this list compiled of mistakes we have made in the past so that you don't have to go through the same thing. After all, we are heading out to the wilderness for some peace, quiet and relaxation, right?

Before you hit the road
1. Fill the tank
Don’t be that guy. There’s nothing worse than getting out on the Forest Service roads and watching the ominous gas light turn on. Start your trip off with a full tank of gas. You may also want to top it off before heading into the wilderness. Stay stress free, my friends. I carry a Rotopax 2 gallon tank that I fill with extra fuel on longer trips, but my Tacoma doesn’t get the best mpg.
2. Bring Lots of Water
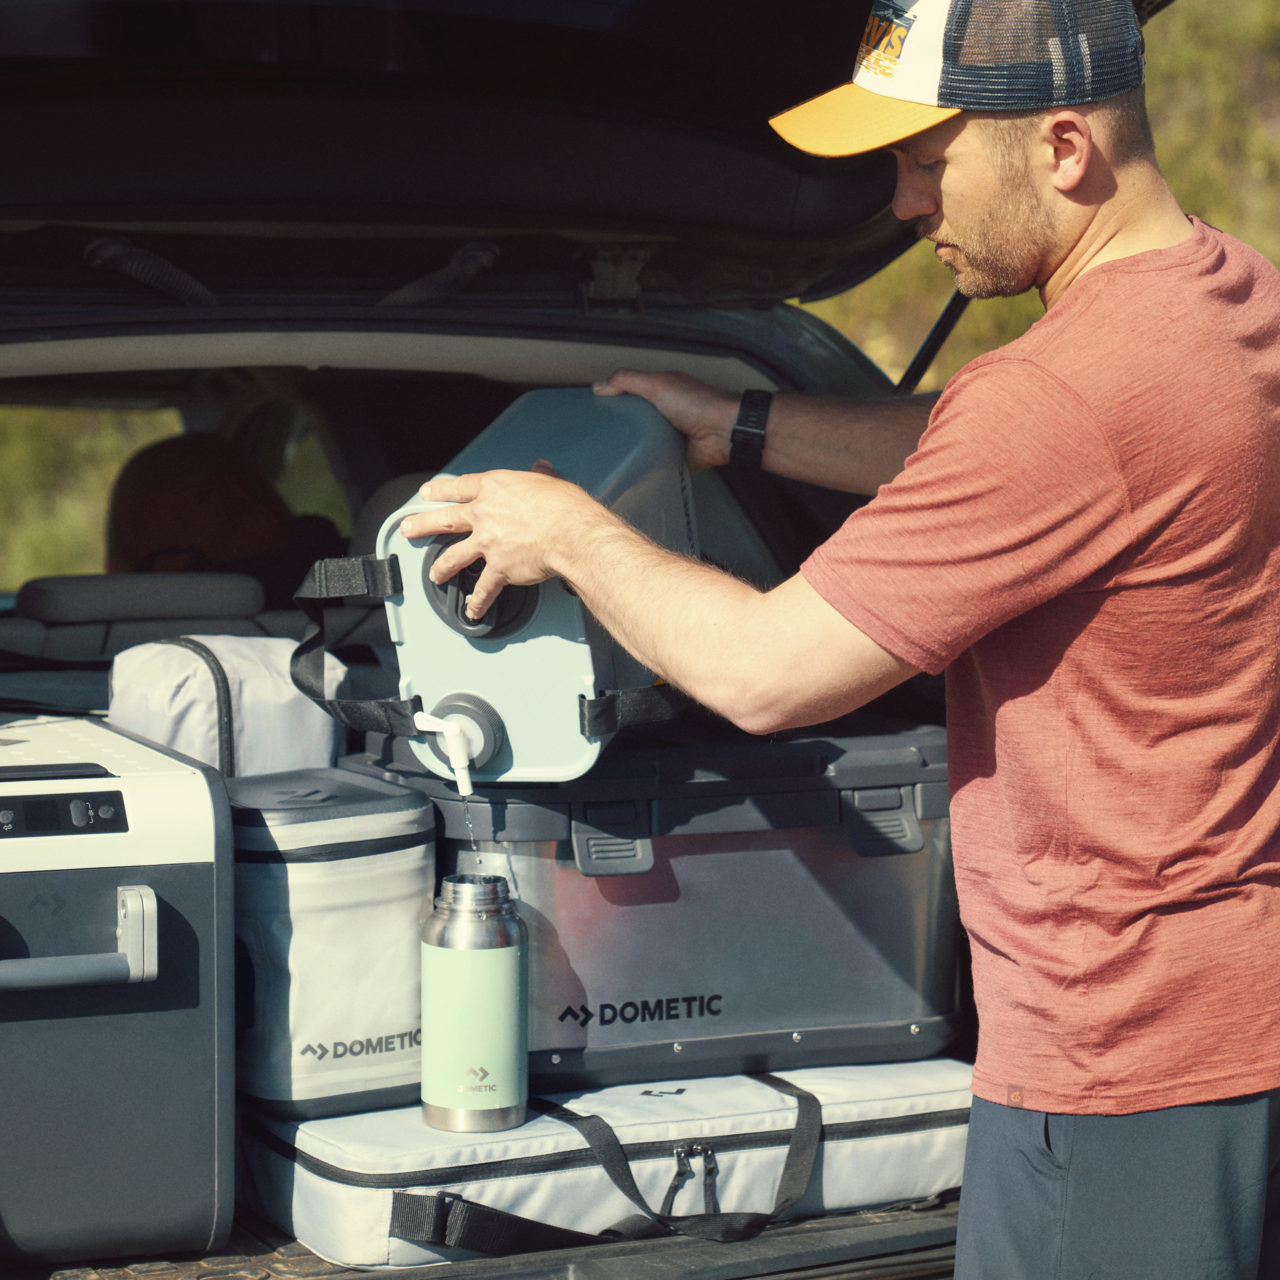
Start your weekend with as many full water bottles and bladders as possible. Weight isn’t an issue since you won’t be lugging it around on your back, and having lots of water gives you peace of mind. Use every gas station, visitor center and restroom as an opportunity to top off. Part of my road-tripping kit is a Dometic Go Hydration Water Jug paired with their Faucet. At camp, this also serves as my Hand and dishwashing station.
3. Sleep like a king or Queen
Don’t skimp on the luxuries. You’re not backpacking here! Bring a thick air mattress, or a heated blanket, and maybe your favorite pillow. Bust out your favorite book before bedtime. Heck, hang an iPad and snooze off to an episode of Ozark.

How to Pick Out the Perfect Campsite When Car Camping
4. Don’t Limit Yourself to Paid Campgrounds
The states are loaded with beautiful free campsites - you just need know where to look. One of the beauties of public land is that you can camp for free, right near your car. Follow these guidelines to choose a site, and be sure to check with the local land management agency for specific regulations.
5. Check if you need a Fire Permit
If you think you’ll want to make a fire, get a permit in advance from your local land management agency. Just because the campsite has a fire pit doesn’t necessarily mean fires are allowed. Know how to properly start, maintain and make sure your campfire is dead out.

When you get to your perfect campsite
6. Save your car battery
You’ll probably be opening the doors frequently, so save your battery by keeping the indoor lights in the “permanently off” position, and carry jumper cables in case of a dead battery. I always have a car jumper kit stowed away. This thing has saved my butt more times than I would like to admit.
7. Don’t make your campsite a yard sale
No need to unpack every last item: leave some things, like your daypack, extra food, and extra clothes, in the car. This helps you stay organized and ensures you have some reserve supplies in the rare event that critters steal your food or weather jacks up some of your gear.

Car Camping Tips for Setting Up Camp
8. Pick a Safe Spot for Your Tent
Scan the site for dead or overhanging branches and trees - you don’t want to pitch your tent underneath these things. Set up your tent in a flat, well-drained area. Bonus points if you can have your opening facing some epic scenery. Even though many tents have 2 vestibules, I usually only use one side to minimize the chance of debris or rain getting inside the tent.
9. Be The camp chef
Find a flat, sheltered spot 150 feet from your tent to pitch a tarp or canopy like the Kelly blah (if you’re expecting rain) and set up your stove. I set my kitchen under my FRO awning up against the truck. Use a proper kitchen table, chill your beer or wine in the stream (check alcohol restrictions for the land management agency), and get ready for a gourmet dinner.

Some Bomb Car Camping Tips
10. Don’t be a Litterbug
It’s important to practice Leave No Trace (LNT) by packing out all of your garbage. we started using the Litter Gitter by Kelty which helps to stay clean and organized as well as cutting down on tic garbage bags. If you’re in a place with access to waste bins, like trailheads or visitor centers, take the opportunity to chuck some in here. This will keep your car from getting stanky.
11. Store Food in the Car
Storing food and cooking equipment in the car prevents hungry critters from setting up shop on your site. Bring a cooler and sealed containers for opened foods: this keeps them fresh and lowers the stink factor. We have started using reusable storage bags and food storage containers by hydra flask. They help keep the food fresh, are super durable and come in some pimp colors for photos. If you really want to go all in, check out a portable camp freezer like the Dometic CFX45. We are big fans of outdoor cooking and having one of these is a game changer over using a traditional cooler. It is way cleaner, and cheaper in the long run - plus you never have to worry about water getting into any of your foods.
12. Tetris TF out of your car
Develop a mental map of where everything is in your car. You don’t need to be overly meticulous and annoying, but using proper bins or bags goes a long way. for soft items, I use Gregory Duffel Bags like the Supply Duffel 60 or Alpaca 60. For other items, I use the Rubbermaid Action Packer bins. A lot of people swear by this REI packing cube system but I personally haven't used them yet. Because I have a pickup truck, it’s rad that these can be locked with a quick combo master lock. Starting and staying organized as you go allows you to spend more time enjoying the outdoors and less time rummaging around for that spork that you swear is under the driver’s seat, but come to think of it, it might be in the glove compartment…

Car Camping Tips for packing up your site
13. Leave it as Clean or cleaner than you found it
Pick up all trash left behind by previous hooligans (especially in the fire pit). I agree, it’s no fun, but people will sometimes just be people. if you love the outdoors, be the better person and pick up what can. I thank you on behalf of all of the a-holes.
14. Spread some love
On your way out, stop by the visitor center or ranger station to tell the staff how much you enjoyed your visit and to thank them for all the work they do to keep these areas open and accessible. To do their jobs they sacrifice a lot. a small gesture of appreciation can go a long way!
The Best Packing List For Fall Backpacking
Fall may be the best time of year for backpacking. Here is a quick list of everything you need to bring on your fall backpacking trip.
Where to go, what to wear, what to eat, and what to drink.
One of our favorite seasons to go backpacking is fall. There are less people, insects, and less heat. Plus, under the color-changing leaves, there is nothing more enjoyable than curling up in your sleeping bag after being exhausted from a long trip in the cooler temps, maybe around a campfire.
There are a few things to think about before you head out on the trail that are unique to fall backpacking. Hopefully, we have got it all covered in this article!

Fall Backpacking Equipment to Bring
- A sturdy tent. We love the NEMO Hornet 2p. It weighs only two pounds and still provides essential weather protection. It has been my go-to tent for the past 3 years. If you're traveling to higher altitudes, you might want to bring a 4-season tent. Prepare for frigid weather and winter-like conditions, especially at night.
- Count your tent stakes. Make sure you have them all because of the fall winds and weather. You will want your tent and fly to be securely staked; this will help to ensure that the wind doesn't drive you crazy all night. Plus, It will keep you dry, which is far more vital. Pro Tip: In the fall, it's even more crucial to set up your tent as soon as you arrive at the campsite (i.e., before it gets dark), and make sure to dry it out as soon as you come home (since you don't want to leave a damp tent outside to mildew for the rest of the winter). Pick up some extra tent stakes - trust me, you will eventually thank us!
- A reliable headlight. The Petzl Swift is our top choice. For nighttime use in camp, choose a headlamp with an adjustable beam, regulated output (so it doesn't decrease as batteries drain), and a red-light option. Be sure to take rechargeable headlights into consideration when you weigh your selections. Remember that the days are growing shorter, so know when the sun will set so you may have plenty of time to prepare your camp.
- Extra batteries. The longer nights require more time spent using your headlamp. Additionally, the cold drains batteries quicker so it's important to have some backups. Consider grabbing some Goal Zero AAAs which can be recharged.
- A Cozy Sleeping Pad. Keep your body heat from being sucked out by the chilly earth. Before you go, check the R-value of your pad. On a scale of 1.0 to 9.5, the greater the number, the better you can anticipate it to insulate you from cold surfaces (R3 and above is best for the fall). We love the NEMO Tensor because it combines thermal insulation with extremely light fabrics. Some people like to double up on their sleeping pads by using something like the Therm-a-Rest Z Lite Sol. This will keep you even more protected from the ground. Bonus: it functions as a seat pad.
- A warm, comfortable sleeping bag. As a rule of thumb, bring a bag rated 10 degrees lower than the anticipated evening low. Additionally, keep in mind that with time, your old sleeping bag may lose some of its insulation properties. A down bag should always be cleaned thoroughly and stored loosely. Need a warmer bag? The NEMO Riff 15 is a great bag to try if you're shopping for one. If not, you can add a mummy liner, pack two summer bags, or put your pad and bag inside of a bivy sack for added warmth.
- A hard-sided water bottle. Use a Nalgene filled with hot water inside of your sleeping bag at night. This will heat up the inside and keep it warm all night. Be careful to fully tighten the lid.
- Extra Fuel. Colder temps mean longer cooking times. You'll need some extra fuel to heat up that hot water bottle for bedtime cuddling in your sleeping bag. Keep in mind that pressurized fuel canisters—or liquid gas, for that matter—cannot be shipped or transported by air, so get extra at the outdoor store closest to your destination.
- A thermos. While your Nalgene is ideal for warming up your sleeping bag because it allows heat to escape, you'll also need a container that holds that heat in. I bring my insulated Hydro Flask so I can make hot drinks and keep them warm as long as possible.
- A Bear Canister. Did you know that many animals choose to breed during the fall? Make sure to stay away from any wildlife and use bear cans, hooks, or lockers to prevent drawing them to your campsite. Use a bear canister that is large enough to fit all of your food and smelly accesories like sunscreen, deodorant, toothpaste, etc.
- Sh*t That Actually Works! Have you used all of your equipment recently? Maybe. Maybe not - better check all of it out before hitting the trails. You'll be happy that your gear is in good working order before you arrive at your camping location miles away from civilization. Make sure that all the zippers function and that the tent fly is free of rips, etc.

What To Wear When Fall Backpacking
If you would like to see exactly what we wear on the mojsoryt of our backpakcing trips, head over to our 3 Day Backpacking Checklist and jump down to the Clothing section.
1. Layer Up. The secret to fall weather hiking is layering. To wick away moisture and keep you warm even when wet, base layers made of wool, fleece, or synthetic materials are required. (Remember: Cotton kills.) I always bring a raincoat, beanie, lightweight insulated jacket, sleep socks, additional socks, and long underwear made of wool. For fall, I add gloves, an additional fleece layer, and perhaps rain trousers. Bring layers of clothes to stay warm in a variety of weather conditions, including wind, rain, and sun.
- A Good Rain Jacket. Although fall weather might be unpredictable, rain is virtually always a given in many locations. Don't undervalue the potential of your rain jacket to maintain warmth as an additional layer in camp. Raincoats do more than just keep you dry. The Arc'teryx Beta AR is bombproof, lightweight and super packable. Yes, it is expensive, but it is aboslutely worth every penny. This is one piece of gear that I highly recommend to invest in. It will last you many, many years with proper care.
- Gaiters. The fall weather can vary greatly. The trail and vegetation may get wet after an overnight or morning rain, but since it's still nice and warm, you may not want to wear pants. I frequently wear shorts with gaiters since they keep my feet and boots dry.
- Down booties. Down booties are the go-to item for avid cold-weather backpackers, whether it's for keeping warm by the campfire or adding more warmth to your sleeping bag. Warm feet are happy feet and don't add much extra weight to your pack.
- Colorful Clothes. If you're backpacking through places where hunting is active, check your local hunting regulations for the dates of the season. Same rules apply for your dog - high-visibility means safe trails.
- Clothes that dry quickly. Quick-drying gear is a necessary even if there is a remote chance that you will become wet (which there always is). Before going to bed, hang any damp (but not drenched) items in your tent. Your clothes will dry overnight so you can start the day off nice and fresh!

What to Eat and Drink
- Simple meals. Keep it simple. You'll be glad if all you have to do is boil water and enjoy! We love boil-and-go prepared foods, such as Wild Zora or Mountain House. Vary it up every night so you have something to look forward to.
- Bring Some Apps. Consider bringing an appetizer with you to camp to keep yourself full before or while you're cooking supper. A simple favorite - homemade bars of granola.
- Oh, Sweet Dessert. Treat Yo'self!! S'mores are our go-to, but any fatty food can keep you warm as your body digests it.
- Extra food. Keeping warm when simply sitting still burns calories, so bring extra food. Good fats, including those in fish, almonds, and avocados, help to maintain a healthy internal temperature.
- Hot drinks. Your body needs fluids to control your core temperature, so stay hydrated with some hot drinks like hot cocoa, coffee or tea. Did you know that the fall is the time of year when dehydration is more prone to happen since there is less sweating and thirst? I mix my own chocolate using protein, cocoa, and coconut powder. Irish cream, peppermint schnapps, or chile peppers can be added to make Mexican-style cocoa.
- Plenty of water. Water is necessary, but it might not always be easy to find as it is in other seasons. Water sources may run dry by the end of the summer, depending on your location. Make sure you are aware of your available water sources. Bring along some electrolytes such as Ultima to get some yummy flavors and vitamins while you stay hydrated!

Where to Go Fall Backpacking
- An area with good weather. The weather starts to become less predictable in the fall. Always check the forecast before heading out, but keep in mind that circumstances can change at any time.
- Where parks are open. Make sure the roads and campgrounds are open before you go. Many parks, highways, and campgrounds close from fall until spring.
- An area where the colors are popping. Fall is the best season to look for colorful leaves. Seek out the best destinations with fall colors.
- A Safe area for camping. Choose a tent location that will protect you from the weather. Avoid low-lying regions and bodies of water because they tend to be cooler. If wind is an issue, position your tent close to stones, trees, even tall brush or grass to block it. Find a spot where the light will shine on you first thing in the morning, and stay in camp to really appreciate it.
DOWNLOAD OUR 3-DAY BACKPACKING CHECKLIST
We put together the ultimate guide to help you make sure you have everything you need for your next fall backpacking trip. Since you are probably heading out in the Fall, you may want to add some additional layers on there. Print it out, and mark it off as you go!
What is Shutter Speed and How to Use it Like a Boss
Shutter speed is mainly responsible for 2 things: changing the brightness of your photo and freezing action or blurring motion.
Let's talk about shutter speed, shall we?
You know that button you press to actually take a picture? It's called the Shutter Button, or shutter release. Want to know why? Because it controls the shutter, and what tf does that actually mean? Let's get into it.
First, let's talk about what and where the shutter is. Think of it like a curtain, a blackout curtain, that sits in front of the camera's sensor. In order for light to hit the sensor and produce photo magic, the shutter has to open. How long that "curtain" is open is called Shutter Speed. The longer it is open, the more light hits the sensor. We will talk about what this does to your final image in a bit.
How Does Shutter Speed Affect my Image?
Shutter speed is responsible for two particular things: changing the brightness of your photo and creating dramatic effects by either freezing action or blurring motion. When you use a long shutter speed (also known as a “slow” shutter speed), you end up exposing your sensor for a significant period of time.
A slow shutter speed will create motion blur when dealing with a moving subject. Think about car advertisements, where a sense of speed and motion is communicated to the viewer by intentionally blurring the moving wheels or how the background seems to be whizzing by. This is also how to create those beautiful "milky" moving water photos. Slow that shutter down.
Check out the 2 images below:
In the first image, the motion blur of the foreground and background gives you (the viewer) a sense of fast motion. This is using a slow shutter while moving the camera along with the rider.
In the second Image, the rider is frozen in action because a fast shutter was used.
Slow Shutter Speed = Motion Blur
Slow Shutter Speed = Motion Blur
Fast Shutter Speed = Frozen Action
Fast Shutter Speed = Frozen Action
Slowing down the shutter is also necessary to shoot in dim or dark environments such as photographing the Milky Way. Keeping the shutter open will allow the sensor to soak up as much light as possible. An example: throw your camera on a tripod, slap a 2 second timer on to minimize camera shake, and set the shutter to 30 seconds to create something like the photo below.
Milky Way Photographed using a slow shutter speed
Shutter Speed and Exposure
Shutter speed also affects the overall exposure of an image. A long shutter allows your camera sensor to gather a lot of light, and the resulting photo will be quite bright. A quick shutter speed means your camera sensor is only exposed to a small fraction of light, resulting in a darker photo.
Keep in mind that Shutter speed is only 1 of the 4 elements to consider when it comes to proper exposure. There is Aperture, ISO, and the brightness of what you are photographing. Unless you're in a studio, you can't do much to control the light of the environment, but you can control your camera settings. Photography is the art of understanding how to set these properly to achieve the image you want.
Take Me To Chapter 4: Let's Break Down What Aperture Is, ya?
Photography Basics Organization
(This will be filled in with links as I produce them) - Stay Tuned!!
Chapter 1:How Do I Use This F*cking Camera?!
Chapter 2:So What The F*ck is Photography Anyway??
Chapter 3:What is Shutter Speed and How to Use it Like a Boss (You are here)
Chapter 4: Let's Break Down What Aperture Is, ya?
Chapter 5: ISO
Chapter 6: Composition
Chapter 7: Metering
Chapter 8: Camera Modes
Chapter 9: Focusing
Chapter 10: Flash
Chapter 11: Camera Settings
Chapter 12: How to Take Sharp Pictures
Chapter 13: Photography Tips for Beginners
Chapter 14: Photography Ideas
So What The F*ck is Photography Anyway?
Photography is the art of capturing light with a camera. Snoozefest. It's art. It's creating and capturing. It is whatever you want it to be.
Let's go with the boring definition first: Photography is the art of capturing light with a camera, usually via a digital sensor or film, to create an image. Snoozefest. It's art, man. It's creating and capturing. It is whatever it is you want it to be. Biyatch, don't kill my vibe. That's what it is.
Photography can tell a story, it can capture a moment in time, it can document, and it can be art. There are many technical uses for photography as well as social and creative ones. How we capture and how we consume photos changes almost daily which keeps it fresh and exciting!
Do I need a Fancy Camera?
Let's start with this: the gear doesn't make the photographer. Do certain features found on pro or prosumer-level cameras help to enhance a photo? Yup. Is it necessary? Nope. Can you take a bomb-ass shot with your iPhone - Oh heck yes! Your eye is more important than the camera used.
I admit, I actually enjoy pissing people off when they ask me - what's the best camera? My reply? The one you have on you when you need it. It's just the truth. Most times that ends up being my iPhone, or my GoPro (anyone say Haboob?).
So what am I getting at? If you know what to look for when taking in a view, or composing a photo, the camera you use doesn't matter all that much - not until you are getting into professional usage for your photos. Then the resolution, depth of field, sharpness, etc come into play. We will get there - keep following along.
Basic Camera Gear
What are the Bare Necessities for Photography?
Now we are stepping away from your phones for this one and leveling up. We will start with the big 3 and then check out the optional accessories.
Camera. Pick one with interchangeable lenses so that you can try out different types of photography more easily. Read reviews, but don’t obsess over them. Trust me, you will spend way too much of your hard-earned money on photography gear over the years. At least do yourself a favor, and save yourself from the stress. Pick a reputable brand, look around on Facebook or OfferUp and jump in. You can always upgrade later.
What do I use? My main camera body is the Canon EOS R5 and I absolutely love everything about it. It is incredibly feature-rich, has great ergonomics, super dependable, and checks all of my boxes as a professional shooter that needs to dabble in almost every type of photography out there. I use the Canon EOS R as my backup - the one I take backpacking because it is 1/2 the price and much lighter. For beginners, I would recommend maybe looking into the Canon EOS RP.
Lenses. For everyday photography, start with a standard zoom lens like a 24-70mm or 18-55mm. For portrait photography, pick a prime lens (one that doesn’t zoom) at 35mm, 50mm, or 85mm. For sports, go with a telephoto lens. For macro photography, get a dedicated macro lens. And so on. Lenses matter more than any other piece of equipment because they determine what photos you can take in the first place. If you want to start with one, I would recommend a 24-70mm to give you a great range to play with.
Post-Production Editing Software. It's my least favorite part, but it is part of the art. Adobe sells Lightroom and Photoshop as a bundle for $10/month, or you can buy standalone software from another company if you prefer; there are tons of options. Whatever you pick, stick with it for a while, and you’ll learn it quite well. This is where Youtube will be your best friend. Please, please, please don't start with Presets. Learn how to edit first, and then dabble with presets. Otherwise, you're robbing yourself of learning the basics and understanding what you are actually doing in the software.
Photography is the art of capturing light with a camera. Snoozefest. It's art. It's creating and capturing. It is whatever you want it to be.
Let's Call These Items Optional, Though We Know You're Going to Get it All!!
A tripod. A landscape photographer’s best friend.
Best Travel Tripod: Peak Design CF Travel Tripod
Best All Around Heavy Duty - Manfrotto MT055CXPRO4 055 Carbon Fiber 4-Section Tripod
Bags. Get a shoulder bag for street photography, a rolling bag for studio photography, a technical hiking backpack for landscape photography, and so on.
Best Backpack: Peak Design Everyday Backpack
Memory cards. Choose something in the 64-128 GB range to start. Get a fast card (measured in MB/second) if you shoot bursts of photos since your camera’s memory will clear faster.
Extra batteries. Get at least one spare battery to start, preferably two. I would NOT recommend off-brand batteries, even though they are usually way cheaper. In my experience, they don't last as long or maintain compatibility with future cameras and can actually damage your body.
Polarizing filter. This is a big one, especially for landscape photographers. Don’t get a cheap polarizer or it will harm your image quality.
My favorite: B + W Circular Polarizer Kaesemann - Xtra Slim Mount
Flash. Flashes can be expensive, and you might need to buy a separate transmitter and receiver if you want to use your flash off-camera. But for genres like portrait photography or macro photography, they’re indispensable.
My Favorite: GODOX AD200 Pro
Cleaning kit. The top item is a microfiber cloth to keep the front of your lens clean. Also, get a rocket blower to remove dust from your camera sensor more easily.
Other equipment. There are countless other photography accessories available, from remote shutter releases to GPS attachments, printers, and more. Don’t worry about these at first; you’ll realize over time if you need one.
What is Shutter Speed and How to Use it Like a Boss
Photography Basics Organization
(This will be filled in with links as I produce them) - Stay Tuned!!
Chapter 1:How Do I Use This F*cking Camera?
Chapter 2: So What The F*ck is Photography Anyway? (You are here)
Chapter 3: What is Shutter Speed and How to Use it Like a Boss
Chapter 4: Aperture
Chapter 5: ISO
Chapter 6: Composition
Chapter 7: Metering
Chapter 8: Camera Modes
Chapter 9: Focusing
Chapter 10: Flash
Chapter 11: Camera Settings
Chapter 12: How to Take Sharp Pictures
Chapter 13: Photography Tips for Beginners
Chapter 14: Photography Ideas
How Do I Use This F*cking Camera?
A step-by-step guide to using your camera like a boss. How can I take better photos? What settings should I use? And more Photography Basics!
Where to Begin
Treat this Photography Basics Series like a book. It is best to read it from start to end because each chapter builds on prior chapters. However, if you want to jump to something more specific, you’re welcome to skip ahead to a later chapter. Here is the overall organization of the guide:
Photography Basics by Chapter:
(This will be filled in with links as I produce them) - Stay Tuned!!
- Chapter 1: How Do I Use This F*cking Camera? (You are here)
- Chapter 2: So What The F*ck is Photography Anyway?
- Chapter 3: What is Shutter Speed and How to Use it Like a Boss
- Chapter 4: Aperture
- Chapter 5: ISO
- Chapter 6: Composition
- Chapter 7: Metering
- Chapter 8: Camera Modes
- Chapter 9: Focusing
- Chapter 10: Flash
- Chapter 11: Camera Settings
- Chapter 12: How to Take Sharp Pictures
- Chapter 13: Photography Tips for Beginners
- Chapter 14: Photography Ideas

Why I Wrote This
It's the set of questions I get asked all of the time. How can I take better photos? What settings should I have my camera on? Do I have to shoot in Manual Mode?
I have been a professional photographer for 15 years now. I have photographed in almost any imaginable scenario, climate, and circumstance forcing me to learn most of what I know on the fly. I admit, that most of my learning came through making mistakes. I hope this guide will allow others to learn from my mistakes and skip right past that painful part of the learning process.
Let me also say that I am writing in this in a fashion that makes the most sense to me. I’m going to give examples about how I personally understand camera settings, lighting, posing and all the good things that encompass photography. Most of my examples will focus on the type of work I do - adventure, lifestyle, product, editorial, etc. however all of the ideas and principles that I share can be applied to any type of photography.
Let me say this: Youtube University is an insanely great asset to use to learn all about photography. However, I would highly suggest having a rock-solid understanding of the basics before blindly following along. Once you have the basics dialed in, have at it on YT.
Top 10 Must-Know Tips for Campfire Safety
Top 10 Must-Know Tips for Campfire Safety that you need to know before heading out on your next camping adventure.
One of the most enjoyable parts of camping is enjoying a glowing campfire-not to mention the light and warmth it provides. Building a campfire, however, comes with a lot of responsibility. A campfire can quickly become dangerous for the people, animals, and land around it if it is not built correctly, maintained, and extinguished. Nearly 9 out of 10 wildfires in the United States are started by people. Campfires can be enjoyed safely and responsibly if you know how.
These are the Top 10 Must-Know Tips for Campfire Safety.

1. Know the Rules
Check the fire regulations of the campground or wilderness area where you are planning to build a fire before striking a match. Campgrounds may temporarily ban campfires if there is a high risk of wildfires, even if they have previously allowed them. Check the ranger's station for current campfire regulations and pay attention to posted signs.
2. Use the Campfire Pit
In most campgrounds, there is a fire pit or fire ring where campfires can be built. A campfire should only be built in the provided pit if one is provided. In a remote area where campfires are permitted but fire pits are not provided, dig a fire pit in an open area away from power lines, overhanging branches, and other hazards that could catch fire. After the pit has been dug, surround it with rocks, clearing a ten-foot radius of anything that could catch fire around the pit.
3. Building a Safe Campfire
Once your fire pit is built, build a safe campfire. Start the campfire with grass or dried leaves that will catch fire quickly. Then, add kindling, small branches and sticks smaller than an inch in diameter. Keep adding larger pieces of wood to the fire as it builds. In addition to providing heat, they will keep the fire burning for a longer period of time. Remember, you do not have to have a raging fire. In a small fire surrounded by rocks, you'll have plenty of heat for cooking and warmth.
4. Mind the Match
Light your campfire with a match, and make sure it is completely extinguished before disposing of it. Wet the match or throw it directly into the fire to burn it. Never start a fire with lighter fluid, gas, kerosene, or any other flammable liquid.
5. Use Local Firewood
Even if they are not visible to the naked eye, tree-killing insects and diseases can live on firewood. You can inadvertently introduce insects and diseases into forests where they wouldn't otherwise be found by bringing firewood from home. That's why it's important to use local firewood. Local means the closest convenient source of firewood available. Pick up firewood from the campground camp store or a nearby location, if possible.
6. Keep Water Handy
You should always have water and a shovel nearby when you start a campfire. Use the water to douse any runaway flames and the shovel to throw dirt or sand on any flames that jump the perimeter of your fire ring. It's also smart to keep a few feet of ground outside your fire ring watered down, so if an ember or flame flies outside, it won't gain any traction.
7. Pay Attention to the Wind
Your fire can spread in seconds if the wind is strong. Any flammable materials, such as unused firewood, should be kept upwind and at least 15 feet away from a campfire in case of a sudden gust of wind.
8. Be Careful with Kids and Pets
Campers need to be aware of more than just the risk of forest fires. The most common cause of camping injuries for children in the United States is fire. Keep your children and pets away from campfires unless they're on an adult's lap and teach them about fire safety. In the event that their clothes catch on fire, teach them how to stop, drop, and roll.

9. Never Leave a Campfire Unattended
Even for a minute, a campfire should not be left unattended. There should be at least one person watching the fire at all times because even a small breeze can quickly spread the fire. Even if you're leaving the fire for a short period of time, like to take a quick hike, you should extinguish it completely. It can be restarted when you return.
10. Put the Fire Out Completely—Every Time
When you're finished with your campfire, make sure you extinguish it properly. Dump water on the fire, stir the ashes with a shovel, then dump more water on it. The fire should be completely cold before you leave it unattended. If it's too hot to touch, then it's too hot to leave.
If you have large logs, make sure you soak them in water before attempting to put them out. Move the stones around the campfire to look for hidden embers. Never bury coals from the fire - they can smolder and start to burn again.
Royal Robbins Men's Alpine Mtn Pro Pant Review
The Alpine Mtn Pro Pant are a unique pair of pants that are super comfortable, and have some killer features. But there are some downsides.
Comfortable and durable with 4-way stretch – Super Comfortable trail pants rich with features.
When I first put on the Alpine Mtn Pro Pant, I thought that was it. I'm done. I have found the perfect pant. They are extremely comfortable with a fantastic fit, and feature a cinch ankle closure that so many outdoor men's pants neglect. These will be one of my favorite pants that will get a ton of use, just not on my more active adventure days. Keep reading to find out why.

Overall Verdict
Oh man did I love these at first. They actually made me reconsider Royal Robbins as an adventure brand when I first started wearing them. I had always considered them an outdoor lifestyle brand, but not anything that I would wear during active adventures. I would rock their gear at camp. But quickly I realized that they were missing some of my major points and therefore they are delegated to stay in Camp. That is in no way put-down, though, as they are one of my favorite pants for that occasion.
Pros: Super Comfortable, very versatile. Great Style & Fit. Ankle Cinch. Great Stretch and Mobility.
Cons: Do not breathe well. Not Great for warm weather. Fabric Stretches too much.
(I am 5'8" and 160lbs wearing a 30" Waist with a 30" Inseam). If you're an Amazon shopper, you're in luck because they do sell them.

Comfort & Mobility
Their stretch and articulation provide freedom to stride and climb, and their durability withstands miles of scrambling and bushwhacking. Meaning, that these things move with you no matter how aggressive you get. They are the opposite of restrictive which is their biggest strength, but also a downfall. Why? because they stretch pretty quickly and then lose a lot of their structure. I personally like slimmer-fit pants and tend to feel like I am swimming in more "regular" fit pants. Within an hour, these pants go from a relatively slim fit, straight into a loose regular fit.

Breathability
This is a downside to these pants, and for someone who runs hot like me, almost a dealbreaker. But please listen, I will say this about almost every single pant I wear. I run super hot. What can I say? I will say these do breathe better than most, but I feel like they tend to hold the heat in once it builds up more than I would like.
I do love that they have thought about ventilation features and have added in the ankle cinch. This is something that most other outdoor pants lack.

Versatility
From everyday casual wear to the office, these pants will fit right in. I have worn these in a professional setting and didn't look out of place at all. I love to wear these at camp, at a picnic or BBQ, or after a long adventurous day. With the ankle cinch, they pair best with some Chacos.
Water Resistance
The Alpine Mtn Pro Pant is water-resistant. They will shed a LIGHT rain, but that is really it. These will wet out relatively quickly. Once they do, you can expect them to become quite baggy and heavy. I found them also to be pretty slow to dry out or wick moisture.

Features of The Alpine Mtn Pro Pant
The Alpine Pro Pant has some unique features. My favorite feature is the ankle cinch which allows for some ankle breathing and also a different style look depending on how high you cuff them. They also feature a zip pocket just above the left knee which I find completely unusable. It is a strange placement that places whatever you put in that pocket on the knee as it bends. I could see it being used for soft items only - think face mask or lens wipes.

Value
The Alpine Pro pants aren't cheap. Royal Robbins is an elevated brand. They use premiere fabrics that cost more in the manufacturing process and therefore the price tag ends up being higher. They retail at $95 and in my experience, don't go on sale very often. I have only had them for about 4 months so I can't speak to the longevity of these, but if they are anything like other Royal Robbins pants, they will last for a long time.
Royal Robbins Alpine Mtn Pro Pant Conclusion
I do love these, just not for technical adventures. Because of their fit and stretchability, these will be one of my go-to pairs of pants for everyday wear - even in the business casual work environment. I absolutely love the ankle cinch feature and the initial fit but I am not a fan of how quickly they loosen up and retain heat.
If you're looking for a great looking, super comfortable and pretty durable pair of pants, these are spot on. If you need more of a technical pant, I would look elsewhere, like the Outdoor Research Ferrosi.
Want Remember This for Later?
Pin This to Your Favorite Board!


Prana Brion Pant Review for Men
The Prana Brion Pant may be the best all-around pant for the adventurous man, but do they check all of the boxes? Let's Find Out
The Prana Brion Pant is almost the best all-around pant for the adventurous man.
They are extremely comfortable, highly durable, and feature a simple, crossover design that makes them super versatile. These will look and feel perfect climbing at the local crag and still be stylish back at the pub you hit up afterward.

Overall Verdict
These are solid pants that deserve their place amongst the best of the best. Due to their versatility, I have owned a few pairs of these in multiple colors. Admittedly though, I don't wear these as much for adventures as I do for casual outings due to their biggest downfall for me: breathability. Keep in mind, I live in the desert, so heat is kind of inevitable. More on that below.
Pros: Super Comfortable, extremely versatile & durable. Great Style & Fit
Cons: Do not breathe well. Not Great for warm weather.
(I am 5'8" and 160lbs wearing a 30" Waist with a 30" Inseam). I'm a sucker for a sale, so I would recommend keeping an eye on these at Backcountry.com. They go on sale all the time. If you're more of an Amazon shopper, you're in luck because they do sell them.

Comfort & Mobility
Arguably the most comfortable outdoor pant on the market. The Brion is made from a comfortable and durable stretch fabric blend (97% nylon, 3% spandex), but it wears and feels like cotton. The stretch allows you to move freely without any constriction or pinch points.
As with most pants, these will loosen up as you wear them, especially on multiday trips when some sweating or any moisture is in play. The waist will hold, but the legs will flare out. This could be great for larger individuals, but for someone with a slimmer frame, it may feel like you are swimming a bit.

Breathability
This is the only major downside to these pants, and for someone who runs hot like me, almost a dealbreaker. They lack ventilation features that other outdoor pants have such as venting or roll-up cuff snaps. The fabric itself is a bit heavier and tends to trap the heat making the Prana Brion a great pant for cooler weather, but not so good for warm weather adventures.

Versatility
From everyday casual wear to the office, these pants will fit right in. I have worn these in a professional setting for years and didn't look out of place at all. This is the strongest asset to these - wherever you go, they will blend in and perform well (unless it's really hot). With the simple cuts, slimmer fit, and minimal pockets, the Prana Brion is one of the most versatile pants for the outdoor enthusiast who has an affinity for post-adventure beers at the local brewery.
Water Resistance
The Prana Brion are finished with a durable water repellent (DWR) coating which is meant to help shed water droplets before they soak into the fabric. I found that this coating does a fantastic job at minimal sprays or drops when the pants are new. After a few washes, the coating starts to break down, but even after a couple of years, these pants retain a bit of DWR protection. However, it's important to reiterate that I am speaking about light mists and minimal water. These pants will wet out and become quite heavy with any decent amount of water, so these are not the best in rainy conditions.

Features of The Prana Brion Pant
The Prana Brion is as basic as it gets when it comes to features. Aside from the gusseted crotch, belt waist loops, and 5 pockets, these are a simple design. I believe this was very intentional in order to appeal to a wider demographic.

Value
The Brion finds itself in the middle of the market with its price point. They are not necessarily cheap, but hefty enough to make your wallet a bit lighter than you would like. You can keep your peace of mind knowing that these pants do last a very long time. Some of mine are over 6 years old and look brand new (including these used in the photos).

Prana Brion Pant Conclusion
I love these pants, but I am not in love with them. WTF does that mean? They tick almost all of my important boxes (Fit, Versatility, Style, Value, Comfort), but with the poor ventilation and breathability, they don't take the cake for me. If Prana incorporated some breathing ports or a cuff system to let some airflow around the ankles, these would get closer to the adventure clothing checklist, but for now, they stay in my Let's-Get-Some-After-Trail-Beers while rocking my Brions!
Want Remember This for Later?
Pin This to Your Favorite Board!


Prana Brion Photo Gallery
Bulletproof Coffee
Want a cup of coffee that will sustain your energy throughout the morning and for all your adventures? Then make it bulletproof.
After traveling to Tibet and trying yak butter tea biohacker Dave Asprey brought home the recipe and coined it “Bulletproof coffee.” So what is it exactly? It's a combination of clean caffeine from coffee beans mixed with healthy fats from unsalted butter and MCT oil. The combination provides a sustained energy throughout the day. No more caffeine crashes!

The Bulletproof Coffee Recipe
- 1 cup of coffee
- 1 tsp - 2 Tbsp MCT OIL (work your way up with this one as you can initially get stomach cramps)
- 1-2 Tbsp unsalted grass fed butter
- For a hint of spice add a sprinkle of cinnamon!
It’s best to blend the three ingredients together in a blender otherwise the oils and fats separate. Blending makes for a very smooth creamy latte.
- Calories: 230
- Fat: 25g
- Saturated Fat: 21g
- Carbs: 0g
- Protein: 0g
- Fiber: 0g
- Sugar: 0g
- Salt: 0mg

So why does it provide sustained energy? Let's break the ingredients down.
THE BULLETPROOF COFFEE
Coffee is a powerful antioxidant. Caffeine keeps you alert and boosts your metabolism. But just like the food you eat, the quality of the coffee you drink matters. Bad quality coffee can make you feel tired and sluggish, reaching for another cup. While a clean quality bean can keep you fueled and energized.
Avoid coffees with molds like ochratoxin. Molds will steal your mental edge and make you weak. For sustained energy it’s best to choose organic coffees that test for molds and toxins like Bulletproof.
We love Bulletproof not only because it’s a clean bean coffee but because they also support sustainability and our environment.
GRASS FED BUTTER
Unsalted grass fed butters are a nutrient dense source of fat providing fuel for energy. We like unsalted Kerrygold.
MCT OIL
A fat burning fuel made from coconuts. This is the key ingredient that helps you feel energized and focused. MCT's don't have to be broken down in the body therefore they give your cells an immediate energy source to pull from.
Keto
If you are interested in learning more about keto and a toxin free lifestyle check out Keto Canary.
Don't forget to save the recipe on Pinterest!


Review of the Nomadik Welcome Box with Hammock - Worth it?
We take a look at the Nomadik Welcome Box that includes a hammock that you receive when you subscribe and answer the question is it worth it?
Gear. We all love gear. Some of us a little more than others - maybe even to the point that it could be considered a problem, or an obsession. Is it truly even possible to have too much gear? I don't think so, and neither does anyone that has received a Nomadik Subscription Box.
If you want to subscribe, get loads of gear and save even more money while doing it, Nomadik gave an exclusive 10% discount to Adventure Dispatch Readers! Click here and use the code "Adventure10" at checkout!
Nomadik is a super take on the subscription mail idea that caters to outdoor gear lovers (Yes, I am looking at you!). When you subscribe to the Monthly Subscription, you will receive a bonus Welcome Box.
The contents change slightly, but for the most part, the items which we individually go through in this article remain the same. You also fill out a personal profile to start that they will use to cater the boxes to your interests. Though you don't get to choose exactly what you want, this helps point them in the right direction.
As is the case with many popular subscription boxes, the longer you sign up for, the less you spend per box. Prices range from $30 for one box, payable monthly, to $26 per box, billed semi-annually, for a total of $158.
Each box is has a guaranteed $50 retail value in each box. Most boxes also offer coupons for pretty hefty discounts from major (and not so major) brands. This brings up a super cool thing about what Nomadik is doing. Sure, they partner with some of the largest brands and include items from them, but they also include items from smaller companies, helping them to get more exposure for their quality items.
What is in the Nomadik Welcome Box?
Everyone that signs up for a Monthly subscription will receive the Nomadik Welcome Box. It's a great introduction to the process and a great teaser of the goodies that you will be receiving. Let's see everything that came in my Nomadik Welcome Box.

Grand Trunk Starter Hammock
This is their ultralight hammock and is a really good "starter" hammock. It packs down well and is pretty lightweight making it ideal to throw in your backpack for any adventure, or just a nap in a nearby park. Hanging straps are included so all you have to do is find the nearest pair of shaded trees to hang from!

Gear Aid Tenacious Tape Mini Patches
I love these things and should be a staple piece of gear for any backpacking adventure. In fact, I think these need to be added to our 3 Day Backpacking Checklist. These are used to repair holes and tears in down jackets, tents, rain gear. They are pre-cut patches of ultra-strong adhesive tape that permanently bond to nylon, polyester, GORE-TEX fabric, and vinyl.

UCO Hurricane Matches
These light up quickly and consistently in driving rain, heavy winds and falling snow—and will relight even after being submerged in water. Each box includes 25 matches that burn for up to 15 seconds each, plus 3 extra strikers. I default to carrying a lighter, but most of my adventures take place in normally dry conditions. I would pack these up as emergency backup if I went to more humid or wet areas.

Ursa Major Essential Face Tonic
This is a great example of Nomadik introducing some new products to even the most seasoned outdoors lover. This 4-in-1 natural face toner cleans, exfoliates, soothes and hydrates - leaving your skin feeling refreshed, firm and alive. I'm not sure it would make my longer backpacking treks where I am weighing every ounce, but for quick overnighters or car camping, why not? At home I have a nighttime routine to wash and clean my face, so why not take it to the backcountry?

Nuun Instant Electrolyte Hydration Powder Mix
I became an instant fan of Nuun a few years back when I used them during and after a few major hikes. They are relatively clean and work really well. These packets are an electrolyte powder that you add to water to rehydrate you faster than water alone. They are delicious and easy to throw in your bag for any adventure.
Wrapping up the Nomadik Welcome Box
You will also get a cool sticker to slap on your cooler and a pamphlet that talks about each item. They also have some incentives such as offering a $15 credit if you share your feedback. This means that they WANT to hear from their customers, and are actively listening. You will also find discount codes for many of the Brands that they work with.
Inside the Nomadik Welcome Box brochure, you will find the "Nomadik Challenge." Basically, if you post on IG and use the hashtag, they select 5 people to win a $50 gear bundle every month!!

Is it Worth it?
It's a bit too early to call it (sorry). This Welcome box is only a bonus gift and not the actual boxes that we will be receiving, but don't worry, there will be a follow-up! That being said, just the fact that Nomadik includes a Welcome Box with a Monthly Subscription in the first place with a value of around $50 is pretty cool. If I had paid the lowest tier amount of $30, and this was my box, I would be OK with it. I definitely received more than $30 worth of gear, so from a money standpoint, it is worth it. I am looking forward to the next box to get a true impression of what Nomadik is all about!
How To Make Your Own Keto Trail Mix
Our Keto Trail Mix is an awesome tasty snack to enjoy on the go. It’s low carb, super crunchy, and loaded with healthy fats for energy.
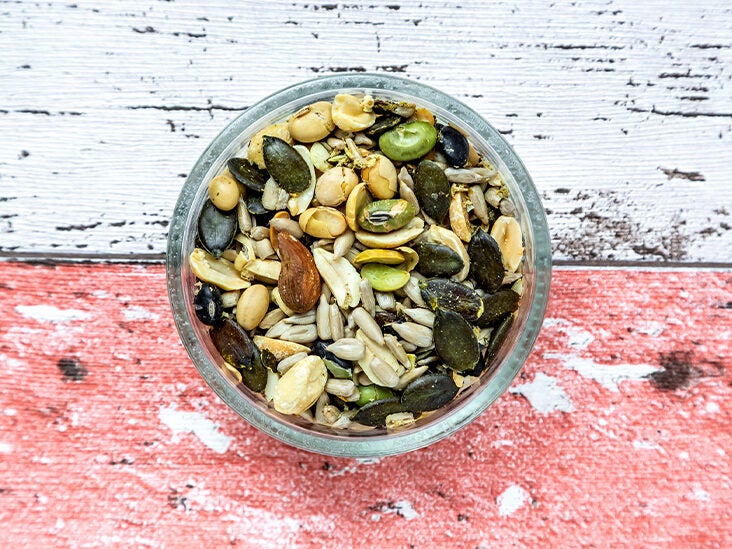
Our Keto Trail Mix is an awesome tasty snack to enjoy on the go. It’s low carb, super crunchy, and loaded with healthy fats for energy. Mix and match the ingredients to make it your own!
Being active doesn't mean you have to sacrifice your diet. There are tons of options available in most major food stores that are keto-specific. You do need to watch for some "loose" and sneaky marketing techniques though. Always check the ingredients for yourself.
The main things to look out for on the ingredient list are sugar or other additives that could counteract the health quality of the foods. Keto is trendy right now and marketers are taking advantage of it by using misleading labels. Flip the package over and check through them yourself before deciding what you to buy.
Keto Trail Mix and Net Carbs
The basic rule for staying in ketosis is to shoot for anywhere between 20-50g of carbs per day. This will vary depending on your weight and activity level. Those numbers are based on Net Carbs. Net carbs are the grams of total carbohydrates in a food minus its grams of total fiber. Because fiber is a carbohydrate that your body can't digest, it doesn't count against the number of carbs that can cause an insulin response.
Total Carbs – Total Fiber = Net Carbs
Sometimes a product will actually list the Net Carbs so you don't have to do any math, but again, make sure you are still checking the ingredients. Another soft rule is that less ingredients usually means healthier. Things such as sugar additives or preservatives can prevent your body from properly creating ketones.

What is Keto?
It is a high-fat, moderate-protein, and low-carb lifestyle that puts your body in a metabolic state called ketosis. Ketosis is when your body burns fat instead of carbohydrates as the primary fuel source. This is a much cleaner, more efficient way for your body to perform optimally.
How to Make Your Own Keto Trail Mix
To keep this as simple as possible, we are going to just throw a few ingredients into a bag, mix it up and head out to the trail. Trail mix is meant to be something quick and easy to pack along on adventures, keep us fueled up, and taste good! Mix it up any way that works for you and keep experimenting!
We created a web story that makes this super easy to follow along and get inspiration for making your own keto trail mix. ------>>>

Let's go Nuts!
Choose your nuts wisely! While nuts are always a great choice to add to your keto trail mix and the fat content is great for keto, you also need to consider the carbs. We love macadamia nuts because of their high fat content and low carb count. Pecans, Brazil Nuts, and Walnuts are nice as well. Below we’re counting down the best to worst nuts based on the amount of carbs in a 1oz portion.
Pecans: 1.1 grams
Pine Nuts: 2.7 grams
Brazil Nuts: 1.3 grams
Almonds: 2.9 grams
Macadamia Nuts: 1.5 grams
Peanuts: 3.8 grams
Walnuts: 1.9 grams
Pistachios: 5.8 grams
Hazelnuts: 2.3 grams
Cashews: 8.4 grams
Add Some Seeds
We love adding seeds to our keto trail mix for that extra crunch and texture. Additionally, seeds (and nuts) are packed with micronutrients such as vitamin E, B vitamins, and minerals (calcium, copper, iron, manganese, magnesium, potassium, selenium and zinc). Here is a list of how some of the most seeds rank according to net carb per 1 oz serving.
Flaxseed: 0.5 gram
Sunflower Seeds: 3.2 grams
Sachi Inchi Seeds: 0 grams
Sesame Seeds: 3.3 grams
Chia Seeds: 1.7 grams
Pumpkin Seeds: 3.9 grams

Chocolate Makes Everything Better!
That's right, we said chocolate! So not only is dark chocolate a suitable snack to have while on the keto diet (in moderation), it's also a great snack to have to help promote heart health. The key is to choose dark chocolate varieties with at least 70 percent cocoa solids to consume the most flavanols.
Our favorite is Lily's Chocolates. The net carbs fluctuate with different flavors, but we highly recommend the Salted Caramel Dark Chocolate. For the keto trail mix, it's best to stick to baking chips with no sugar added making them an awesome stevia sweetened addition.
Yes to Cheese, Please!
If you aren't a chocolate fan and don't want the stevia sweetness add some cheese snacks to the mix. Prepackaged snacks such as salty Moon Cheese Bites are perfect because they don't need to be refrigerated. If it is a short trip, you could definitely get away with chopping up some hard cheeses and tossing them in there.
How to Store and Carry Your Keto Trail Mix
As avid supporters of our big beautiful world, we try to practice conscious packaging whenever we can to minimize our carbon footprint. We love using Stasher Snack Bags any chance we get! They are reusable snack-size silicone bags that are toxin-free and environmentally friendly. Stasher makes these in a variety of sizes so you can use them for trail mix, sandwiches (minus the bread because - keto), cooking ingredients in the cooler and more!
Want to Learn More About Keto?
Being a big part of our life, we have created a few articles about the health benefits of keto. One of the misconceptions about keto is that it is difficult to stick to. It's easy to get overwhelmed when you're first getting started, but we hope that some of our articles help break it down into nice, bit-sized pieces.
If you are into backpacking, some concessions must be made because the food options are limited. A lot of keto foods are perishable, but again, we tried to make it easy by putting a full guide to the best snacks that you can find at your local Target. Most of these items are available at other grocery stores as well.
Pack it Up, Pack it In
Don't forget anything ever again by using our Free Car Camping Checklist! Now that you have some delicious snacks ready to go, use this guide to pack up the car and make sure everything you need is right by your side!
Ultimate 3 Day Backpacking Checklist, Everything You Need
3 Day Backpacking Checklist - the ultimate guide to make sure you have everything you need for your next backpacking trip.
This 3-day backpacking checklist includes everything you'll need for a comfortable weekend backpacking trip — nothing more, nothing less.
If you are just starting out or if you want to have your backpacking gear dialed in for your next trip, this guide will have you covered. I encourage you to make adjustments based on your specific needs but try to stick to the essentials.
In this checklist, I detail everything I bring on a three-day weekend backpacking trip in the spring, summer, or fall. I hope that this detailed packing list will ease your planning, help you figure out what you can cut out, and give you some good choices for gear to invest in that will last you for many years.

Start planning your next backpacking trip and make sure you have everything you need with this 3-day backpacking checklist.
Backpacking Pack
Starting right at the top, picking out the correct bag for your trip is the most important gear decision you are going to make. The pack will need to be big enough to hold all of your gear, comfortable enough to wear on long trekking days, and durable enough to last for many trips to come. Everything on your backpacking checklist will be housed in this bag, so choose wisely!
Ideally, for a 3-day backpacking trip during the Summer, Fall or Spring when the weather is more temperate, you can get away with a 45 to 55L pack. In colder temps, you may need to up your carrying capacity in order to pack warmer clothing and/or more layers.

We are huge fans of Gregory Backpacks because we believe they check all of the boxes that are most important to us. They are incredibly durable and dependable. They have features such as full front access on some of their bags that no other manufacturer offers. Their fit is very universal and makes for very comfortable hiking days.
For a 3-Day backpacking trip, I personally use the Gregory Baltoro 75L because I carry a ton of camera gear. It has the best weight support, and having a lot of extra space allows me to move the gear around the pack to make it very comfortable. If I didn't carry so much gear, my go-to bag would be the newly released, ultralight Gregory 58L Focal.
The equivalent bags for women would be the Gregory Deva 60 or 70L and the Maven 55L. The brand new ultralight Facet 55L would be another great option.

Backpacking Tent
Your tent will always be one of the heaviest items in your pack, so make sure you choose one that is big enough to accommodate you (and your partner) comfortable, but not too big that your back is screaming at you. There are a lot of options that greatly range in price, but I highly recommend two tents above all the others.
My personal tent of choice is the Nemo Hornet 2p Ultralight Backpacking Tent. It is incredibly light, packs up super easily, and is spacious (enough) for two people. It also has two pretty big vestibule areas that keep your backpack and dirty gear outside of the tent while keeping it safe from the weather.
If you want a bit more space, the Big Agnes Copper Spur HV UL 2 is an amazing tent! It is almost as light as the Nemo, but it is completely freestanding and has a lot more interior space.

Sleeping Bag
The temperature rating of your bag is going to be dependent upon a few different factors: the weather and climate, time of year, type of sleeper, etc. I good rule of thumb is to plan for the temperature to be 10° colder than what the report says the low will be. So if the nighttime low is 45° I would bring a bag that is rated for 35°.
To be honest, I normally bring a very warm bag. In fact, my go-to bag is the Nemo Kayu Ultralight 15° Sleeping Bag. It's overkill, I know. But I can always unzip to sleep with half of my body exposed. I would rather be over-prepared than under.

Sleeping Pad
I can't stress the importance of having a proper sleeping pad. It may be the most misunderstood or overlooked piece of gear when it comes to sleep systems. You can have the warmest sleeping bag in the world, but if you don't have a properly rated sleeping pad, say goodbye to your body temps. This is especially true when you are using down-insulated bags. Down loses almost all of its insulating properties when compressed. This means there is very little warmth being held in by your bag underneath you - that is taken care of by your sleeping pad.
I use the Nemo Tensor Regular Wide Sleeping Pad because it is insanely light, very comfortable, and has a true 3 season insulation rating. It also doesn't make any annoying sounds as you move around, which I do (a lot). It comes with the Nemo Vortex pump sack making inflating a breeze.

Trekking Poles
I admit I was pretty anti hiking poles for a long time. I thought they were more of a nuisance than an aid. Keep in mind, much of my dismay came from hikers using them on day hikes and swinging them around - basically using them improperly in places where they weren't necessary. Then, I got older. LOL
I won't backpack without trekking poles. They are a required part of my kit. My packs tend to be heavy due to camera gear and copious amounts of chocolate. Though I don't mind the extra help poles give by allowing you to use your upper body a bit when climbing, it is the downhill that gets me.
Do yourself a favor, and use poles when descending with any kind of weight on your back. Your knees will thank you. The Black Diamond Trail Ergo Cork Trekking Poles are a solid set that has all the bells and whistles I need. They are super stable, fold down reasonably small, and are fairly lightweight.
Headlamp / Torch
I have used the Petzl Tactikka Core Headlamp for many years and it has worked flawlessly. It is unique in that it has a self-regulating brightness adapter mode that helps to conserve battery life. It also has a hybrid charging system allowing you to use AAA batteries in a pinch. The red light also helps to save your night vision and avoid that awkward moment when you blind people trying to have a conversation.
GPS / Communication Device(s)
The Garmin inReach Mini allows for two-way custom texting and also has GPS that you can use for navigating. It just may save your life one day. It also helps keep your loved ones at ease when you're off the grid by letting you send updates.
I also bring along a pair of Rocky Talkies for communication amongst the group. These are crucial for nailing poses when your subjects are far away, or when using a drone. They also allow the group to be more versatile allowing individuals to break off due to interests, speed, energy, etc, but stay in safe contact with everyone.
First Aid Kit
You should always have a first aid kit on your backpakcng checklist and whenever you are adventuring or traveling off-grid. Accidents happen - just check my scar count. Adventure Medical Kits Ultralight & Watertight Medical Kit come in an assortment of sizes that you can choose from depending on your and/or the groups' needs.
I usually go through the kit and customize it with items that I am more familiar with - otherwise, I'm just carrying useless weight. I also add in my own leuko blister tape strips that I make. I use this leuko tape and this paper backing.
Backpacking Checklist: Cooking & Kitchen Gear
There are loads of options for cooking food when backpacking, but I tend to keep it very simple. I want to spend my time enjoying the outdoors, taking photos and being wild in the wild. The last thing I want to be concerned with is wrestling with prepping or cooking my food.

Backpacking Stove and Fuel
There is no easier, more convenient, and reliable option than a Jetboil Zip Cooking System. It is super simple, fairly small, and very reliable. For my cooking needs, I only need to heat up water for my meals and coffee. Carry a long handle spoon/spork to make digging into your backpacking meals less messy.
Pro Tip: Divide the carrying weight by having one person carry the Jetboil and someone carrying the fuel.
Water Filtration System
I recently tested and am in love with the Grayl Ultrapress Water Purifier. Yes, it is heavy, but you have to keep in mind that it is a filter AND a water bottle. So that perceived extra weight negates itself when you compare it against a filter plus a water bottle. Also, this is one of the only purifying systems that filter viruses.
I also carry Water purifying tablets for emergencies. They are very small and you can easily stow them with your first aid kit and not even know they are there.
Camp Mug
You will need something that you can keep in your hand when it's filled with piping hot coffee or tea, as well as keep your beverage nice and cool on warmer evenings. A backpacker's favorite, including me, is the GSI Outdoors Infinity Backpackers Mug. It's insulated and only weighs 3.2oz. Plus, it is spill-resistant and has a little handle making your java sipping just delightful.
Knife or Multi-Tool
I use the Gerber Dime for backpacking & Mountain biking. The spring-loaded pliers work well, the tiny scissors are strong, and the knife blade is sharp. It even has tiny tweezers for the unexpected splinter. All of the tools lock securely into place when you’re using them, and the unit feels solid and durable.
Spyderco Delica 4 Lightweight 7.15" Signature Folding Knife is the best knife out there for backpacking. This knife combines a lightweight of only 2.5 oz with a razor sharp blade and a remarkably comfortable, solid grip.
Bear Canister or Bag
This is a requirement in some parks, but not necessarily everywhere you go. Make sure you check before you head out. For shorter trips or when only carrying food for yourself, the Medium Bear Vault is a good, inexpensive option. For longer trips, or when carrying for two people, go for the larger version.
Backpacking Checklist: Toiletries
Let's just be open and honest about what we doing out in the wild. We are being free. It's okay to be grimey and stinky. In fact, it's kind of expected. When it comes to figuring out what to put in your toiletry kit, think about hygiene. The rest of the fluff will be waiting for you when you return home.
Toothpaste and Toothbrush
Do you know that travel aisle that has all the super cute, tiny bottles of things that are supposedly for travel use? Well, this is the one time you might actually use them! The toothbrush is up to you. As for the toothpaste, go with a travel-size version. Our favorite is the Dr Bronners because it is all-natural, fair trade certified, and the packaging is completely recyclable.
Let's Talk About Your Poop Kit
We all do it. It's a natural thing. For some, what is unnatural is the idea of doing it outside of a bathroom. Please read about proper Leave No Trace practices and poop the right way in the wild. When done correctly, you are actually helping Mother Earth.
Despite the dry or frozen soil, the Duece Ultralight Trowel ensures that you can deposit your own brand of fertilizer into the Earth’s natural garden. Digging a personal latrine is more than a cosmetic camping practice because, when buried, your waste is quickly decomposed and absorbed as nutrients instead of running into the local watershed.
Have an extra Ziploc or stuff sack with you that you designate for the dirty TP, and pack it out. Use some hand sanitizer to clean your hands. If you use wet wipes, just remember that they also get packed out with you.
Sunscreen
When you're backpacking, especially in higher elevations, your skin is constantly being exposed to harmful UV rays. Sun Bum Orginal SPF 50 is a reef-safe sunscreen that is made with clean ingredients.
Lip Balm
Nobody likes chapped lips, being exposed to the elements can bring them on in a jiffy. We always stash some Dr Bronners Organic Lip Balm to protect our kissers. As a side note, lip balm can be indirectly applied elsewhere in emergencies. (wink)
Quick Dry Towel
A lightweight quick dry towel is always handy, whether it’s for drying your hands, doing dishes, or being used after a shower or swim. They come in a variety of sizes so you can pack what you need.
Backpacking Checklist: Clothing
This is the part of the list that most people get wrong. It took me many trips before I trusted my clothing setup. No matter how many times I heard others say it, I still needed to go through it to learn on my own. It is safe to say that you only NEED about half of what you THINK you need.
Since we are sticking to a 3-day trip, the truth is you only need 1 full hiking outfit and 1 camp outfit. Obviously, there are a couple of things you can bring extras of, but after a couple of hours on the trail, you will be happy you decided to leave the fashion show back at home.
Though comfort is king, steer clear of cotton fabrics. Cotton holds moisture and collects odor, both of which won't make you comfortable on the trail. Stick to moisture-wicking fabrics that pull the sweat away from your skin, dries quickly and resist odor.
Rain Shell or Shell
Even though many of my backcountry trips take place in the desert with super low chances of rain, I ALWAYS pack a rain jacket. It is a crucial part of The Adventure Dispatch backpacking checklist. A wet backpacker is not a happy backpacker. Plus these jackets are also windproof, so even if it doesn't rain, a shell will protect you from other elements.
This is the piece of gear that I absolutely recommend spending money to get the best quality you can afford. When you purchase a quality piece of gear you should expect it to last years. I have used the same jacket, the Arc'teyx Beta LT Jacket, for the last 8 years and it works just like the day I bought it. The LT hits the perfect spot for me when it comes to weight and waterproofness.
Insulated Jacket or Vest
Probably one of my favorite and most worn pieces of gear is my mid-layer. The North Face Ventrix Hooded Jacket goes on every single adventure I do. It is incredibly comfortable, super warm, very breathable, and ultralight (13.4 oz).
By far, the most popular jacket in this space is the Arc'teryx Atom LT Hoody (13.2 oz) which is also a fantastic jacket. I don't have personal experience with the hoody, but I do have and use the Arc'teryx Atom LT Vest on warmer excursions.
Top Base Layer
For colder weather, the Patagonia Capilene Midweight Crew Top is a great choice for a base layer. It's 100% recycled, only weighs 6.5 oz and is more durable than merino. The fit is great - not too tight or loose, and resists odors.
For warmer treks, I always bring my Outdoor Research Echo Hoody. It is ultralight, quick-drying, odor-resistant and comes in rad vibrant colors. My only qualm with it is that they tend to run just a hair short in length.
Moisture Wicking T-Shirt
On my backpacking checklist, I usually account for 2 Outdoor Research Echo Tees because they are so incredibly lightweight and I know I am going to sweat when wearing a pack. It's nice to have a tee to switch out after taking a break while the other one dries.
Hiking Pants
I am a big fan of the Eddie Bauer Guide Pro Pants. They also come in a slim version if you prefer a more tailored fit. These have lasted me for years, don't loosen up to much on multiday trips, dry quick and don't restrict movement. The only downside is the lack of breathability on warmer days.
In warmer weather, the Outdoor Research Ferrosi pant are the ultimate hiking pant. These are the most breathable hiking pants on the market are still incredibly durable with decent moisture wicking capabilities.
Hiking Shorts
I admit, I mostly hike in shorts. I run very hot which means I sweat. A lot. The more air I can get on my skin the better. Keep in mind, most of my adventures happen in warmer, dry climates. The most important factors to me are fit, breathability and durability.
I go with one of two setups. It is either a pair of Vuori Trail Shorts with a liner or the Outdoor Research Ferrosi 7 in Short. The Vuori are insanely comfortable and move with you like a second layer of skin, but won't hold up in harsher conditions like thick brush. The Ferrosi shorts on the other hand are ready for anything you can dish out. As a bonus, they have an integrated hip belt so you can adjust on the fly.
Quick Dry Undies
No backpacking checklist would be complete without talking about the under skivvies. I bring two pairs of quick drying underwear that I alternate, so breathability and odor control are 2 of the most important features I look for. I usually bring an ultralight and super quick-drying pair of Outdoor Research Echo Boxer Briefs and an Icebreaker Anatomica Boxer that has better odor control, but are a bit of a heavier fabric.
Hiking Socks
Sometimes overlooked, your sock choice if one of the most important sections on your backpacking checklist. When it comes to sock shopping, I am looking for a couple of keypoints that need to be hit.
As a hot hiker and usually in warmer weather, having lightweight sock with great breathability is paramount, but it can't come at the sacrifice of proper padding for long treks. I've tried many socks, but the Smartwpol PHD Pro Light Crew sock have been the best for my needs.

Hiking Boots
Now I need to be 100 here. My go-to adventure footwear of choice are a solid pair of Chacos. I have backpacked with heavy gear through super rough terrain wearing Chacos. They work for me, but that doesn't mean they work for everyone. Recently, I have found boots that may have changed the game for me.
With a bummer knee injury thanks to trail running in "minimalist" shoes, I went in search of more padded footwear to keep these old bones from getting older. Every runner that I know and trust all pointed to Hoka One One for trail runners. I gave them a try and instantly converted.
I had a backpacking trip coming up, so I gave the Hoka One One Anacapa Hiking Boots a try and fell in love. They are very lightweight, have enough padding to dampen the footfalls, but not so much so that you feel squishy, and don't feel restrictive like many boots do.
Camp Sandals
It blows my mind when I hear backpackers not bringing camp sandals or when they try to tell me I don't need the extra weight. You. Are. Crazy. Backpacking is an exercise in simplicity, and what it more simple than the pure joy of pulling off your ragged, tired hiking boots and slipping into nice, cozy camp slippers to enjoy the evening?
I have had a pair of Sanuk Vagabond Sidewalk Surfer that have come on every backpacking trip I've been on unless it involves snow or heavy chances of rain. They weigh 6 oz, pack flat and are super comfy, not to mention stylish!
A ton of backpackers love their Crocs. They are durable, have decent protection and ultralight, but I don't like the bulk they add, and find them to be slippery when wet. Others go with a hybrid water shoe like the Vivobarefoot Ultra 3 or a camp sandal like the Xero Shoes Z-Trail Sandals.
For cold weather camping, the North Face Thermoball Traction Booties are the jam! They keep you feet toasty warm and dry even on the coldest of nights.
Backpacking Checklist: Accesories
When backpacking, you'll want to bring a hat and sunglasses to protect yourself from the sun. I frequently wear a trucker hat while backpacking, but sometimes go with the Outdoor Research Sombriolet Hat when I want more coverage.
I also recommend a Buff, which may be worn over your neck for sun protection, across your face and ears for wind protection, and even as a headband. You should also bring gloves and a beanie if it's going to be cold.
Is there anything on our backpacking checklist that we missed or do you have any questions about an upcoming backpacking trip? Please let us know in the comments section below.
7 Essential Keto Hiking Snacks You Need to Pack
7 Keto Hiking Snacks for you to take on your next adventure to help your metabolism, repair muscles, and boost immune systems.
It is possible to stay in ketosis while hiking. There are a ton of ways to keep your belly full and boots marching along without sacrificing your diet. We have compiled a simple list of keto hiking snacks that could be picked up at most local grocery stores. If not, there is always Amazon to the rescue.
Not only does this list focus on keeping all of the snacks low carb, but it also keeps a prioritized eye on protein which is crucial for a succesful and active hikers diet. High protein hiking snacks not only keep the h-angers at bay, but are super beneficial for your body. Protein helps hikers regulate their metabolism, repair tired muscles, and boost their immune systems. Plus, you're not yourself when you're hungry - I should coin that line. 😂

Keto Beef Jerky
Jerky made from beef is ideal for hiking. It's easy to carry and high in protein and one of the best high protein hiking snacks. The high salt content found in beef jerky is actually beneficial for hiking because it aids with hydration regulation. This keto hiking snack is packed with protein as well. Any other snack option can't compare to the quantity of protein you get from even a little strip. Protein is good for your body and provides an energy boost while also satisfying hunger rapidly.
The question is, is jerky good for you? The quick answer is that it is debatable. Jerky can be healthy if it suits your dietary objectives and the sort of product you select. Dried meat snacks can be a good source of protein when consumed as part of a balanced diet.
Jerky skeptics can be a little out of date. With additional MSG, nitrates, and chemical preservatives, many individuals warn that they're rich in sodium. The truth is that jerky is no longer made in this manner.
Sodium, on the other hand, is a valid cause for concern. Although sodium is a necessary nutrient, it is far too easy to consume too much in the average American diet. According to the FDA, the daily recommended dosage for the average individual is 2,400mg, which is just over a teaspoon of table salt.
How to Choose a Healthy Jerky
- Look for jerky with fewer than 500mg sodium content per serving
- Opt for brands that have no more than 5g of added sugar
Our Favorite Beef Jerky: People's Choice | Country Archer | Tillamook Country Smoker
Alternatives: Salmon Jerky | Turkey Jerky | Vegan Jerky | Mushroom Jerky

Salami or Sausage
Find the hard salami brands with zero carbs and a paper casing. This method tastes better and keeps fresh longer. Summer sausage is another great option.
Our Favorite Picks: Criminelli Whiskey Salami | Dukes Shorty Sausages

Hard Cheese Snacks (k)
Wrap the cheese to keep it from getting too greasy in your bag. You can also find cheese snacks that are freeze-dried and can be eaten like chips!
Another tasty one of our high protein hiking snacks that is easy to consume on the trail is string cheese. String cheese is high in protein and comes in a number of flavors, including Colby Jack, cheddar, and the most popular, mozzarella. It's great on its own or with meat or fish for a quick trail supper that doesn't require any preparation!
Cheese that is good for hiking typically has the following characteristics:
- It is a Firm or semi-firm cheese
- It has been aged
- It has a low moisture content
Our Favorite Picks: Horizon Organic | Mini Babybel

Keto Protein Bars
What hiking snack list would be complete without energy bars? Just keep in mind that some of these protein bars contain a lot of sugar alcohols, which each body processes differently; we've found that eating more than half a bar per day has a significant impact on our ability to hike up the hills we need to. We've identified a handful that keep the sugar alcohols to a minimum and allow us to go on with our hike.
Our Favorite Picks: Perfect Keto Bars | Quest Bars

Fatty's Beef Sticks (k)
There isn't much to say about these hefty sticks o'beef other than they are just what you need and want! They are the O.G. BIG meat snack. Packed with protein. Low in Sugar. Crafted with real ingredients. Cut out all of the marketing lingo and fancy packaging, Faty's serves up a fantastic chunk of meat, that's relatively healthy and keeps you moving on the trail!
Our Favorite Flavors: Jalapeno | Original | Pepperoni

Avocado
These packable veggies provide a much needed bit of green into your daily diet and are such a great source of fat (and low net carbs).
Avocados are another great way to get plant-based healthy fats in your diet. They are crammed with vitamins and minerals, such as vitamin B6, C, and E. Their anti-inflammatory properties will keep your body feeling fresh on mile ten.
To make this a trail-friendly snack, bring a pocket knife and a small spoon. Bring a small garbage bag with you to pack out the pits and peels. Although fruit scraps may appear innocent, they can attract wildlife and disrupt the local environment.
/GettyImages-121168161-58ae00945f9b58a3c90aa163.jpg)
Keto Trail Mix
We put together our own mix of dark chocolates, almonds, and macadamia nuts. It keeps it simple, delicious and nutritious.
– 2 squares (1/6 a bar) Theo's dark chocolate
– 1 oz almonds
– 1 oz Macadamia nuts
This mixture was crunchy, salty, and chocolatey, and it was exactly right. Place this on the outside of your bag to melt the chocolate on hot days, then massage the bag to mix the nuts and coat them in chocolate. You've got a chocolate-covered nuts snack if it cools down! Grab a spoon and dig in if it stays melted.
Keto Hiking Snacks Wrap-up
We hope this helps navigate the grocery aisles with ease when loading up before your next hiking adventure. This is a simplified list of keto hiking snacks that shold serve as a starting point or baseline for any adventures, including backpacking.
If you are not keto, or hiking on a cheat day, check out our 7 High Protein Hiking Snacks artcile to make sure you're still getting the proper nutrients.
Ultimate Guide to Backpacking Santa Cruz Island in the Channel Islands
Printable Santa Cruz Island Backpacking Guide. Everything you need to know to do the ultimate backpack on Santa Cruz Island.
This is the most comprehensive Santa Cruz Island Backpacking Guide. It contains everything you need to know to do the ultimate backpack on Santa Cruz Island in the Channel Islands National Park.
The Channel Islands National Park consists of five islands located just off the coast of sunny California. On these islands, you will find loads of hiking, camping, kayaking, snorkeling, and other recreational activities.
The islands are well-protected, and the National Park Service does an excellent job of minimizing human impact. Due to the fragile ecosystem, if you plan on visiting this National Park, you'll need to plan ahead.

IN THIS GUIDE, WE SHARE ALL THE LOGISTICS FOR PLANNING A BACKPACKING TRIP ON SANTA CRUZ ISLAND LOCATED 25 MILES OFF OF THE COAST OF CALIFORNIA.
You should practice good trail etiquette at all of our shared destinations and remember to Leave No Trace. That means packing out your garbage, being respectful of others on busy trails, and following the established rules.

Getting To The Santa Cruz Islands
From Ventura Harbor, Island Packers offers regular boat ferries and cruises to Santa Cruz and the other islands in Channel Islands National Park.


The trip to Prisoners Harbor or Scorpion Anchorage on Santa Cruz Island takes slightly over an hour. Be aware that the boat ride can be cold and rough, so dress accordingly with layers. If you get seasick, consider taking preventive steps before the ride, such as purchasing anti-nausea bands or packing Dramamine. If you start to feel sick while on the boat, head to the back for fresh air and keep your eyes on the horizon.
[ninja_tables id="7330"]

You must check in at the Channel Islands office at least one hour prior to your departure to pick up your ticket. Before you put your bags on board they will ask you to remove any water containers and gas/fuel. These will be held in a separate, fire-safe container and collected once you get to the island. Be sure to mark your fuel canisters with your initials or name so it is easy to identify.
It's a good idea to call Island Packers at (805) 642-1393 prior to your boat ride to ensure your trip has not been canceled due to rough seas.

Santa Cruz Island Map
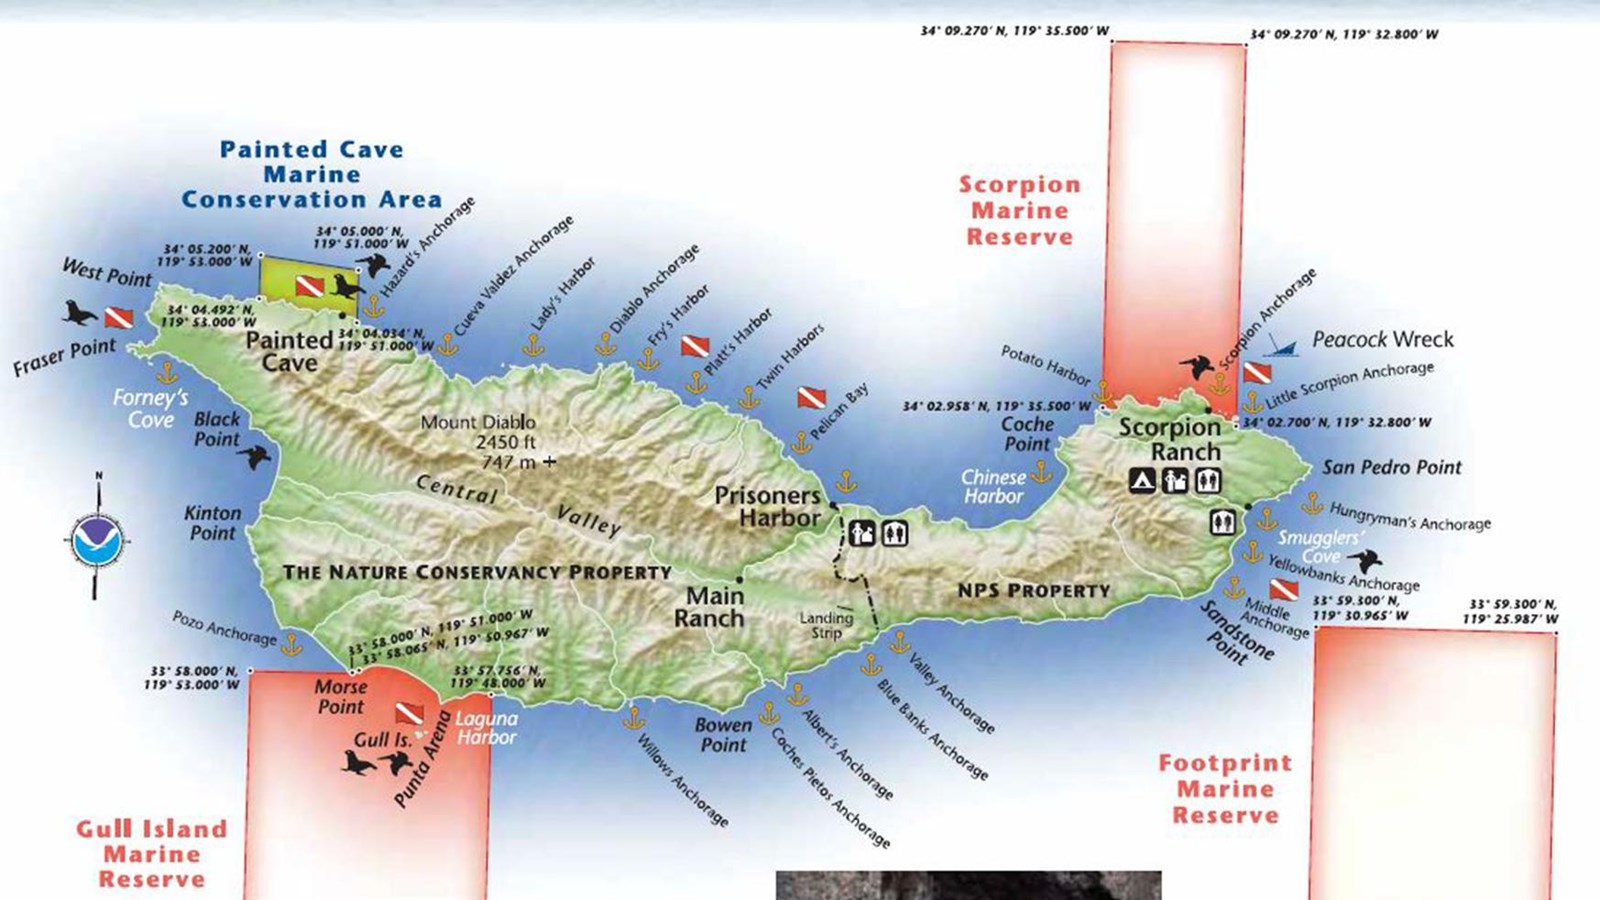
Santa Cruz Island Weather
The best time to visit Santa Cruz is from September to November when the summer tourists have left and the beaches, hiking trails, and other attractions are less crowded.
The warmest month of the year in Santa Cruz is September, where the average temperature gets to around 23℃ (73℉), but temperatures can reach as high as 25℃ (78℉) on the hottest days in summer. The weather in the winter, especially around December, can reach a minimum of 6℃ (43℉).
Here is a link to check the Current Weather and forecast.
Camping Reservations
Del Norte Campground : To camp at the Del Norte Campground, you must have both a boat reservation and a campground reservation. The Del Norte campground, SCI is the smallest campground in the park. There are only four sites each with a four-person capacity for a maximum of 16 total campers at one time. Located 3.5 uphill miles from the pier where you disembark the boat. This is a “backcountry” campground. Rustic and charming with beautiful views of the island coast, this campground is frequented by backpackers and hearty hikers.
Picnic tables and small food storage boxes are in each site. NO fresh/potable water is available at this location and most years no streams or creeks flow to allow for water filtration by campers.


Most Scenic Campsite: Site 1 give you gorgeous views of the water but you are very exposed
Most Private Site: Site 4 gives you some privacy and shelter from the winds.
Scorpion Canyon Campground: To camp here, you must have both a boat reservation and a campground reservation. Scorpion Anchorage offers the most numerous and most-visited campsites in the Park. The campground area has shade in most sites provided by old-growth eucalyptus trees.
There are two campgrounds - Upper and Lower. Lower is closer to the harbor and therefore a bit more exposed to the elements and humidity. If you plan on doing more water activities, stay in Lower Scorpion Campground for quicker pier access. If you plan on doing more inland hiking, Upper Scorpion Campground is the spot for you.


The placement of the campground in Scorpion Canyon provides shelter from the prevailing NW winds. There are no trash cans for the public on the island, so you must pack out all trash when you leave.
You may reserve up to 7 consecutive nights.
Santa Cruz Island Backpacking Trail Map

Water Availability (IMPORTANT)
Drinkable water is VERY scarce on the island. Be prepared to carry extra water, especially in warmer weather. Potable water is ONLY available at the Scorpion Ranch campground on Santa Cruz Island.
Santa Cruz Island Backpacking Itinerary
- Day 1: Hike Prisoners Harbor to Del norte Campground | 4.8 miles
- Day 2: Hike Del Norte Campground to Scorpion Anchorage Campground | 9.5 miles
- Day 3: Optional Exploratory Hike (optional) | Smugglers Road, Scorpion Canyon, Potato Harbor | ~8 miles
- Day 4: Kayak Tour at Scorpion Anchorage | Hike to Scorpion Canyon Ferry | .5 miles
There are a few variations that you could do to this itinerary. We chose to designated Day 3 as a full exploratory day in order to really kick back and enjoy the island. This gave us enough time to explore all the parts we wanted to see. We also like to spice up our trips, so we allotted time on Day 4 to take a guided kayaking tour.
Trip Report
Day 1: Hike Prisoners Harbor to Del norte Campground (3.2 miles, 1182 elevation gain)
- Potable Water Availability: None available
- Best Campsite at Del Norte Campground: #1 (most scenic) | #4 (most private)
I would recommend getting the earliest ferry out of Ventura so that you can get to the island with plenty of time to explore and, if possible, do the Pelican Bay Hike. You will need to fill out a form and submit this to the rangers before doing the hike. Only passengers of Island Packers are permitted to hike on this land, so take advantage of this unique opportunity.
The Pelican Bay Hike is a 4-mile out-and-back trail that gives offers some insanely beautiful views and gives you access to the sandy shores at Tinker Harbor. Do not miss this hike if you are comfortable with tacking on 4 additional miles to your first day. You can leave your big packs in the fox boxes at Prisoners Harbor and just take a day pack with snacks and water.

If you do the entire Pelican Bay Hike, expect to spend about 3 hours exploring. Once you are back at Prisoners Harbor, grab a quick lunch or snack, pack it up, and head out to your first leg of the backpack.
Although the trail does snuggle up against the coastline to give you ocean views at every turn, the majority of the hike is along a road. And it is pretty dang steep. Once you get your boots dug into the actual trail, guess what, it gets even steeper! The trail drops you down into a valley and then straight up the other side a couple of times. However, the rolling hills, blue skies (hopefully) and water views make the hike fly by.

The turnoff for the campground is well marked at a Y intersection, and the sites are only a few hundred feet up the trail. While at camp, make sure to place all of your food, or anything scented inside the fox boxes. The Island foxes are definitely not shy and will start inspecting the new visitors as soon as you arrive. It is recommended to keep all of your gear, socks, bags off the ground and tabletop as these little dudes just may be curious enough to rustle through your goods to try to find some snackies.
Day 2: Hike Del Norte Campground to Lower Scorpion Campground (9.7 miles, 2322 elev gain)
- Potable Water Availability: Water available at both Upper and Lower Scorpion Campground
- Best Campsite at Lower Scorpion Campground: #3 (most private & best access)
Get an early start to give yourself plenty of time to enjoy the views. It is possible to add a side trip down to Chinese Harbor (adds 3.6 miles roundtrip). The average time to hike from Del Norte Campground to Lower Scorpion is about 5-6.5 hours, but trust me, you will want to stop to take some photos. Many, many, many photos.

It is pretty incredible how often and vastly the landscape changes along this trail. Some of the hike cuts its way between high grass valleys, over wide-open hilltops, down into deep, rocky valleys, and around some sketchy edges up to a spine that overlooks the west side of the island.
The turnoff for Chinese Harbor is about 2.3 miles from the Del Norte Campground. You should note that this will take you to an overlook of Chinese Harbor, and not down to the beach. The hike is 1.8 miles each way.
This hike really rakes a turn for the awesome the moment you link up with Montañon Trail at about the 5.2-mile mark. The massive peaks in the distance seem impassable, making you question where in the heck you are even headed. You can make out parts of the trail, but it seems to disappear around a very steep corner. And that's because it does!

What started out as a relatively passive hike, gets gnarly with the quickness as you take a quick ascent up to Montañon Ridge. The terrain gets pretty chunky and narrow as it curves its way around a lower ridge, followed by an incredibly scenic 360-viewpoint on top of the ridgeline. Being that this junction is very close to the highest point on the island, you get massive views of the western coastline on one side and Scorpion Harbor on the other. On clear days, you can see Anacapa Island!

This is the part where someone (there's always that guy) starts saying "It's all down here from here." But, for once, he won't be lying. The next 4 miles wind their way down to Scorpion Harbor. There are two trails you could take to get to the campgrounds. We went for the slightly longer one that drops you into the valley, passing through Upper Scorpion Campground and then into Lower Scorpion. Just passed that is the harbor.
There is a fantastic short hike that will lead you to an overlook of the harbor. Here, you will get sweeping views of the giant kelp forest floating below and the massive rock formations in the distance: Scorpion Rock. This is a killer location to photograph sunset or sunrise.


Day 3: Optional Exploratory Hike | Smugglers Road, Scorpion Canyon, Potato Harbor | ~8 miles
There are many ways to spend the day hiking and exploring all the goods on this side of the island. We compiled an 8-mile loop that hits all of the hot spots. You will cover a couple of miles that you did on the way into Scorpion Canyon on Day 2. If you would like to spend more time along the amazing North Bluff Trail instead, do this shorter loop that starts from the Upper Scorpion Campground.


To do the full loop, start off by heading out of camp towards the harbor and turn right onto Smugglers Road. This will take you right up to the top of the cliffs and over to Scorpion Bluffs. The trail will then lead you back inland on the island, circling back around to the campgrounds.
From Upper Scorpion Campground, turn left onto Potato Harbor Road. This climbs its way up to intersect with the North Bluff Trail. Head west on the North Bluff Trail until you reach the most beautiful part of the island: Potato Harbor Overlook.

Day 4: Kayak Tour at Scorpion Anchorage | Hike to Scorpion Canyon Ferry | .5 miles
We scheduled our return ferry for 4 pm so that we could sleep in and enjoy a group breakfast. In the early afternoon, we headed out on a kickass guided kayak tour to see the island from the water!

The Adventure Sea Cave Kayaking experience was incredible! TBH, we tend to stay away from guided tours. We like the freedom to roam freely and get our own take on the experience. But, that's not an option here because it is a protected preserve.


Now, I will be the first to admit - we were dead wrong! The $169 price tag was well worth it! We were shown a lot of really rad sea caves, paddled through tunnels, and got soaked by explosive blow spouts. Our guide kept us entertained and talked about the super interesting history of the island. We learned the names of the birds that live exclusively on the island and tasted kelp fresh from the ocean. Yes, that is correct. We ate kelp.
You can book your adventure in advance here - which is highly recommended during the busier seasons.
Cell Phone Reception
Don't expect really any cell phone service on your Santa Cruz Island backpacking trip. The reception will be very sporadic and unreliable. It's a good idea to turn off or put your phone on airplane mode. Otherwise, your phone will roam about looking for a signal, draining your battery. How else are you going to get those banger IG boomerangs?!
We found that the only place we reliably had any reception at all was on the pier at Scorpion Anchorage.
Santa Cruz Backpacking: What Gear Do You Need?
Make sure to Download our 3 Day Backpacking Checklist. By adding in a couple more meals, snacks and a little more clothing, you could easily adapt this to 4 days.

Below you will find a list of the gear that we took on this trip. It includes almost every piece that we had with us in our backpacks. This was the first time we used the Gregory Backpack Combo, and it worked out perfectly. I would argue that this combo may be the perfect backpacking duo for the adventurous couple.
His
- Backpack: Gregory Baltoro 75
- Tent: Nemo Hornet 2p
- Sleeping Bag: Nemo Kayu 15
- Sleeping Pad: Nemo Tensor Wide
- Shoes: Hoka One One Anacapa Mid GTX and Chacos
- Headlamp: Petzl Reactik
- Sunglasses: Rheos Coopers
- Hiking Poles: Black Diamond Trail Ergo
- Clothing: Marmot Knife Edge | Eddie Bauer Guide Pro Pant | Vuori Trail Shorts | Outdoor Research Echo Hoodie | Arcteryx Atom LT Hoody | Smartwool Performance Hike Light Socks
- Food Stuffs: Jetboil Zip | Fatty Meat Sticks | Ultima Electrolytes | Mountain House Meals | Starbucks VIA | Nalgene 32oz Water Bottle
- Camera Gear: Canon R, Canon 24-105 lens, GoPro Hero 9
Hers
- Backpack: Gregory Maven 55
- Sleeping Pad: Nemo Tensor Regular
- Sleeping Bag: Marmot Trestles 15
- Sleeping Bag Liner: Cocoon Silk Mummy
- Pillow: Klymit Pillow X
- Shoes: Hoka One One Tennine GTX
- Sunglasses: Rheos Wyecreeks
- Clothing: Marmot Knife Edge
- Food Stuffs: Wild Zora Paleo Meals | Wild Zora Snacks | Wild Zora Grain Free Hot Cereal | Four Sigmatic Mushroom Coffee Mix |
A note about Ticks
Ticks are present on the islands and can carry bacteria and viruses that can cause diseases in humans, including Lyme disease. Now, you see this sign oftentimes at trailheads and they advise you to check yourself. I never take it too seriously, but the ticks on this island are aggressive! Seriously, if you literally step a foot off the trail to snap a quick photo, there's a good chance one of these suckers will get on you.
Periodically check yourself throughout the hike and again when you get to camp. They are harmless if you swat them off before they dig in. If they have latched on, make sure you know how to remove them safely and completely. The Clever Hiker wrote a fantastic article covering ticks that I suggest you check out.
An Easy Guide To Cleaning Your Water Bottle
Quality water bottles are great for a variety of activities. An eco-friendly alternative to disposable plastic water bottles, they are durable and leakproof and should last you a long time as long as you care for them properly
Quality water bottles are great for a variety of activities. An eco-friendly alternative to disposable plastic water bottles, they are durable and leakproof and should last you a long time as long as you care for them properly. Washing them immediately after use and letting them dry is the best method, but that doesn’t always happen. I’ve outlined a few ways to clean your water bottle below to keep it fresh and ready to go!
Why Should You Clean You Water Bottle?
Like any household dishware, keeping your eating surfaces, utensils and plateware helps reduce bacteria buildup and funk. Plus, it's just downright gross not to wash your dishes, so get with it dude. I used to live with a guy who only rinsed his dishes with water after using them. That's gross - the rest of us had no idea, and we were using the same nasty dishes for years.
On a larger scale, having a dedicated water bottle to keep with you will help reduce single-use plastics such as disposable water bottles. It goes a long way. I have a few water bottles of different sizes and materials that serve their purpose for certain things such as airplane travel, hiking, running errands, etc. This mean I use them, wash them, and then they sit. This brings us to the next question:
How Often Should You Clean Your Water Bottle?
The "correct" answer that I should give here, and the one that won't get any backlash in the comment section, is that you should wash your water bottle after each use. If that's your jam, then have at it. I don't think it is necessary unless you are using powdered or sugary mixes in your water bottle. These will build up bacteria much more quickly then plain water, so they will need to be cleaned more often.
After each use, I rinse with hot water and let air dry upside down. I give it the sniff test before or after each use. This is my gauge and it works for me. Now, again, this is for when I am only using water in my water bottle and when I am the only one using it. Who shares water bottles anyway? #couplegoals. Gross.
The Baking Soda Shake:
Our preferred method. It's the quickest, cheapest, and most effective method. Say hello to your new best friend, Baking Soda. Give you water bottle a good rinse, maybe wash it down with dish soap if you would like, and then let's get to the good stuff. Drop 1/4 cup of baking soda in. Fill the Nalgene 3/4 full with HOT water. Close the Lid and shake your heart out. Really get that thing shook up, and make sure you get the underside of the cap as well. Rinse it out real good and dry.
This is the ultimate cleaning method to get all of the funk out of your water bottle. I used to be very hesitant to put any kind of powdered drink, such as Ultima or any other electrolyte, in my water bottles, even though I love having something other then water to sip on when I'm adventuring. I don't need to stress it anymore. Using baking soda gets all that and then some out of my bottle. Give it a try.
Oh, and check out this web story we made to break it down.
Now let's get to the more straightforward methods.
Dishwasher:
Putting your water bottle in the dishwasher is the easiest and least time-consuming way to clean it. The majority of them can be washed in the dishwasher, but verify the manufacturer's instructions first. Because the lid may not tolerate the heat as well as the bottle itself, it should be placed on the upper rack away from the heating element. If your dishwasher's higher rack won't fit the size of your water bottle, don't worry; there are other cleaning solutions.
Soak in Warm, Soapy Water:
Allow the water bottle to soak in a sink with warm water and a little bit of mild dish soap. Shake it to disperse the soapy water, then rinse thoroughly and dry it.
There should be no soapy flavor left in the bottle if you use a tiny amount of mild soap. If you don't want to use soap, you can clean the bottle with warm water and lemon or warm water and baking soda.
This is especially useful if your bottle is solely used for water and other non-staining drinks. If you are like me and sometimes toss in some Ultima or other electrolyte drink mix, you will need to get a bit more aggressive in your cleaning. (hello, baking soda; see above)
Denture Cleaning Tablets
You can buy water bottle cleaning tablets or a new technology disinfectant glass cleaner if you want a professional cleaning product to ensure that your bottle is properly disinfected. Simply dissolve the cleaning tablets in water and allow them to dissolve in the bottle overnight. Give it a good shake before rinsing it thoroughly.
Shoppers tip: Water bottle cleaning tablets can be replaced with denture cleaning tablets at a lower cost. We use Polident Overnight Whitening Antibacterial Denture Cleanser Effervescent Tablets (man, that's a mouth full - see what I did there?). This works, but does leave a minty flavoring to your bottle unless you wash again after rinsing. Make sure you choose a brand-name denture-cleaning tablet with increased cleaning power to ensure it actually does what it says it's going to do.


Outdoor Brands that are 1% For The Planet Members - Our Favorites
Here is a list of our favorite brands that are members of 1% For The Planet. We encourage you to support and shop with these vendors, and sleep well with the knowledge that your purchase has a direct positive impact on the environment.
Here is a list of our favorite brands that are members of 1% For The Planet. We encourage you to support and shop with these vendors. You will sleep well with the knowledge that your purchase has a direct, positive impact on the environment.
UPDATED: JAN 2022
This is important. You can make a difference by just being conscious about where you spend your money for amazing gear to get you outdoors!!
What is 1% for The Planet?
One Percent for the Planet is an international organization whose members contribute at least one percent of their annual sales to environmental causes. Their mission is to "build, support, and activate an alliance of businesses financially committed to creating a healthy planet.
- Patagonia | A designer of outdoor clothing and gear for the silent sports: climbing, surfing, skiing and snowboarding, fly fishing, and trail running.
- Grayl | GRAYL® Water Purifiers make safe, clean drinking water anywhere on earth! Unrivaled ease, speed and versatility – simply Fill. Press. Drink.
- Klean Kanteen | High Quality, Top Performing, Insulated Water Bottles w/Klean Coat & Climate Lock. From Kids to Adults, Office to Backcountry, they have High Quality Products for Everyone!
- Tentsile | Escape damp & uneven ground for the most comfortable sleep you'll ever have in a tent. Perfect for families & adventurous campers.
- Peak Design | Everyday bags, travel bags, camera accessories. As leaders in carry, they design stuff that helps you transport and manage your stuff.
- Kammok | Kammok elevates the camping experience, designing and producing highly functional camping gear that unites people in the open air of the great outdoors.
- Wild Rye | Technical & beautiful outdoor apparel. Wild Rye crafts design-driven ski and mountain bike apparel for the modern outdoors woman. #playwild.
Best Gear for Mountain Biking in the Desert
Mountain biking in the desert comes with its own set of gnar-gnar and awesomeness, but also with its own collection of ouches and oh-shits.
Mountain biking in the desert comes with its own set of gnar-gnar and awesomeness, but also with its own collection of ouches and oh-shits. Being that I live in Phoenix, I rock many battle scars courtesy of saguaro and sharp rocks. Over the years, I have tested out different gear options to lock in the perfect set up and I wanted to share that.
Here is a current list of the gear I use when Mountain Biking in the Desert.
Protect Ya Noggin - Helmet
Let's start with the most basic, a helmet. It's kind of an important part of your body, holding the thinking noodles and eyeballs, so it's a good idea to keep it protected. When it comes to mountain biking in the desert, it's also vital to have great ventilation.
Smith Forefront 2 MIPS Helmet
Why We love it: The most breathable, best looking, and comfortable helmet on the market
The Specs:
- Smith's premiere helmet for trail and all-mountain
- MIPS low-friction liner disperses rotational forces
- Aerocore In-Mold design is light, breathable, rugged
- 20 large vents with Koroyd for increased breathability
- Three-position visor is compatible with enduro goggles
- VaporFit adjustable fit system for a customized fit
- X-Static anti-odor lining with Reflective Cooling
Check the latest price:
Smith Optics | Backcountry | Amazon
Sweet Eye Protection with Style
I cringe when I see someone riding without sunglasses. I can't tell you how many times an unseen branch or pebble pops up and tags the sunglasses which would've otherwise been in my eye. Plus, it's also pretty important to see where you're going, amiright? Why not protect your eyes, while killing the fashion game?
Smith Optics Ruckus ChromaPop Sunglasses
Why We love it: Matches the Smith helmet look, fits like a glove, looks badass, and comes with two lenses for when the light drops
The Specs:
- Performance sunglasses for running, cycling, and training
- Chromapop lens enhances clarity and natural color
- Interchangeable lens system with included bonus lens
- Rimless frame features nose and temple pads for a solid fit
Check the latest price:
Backcountry | Amazon | Smith Optics
Gore Wear C3 Trail Short
Why We love it: Insanely durable, comfortable, and the perfect length
The Specs:
- A versatile short that pairs well with our favorite padded liners
- Durable, quick-drying fabric for full freedom of movement
- Polyester mesh lining improves breathability
- Two front and two side zippered pockets for small items
- Reflective detailing helps keep us seen in low-light conditions
Check the latest price:
Backcountry | Amazon
POC Joint VPD 2.0 Knee Pads
Why We love it: Great for long rides because they breathe and don’t move around. Just enough protection without being overkill
The Specs:
- Knee pads for trail, enduro, and downhill riding
- 3D-molded VPD foam stiffens upon impact to disperse force
- Perforated design offers plenty of airflow
- Elasticized hook-and-loop strap customizes the fit
- Slim fit easily slides under your shorts
Check the latest price:
Backcountry | Amazon
FiveTen Kestral Lace MTB Shoes
Why We Love these: I dig these because when the inevitable hike-a-bike section comes, these feel like regular (but stiff) shoes.
The Specs:
- A durable and comfortable off-road shoe
- Soft, tacky outsole for confident pedal grip
- Nylon shank balances stiffness and walkability
- Synthetic toe box provides extra protection
- Lace closure with hook-and-loop strap for a customized fit
Check the latest price:
Backcountry | Amazon
Evoc Pro 3L Hip Pack
Why We Love this: It keeps the sweat off the back and lugs my water around for me. Enough room for Al of the essentials and none of the fluff.
The Specs:
- STAY HYDRATED - Stores the included 1.5L Bladder with space for your belongings in the 3L bag
- QUALITY MATERIALS - Made with 3D air mesh, Airo Flex, and 210D nylon ripstop, the Airflow Contact system offers cooling back ventilation
- VENTIFLAP TECHNOLOGY - The hydration waist pack adjusts quickly for uphill and downhill riding and built-in ventilation to keep you cool
- EXTRA STORAGE - 2 bottle carriers with extra safety fixation are easy to reach, 2 hip pockets for storing essentials
Check the latest price:
| Amazon
Tasco Ridgeline Gloves

Why We Love these: Incredible grip. Super comfy. Durable AF. Sweet designs.
The Specs:
- Pull On closure
- Velcro Free Slip on Minimalist Glove
- Vented Fourchettes (sides of the fingers) to allow for maximum venting
- MicroFiber Sweat wipe on thumb panel - wiping your nose never felt better!
- Conductive threads on the index finger and thumb to ensure you don't miss that trail-side photo
Check the latest price:
| Amazon
Bonus | Some random goodness
Quadlock Case for Iphone 12 Pro – I have the entire set made by Quadlock: car mount, bike mount, armband, motorcycle mount. It’s the most versatile and substantial system out there.
Garmin Edge 830 - My guiding star. Keeps me pedaling without stopping to look at my phone. Makes sure I get home to the ol lady. Great battery life. Gives you bonus chirps when you jump!
GoPro Hero 10 - The best way to capture MTB goodness - high quality. Super cool hyper-lapse features. Durable af. The leader for the pack.
Fattys - Packed with protein. Freaking delicious. Keto friendly. I re commend the Original and Jalapeno flavors.
Ultima Electrolytes - The cleanest and healthiest electrolyte mix on the market. Super small footprint. Delicious. Keto friendly. My favorite is the watermelon flavor.
WANT TO REMEMBER THIS FOR LATER?
PIN THIS TO YOUR FAVORITE BOARD!


Backpacking the Trans-Catalina Trail (TCT) - Everything You Need to Know
The Trans-Catalina Trail is a 32-mile trail that runs from end-to-end of Catalina Island. This is the essential guide to hiking this epic trail.
Catalina Island is an inhabited island located 22 miles off the coast of Southern California. There are amazing hiking, camping, and backpacking adventures along the Trans-Catalina Trail. The island also offers fantastic kelp forest diving and a diverse wildlife population, including Bison!
The Trans-Catalina Trail is a 40-mile trail (commonly referred to as the TCT Trail) that runs the length of the island. The hiking has its fair share of tough climbs complimented by never-ending views at every turn. There are some of the most amazing beachside campsites that offer unbeatable seclusion, and get this - there are even a few restaurants along the trail!
We would highly recommend doing this adventure in the fashionable way that we like to call Backpack-to-Bourgeois. WTF is that? Simple: do an epic grind of a backpack, and end it with a pampering hotel stay where you treat yourself like the king or queen you are.
Backpacker on the Trans-Catalina Trail
All smiles on the TCT Trail
In this Trans-Catalina Trail Guide, we share all the logistics for planning a backpacking trip on the Trans-Catalina Island Trail.
You should practice good trail etiquette at any destination you visit and remember to Leave No Trace. That means packing out your garbage, being respectful of others on busy trails, and following the established rules.
Get a Free PDF of This Guide!
We'll send you a PDF of this guide for offline reading along with future backpacking, camping, hiking, and photography tips to support all of your outdoor adventures.
[wpforms id="7102" title="false"]
Trans-Catalina Trail Stats
Total Distance: 37.5 miles
Total Elevation Gain Loss: +/-7950 feet
Difficulty: Moderatly Challenging
Dogs Allowed: On the trail and at camp, yes (except for Two Harbors Campground)
Advanced Reservations Required: Yes (see CampgroundsReservations section)
Number of Recommended Nights: 4 nights / 5 days
Cell Service: Sporadic.
Getting to Catalina Island
One of the things that makes this one of the most unique backpacks in the world has a lot to do with just getting there. In order to get to the island, you have to take a 60-90 minute boat ride via the Catalina Express. If you’re lucky you might spot some marine wildlife on this gorgeous ferry ride across the Pacific Ocean.
Be aware that the boat ride can be cold and rough, so dress accordingly with layers. If you get seasick, consider taking preventive steps before the ride, such as purchasing anti-nausea bands or packing Dramamine. If you start to feel sick while on the boat, head to the back for fresh air and keep your eyes on the horizon.
You must check in at the Catalina Express office at least one hour prior to your departure to pick up your ticket.
It’s a good idea to call Catalina Express at (800) 613-1212 prior to your boat ride to ensure your trip has not been canceled due to rough seas.
TCT Backpacking Overview
The Trans-Catalina Trail runs east-west along Catalina Island which is part of the Channel Islands Archipelago.
Now to be Uncle Frank, this hike should not be underestimated. Even though you are in Southern California under a beautiful sunny sky surrounded by gorgeous blue waters, rolling hills, and fuzzy Bison, this hike is a bit of a beast. There is actually considerable elevation gain (about 8k feet), a lot of very exposed sections which can be downright brutal in the hotter months, and minimal water sources. This means you will need to carry more water weight than you would probably like to. This is actually a common scenario when hiking the Channel Islands - see Santa Cruz Island Backpacking.
Unlike most backpacking adventures, you are able to get your fill of civilization/humanity every single day. That means actual bathrooms, cooked food (pizza!), and even a general store. Parts of the hike follow a dirt road where are you will encounter the occasional vehicle or guided jeep tour. But come on, being able to be in the middle of a backpack and stop off to have a slice of pizza and a cold beer before you continue on is pretty f*cking epic.
Catalina Island Weather
On average, Catalina Island receives more than 260 days of sunshine every year. For the most comfortable weather and the best chance of seeing the sun, it is recommended to plan your backpack from September to early November. Just note that the landscape and foliage may not be as vibrant green this time of year. If you prefer the greenery and are willing to chance rain, late winter, early spring would be the best.
Check the current weather conditions for Catalina island here.
Campground Reservations
Each campsite requires its own reservation and they may be booked up to a year in advance. Visit Catalina Island is a great source of information about each campsite, so I would recommend looking through this page before reserving. This is a very popular destination for backpackers, day hikers, bird watchers, and more so make sure to Book Early - the spaces fill up quickly!
Here are links for each of the campgrounds on the Trans-Catalina Trail:
BlackJack Campground | Little Harbor Campground | Two Harbors Campground | Parson’s Landing Campground
Permits for Backpackers
Carry a copy of your camping reservations with you when hiking the Trans-Catalina Trail. I recommend having them downloaded to your phone because the cell reception is very unreliable. If you plan on doing some day hiking on the island, you will need to apply for a free permit.
Trans-Catalina Backpacking Trail Map
After you pop off the ferry in Avalon, stop by the Catalina Island Conservancy shop to pick up a detailed Trans-Catalina Island Trail map (free). Even though it is extra weight, it's always recommended to have a hard copy map on hand just in case when backpacking. This map shows the location of water sources, restrooms, food, and other services are located along the trail.
Trans-Catalina Trail Backpacking Itinerary
Day 1: Avalon toBlack Jack Campground | 8.75 miles
Day 2: Black Jack to Little Harbor Campground | 8.35 miles
Day 3: Little Harbor toTwo Harbors Campground | 7.2 miles
Day 4: Two Harbors to Parson’s Landing Campground via the TCT | 7.24 miles
Day 5: Parson’s Landing to Two Harbors via the road and Lion’s Head | 7.2 miles
There are many variations that can be done to this itinerary. Many people opt to cut the last portion of the hike off and finish up with a kayak rental after some pizza and beer at Two Harbors. Well maybe not many people, but we did! It's your adventure, so make sure you make it yours!
Here is a very detailed trail map on Alltrails:
Water Availability
Water is accessible in Black Jack, Little Harbor, and Two Harbors, but there is no potable water on the route between the campgrounds. Your campground reservation at Parsons includes 2.5 liters of water for the final night which will be waiting for you at your site.
Try to get your gear weight down so that you can manage to carry at least 3 liters of water each day. We love using the 4L MSR Dromedary Bag for water hauls like this. Though it can add a bit of a flavor to the water, the bag is incredibly tough and trustworthy.
Cell Phone Reception
Don't expect really any cell phone service on your Trans-Catalina Island backpacking trip. The reception will be very sporadic and unreliable. It's a good idea to turn off or put your phone on airplane mode. Otherwise, your phone will roam about looking for a signal, draining your battery. How else are you going to get those banger IG boomerangs?!
Leave No Trace
Due to its sensitive ecosystem, backpacking the Trans-Catalina Trail comes with its own set of guidelines to keep in mind on top of practicing Leave No Trace.
Catalina Island is home to a variety of species, including the island fox, bison, and some aggressive ravens. Always keep an eye on your meal. The majority of campgrounds feature fox boxes (also known as bear bins) where you may store your food and drink safely.
Please read this twice: Bison are really dangerous! They have a top speed of 35 mph and can change behavior very rapidly of they feel threatened. Do not approach them for photos or any other reason. You will find them right on the trail and in the campgrounds. It's common to have to wait until the herd moves on before continuing your hike. Always be on the lookout for any signs of aggression if they are present.
We were stopped for a mid-trail snack for about an hour because the bison had decided that was the perfect place to graze. While waiting, we were joined by 2 other groups who also took the opportunity to take a rest.
At the campsites, in town, or at the airport, there are restrooms available so please take advantage of them! If you have to go when not near a bathroom, make sure to observe Leave No Trace guidelines and pack out your toilet paper.
Trans-Catalina Backpacking Gear
Make sure to Download our 3 Day Backpacking Checklist. By adding in a couple more meals, snacks, and a little more clothing, you could easily adapt this to 4-5 days. Below you will find a list of the gear that we took on this trip. It includes almost every piece that we had with us in our backpacks.
Note that in the late fall, winter, and early spring, evenings can be quite cold. Make sure to pack a beanie, long pants, and a warm jacket for the evenings.
HIS
Backpack: Gregory Baltoro 75
Tent: Nemo Hornet 2p
Sleeping Bag: Nemo Kayu 15
Sleeping Pad: Nemo Tensor Wide
Shoes: Hoka One One Anacapa Mid GTX and Chacos
Headlamp: Petzl Reactik
Sunglasses: Roka
Hiking Poles: Black Diamond Trail Ergo
Clothing: Arcteryx Beta SL | Eddie Bauer Guide Pro Pant | Outdoor Research Echo Hoodie | Arcteryx Atom LT Hoody | Smartwool Performance Hike Light Socks
Food Stuffs:Jetboil Zip | Fatty Meat Sticks | Ultima Electrolytes | Mountain House Meals | Starbucks VIA | Nalgene 32oz Water Bottle
Camera Gear: Canon R, Canon 24-105 lens, GoPro Hero 9
HERS
Backpack: REI Traverse 65
Sleeping Pad: Nemo Tensor Regular
Sleeping Bag: Marmot Trestles 15
Sleeping Bag Liner: Cocoon Silk Mummy
Pillow: Klymit Pillow X
Shoes: Hoka One One Tennine GTX
Clothing:
Food Stuffs:Wild Zora Paleo Meals | Wild Zora Snacks | Wild Zora Grain Free Hot Cereal | Four Sigmatic Mushroom Coffee Mix |
Share on Pinterest
Hikers Will Need a Permit To Hike Angels Landing
Starting in April, Zion National Park will require hikers to win a permit lottery to climb the Angels Landing trail.
Want to hike to Angels Landing in Zion National Park?
You’ll have to be a little bit brave, and a little bit lucky.
As of April 1, hikers will need a permit to make the strenuous 5-mile trek, which climbs 1,488 feet and is definitely not for anyone with a fear of heights.
The new policy comes in response to a rise in visitors to the park in recent years. June was the busiest month ever for Zion, which opened its doors in 1919, and the park is on course to have its busiest year ever, surpassing 2019′s 4.5 million visitors.
The Angels Landing trail, in particular, has become increasingly crowded — and dangerous. At least 13 people have died on the trail since 2000.

“Angels Landing is one of the most iconic destinations in Zion National Park and issuing permits will make going there fair for everyone.” Jeff Bradybaugh, park superintendent, said in a statement. “The system we’ve put in place will reduce crowding on the trail, address safety concerns and make it easy for visitors to plan ahead.”

How to Get a Permit for Angels Landing
People will be allowed to enter the lottery for a permit online beginning Jan. 3, 2022. It'll cost $6 to enter the lottery and $3 per person among lottery winners of a group. The initial lottery will close on Jan. 20, 2022, for permits between April 1 and May 31, 2022.
Another lottery window will begin April 1, 2022, for permits between June 1 and Aug. 31, 2022. On July 1, the window will open for permits between Sept. 1 and Oct. 31, 2022. Permits for Dec. 1, 2022, through Feb. 28, 2023, will first go on sale on Oct. 1, 2022.
The $6 application fee is nonrefundable, according to park officials. Lottery winners can receive a refund for the $3 per person if they cancel two days before their permit date.
Park officials say people will need to print or download their permits before they get to the Angels Landing trailhead. A ranger may ask for a permit at the Grotto, Scout Lookout or along the trail. They may turn a hiker around if they do not have their permit with them.
Why did this happen?
The new permit program is in response to safety concerns and congestions along the hike that have risen in recent years. Last month, preliminary visitation data shows Zion National Park, at over 4.5 million, has already broken its visitation record this year.

The figure, through October, is about a 60% increase from visitation numbers reported in 2011. With 2021 trends at Angels Landing mirroring 2019 trends, when the park began counting people going up Angels Landing, officials said they knew it meant they needed to do something to address overcrowding on the trail.
Rangers started testing out the system during the summer holiday season in an effort to manage the number of hikers especially along the chain section of the hike, which posed safety concerns. Park officials then proposed the concept as a mainstay in August.
The plan received close to 1,000 responses during the public comment period and enough support that they moved forward with the idea. A spokesperson for the park said that since the permit lottery is a pilot program, the National Park Service will monitor it and make adjustments “as needed.” Officials also plan to seek feedback on the plan after it is implemented to see what does and doesn’t work.
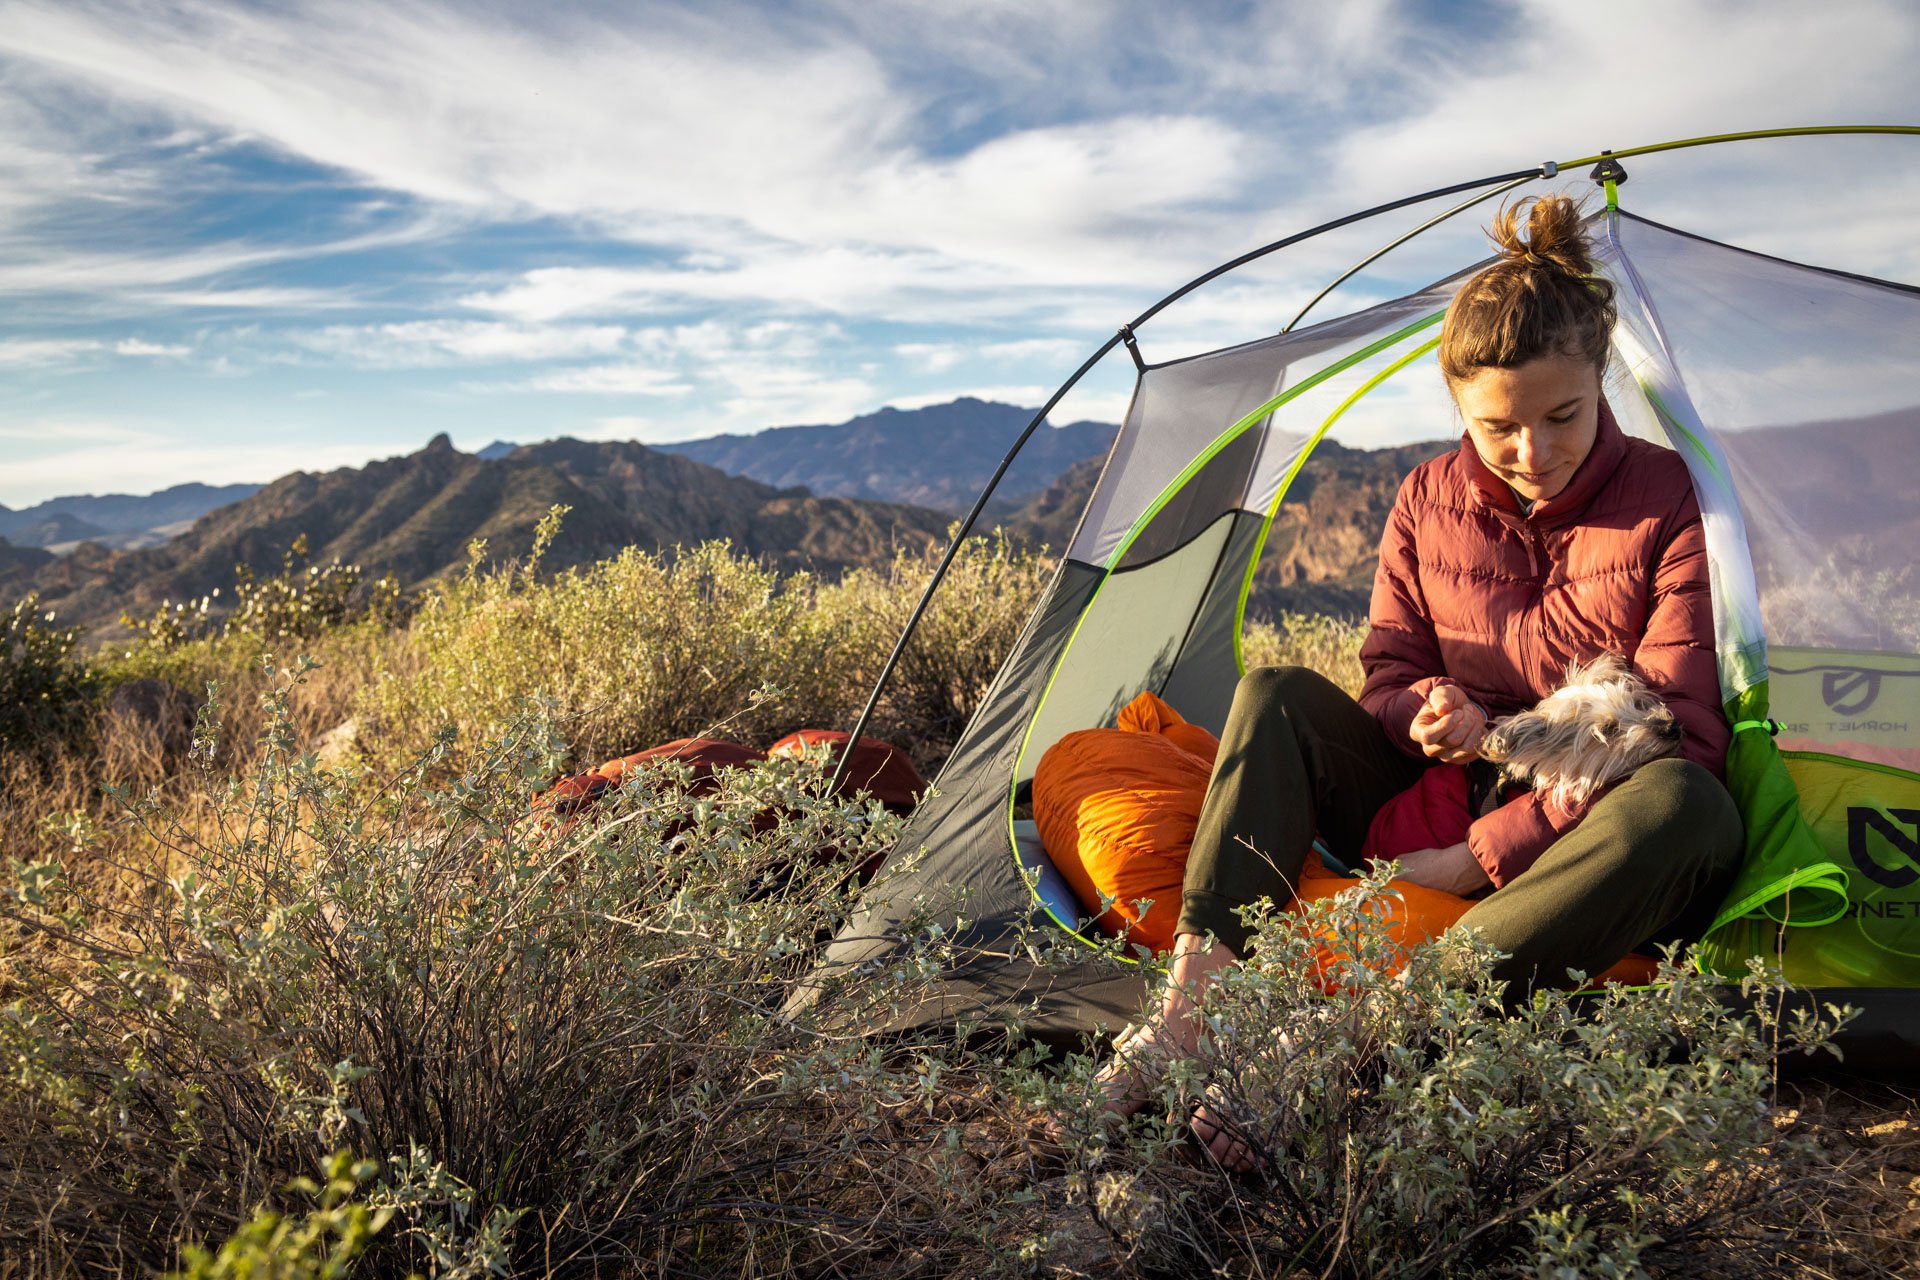
OUTDOOR
ADVENTURE
Featured Posts
HIKING
|
FLY FISHING
|
CAMPING
|
BACKPACKING
|
GEAR REVIEWS
|
HIKING | FLY FISHING | CAMPING | BACKPACKING | GEAR REVIEWS |
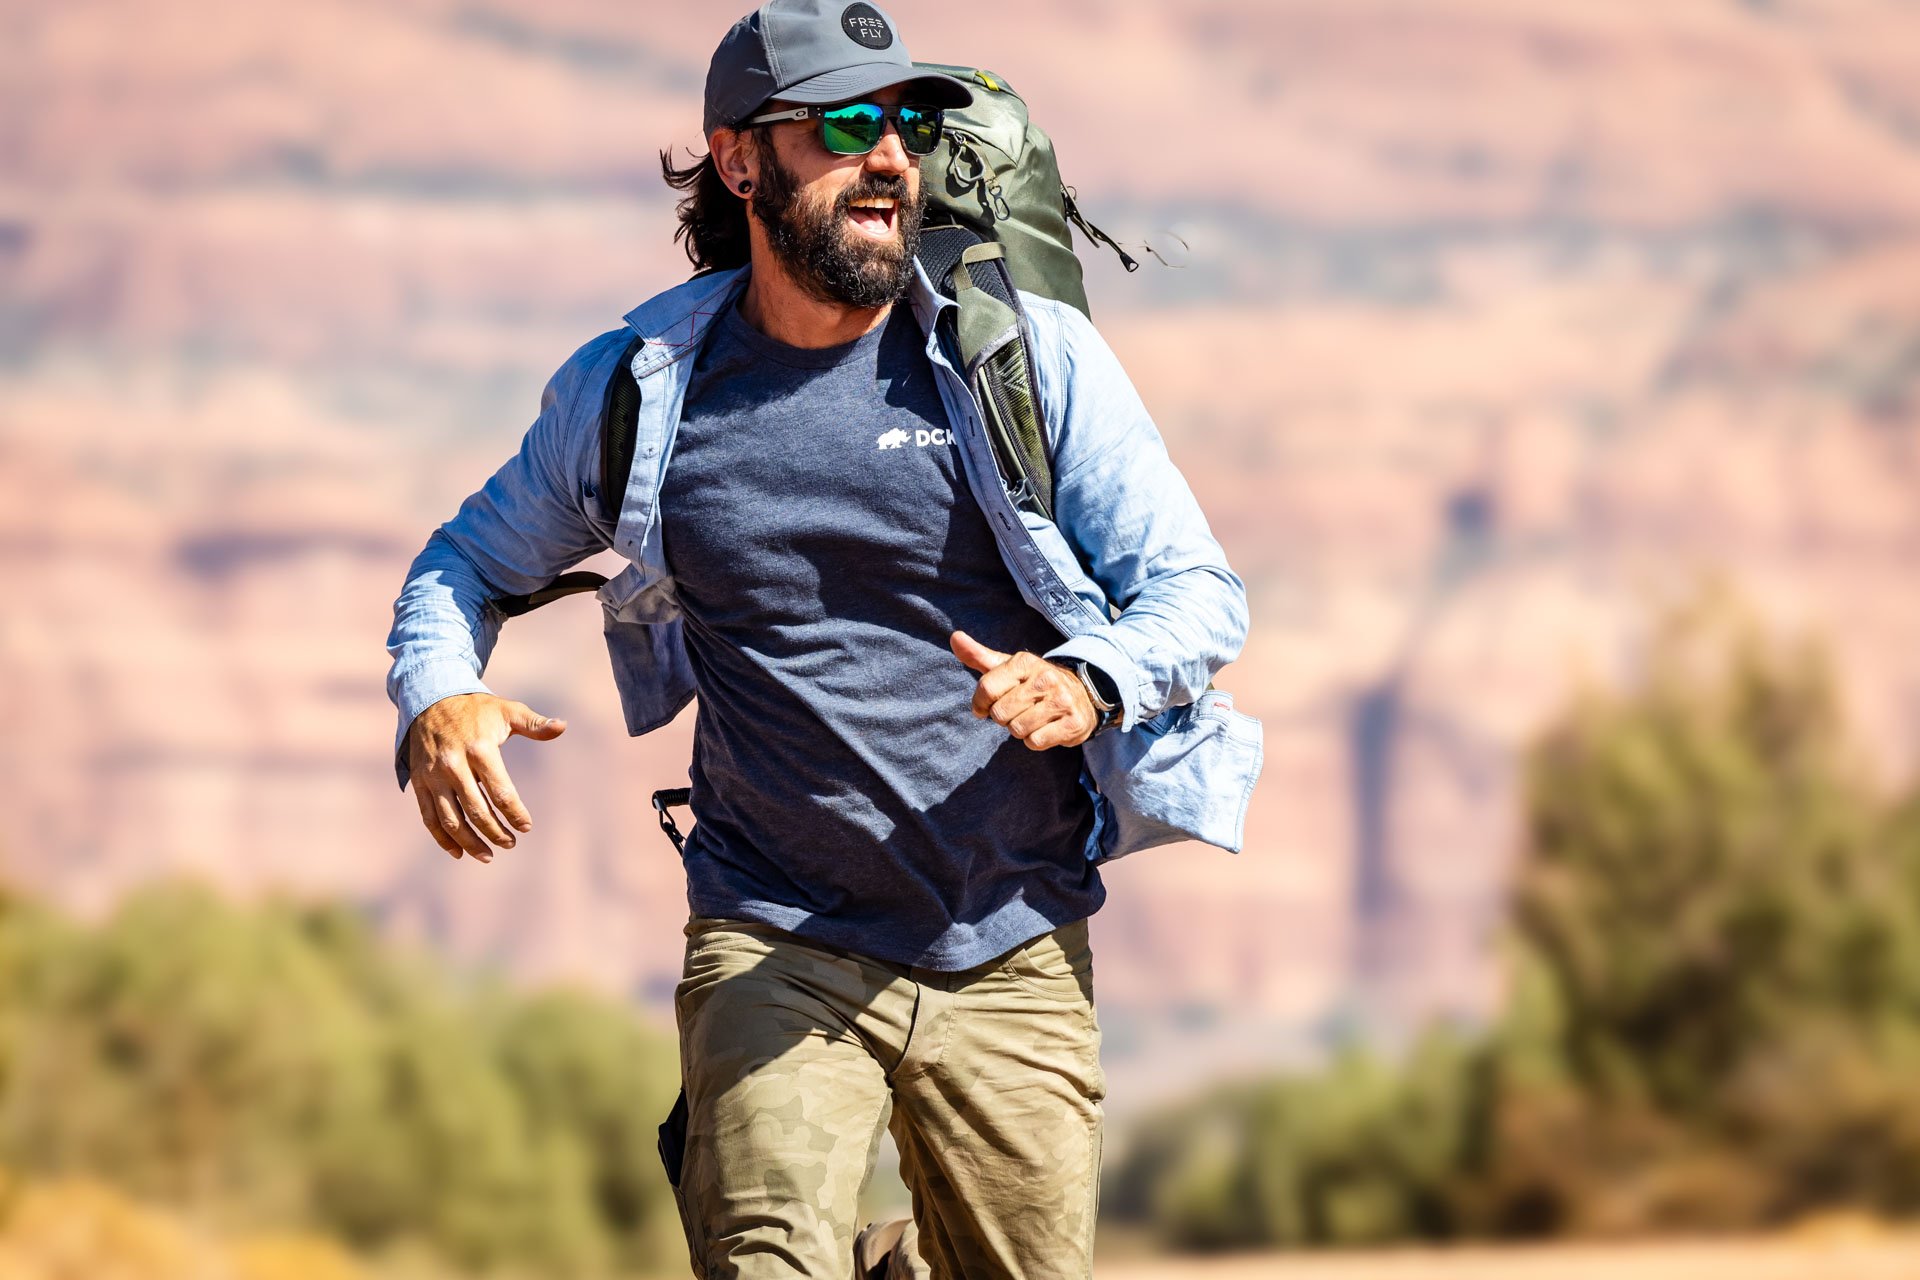
Best of
Top Clothing Brands of 2023
Discover unbeatable deals on Patagonia winter essentials at the REI Outlet sale! Get up to 40% off on jackets, parkas, and more.
Subscribe to Our Newsletter
Sign up with your email address to receive news and updates.
Get in touch.
Just like in a hardcore round of intense pickleball, communication is key! Reach out with any questions, comments, beer recommendations, inquiries, critiques and jokes.


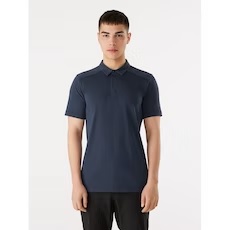
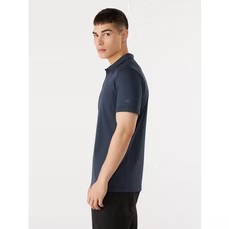


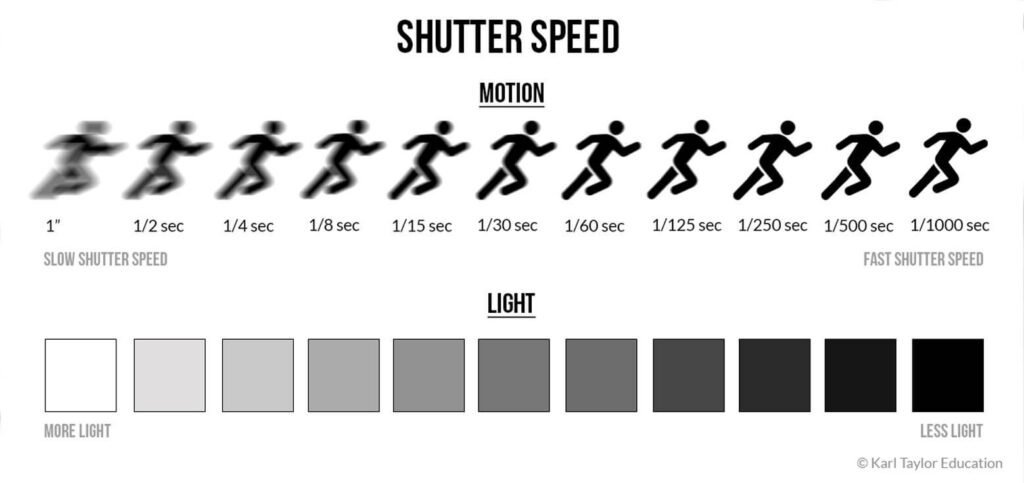


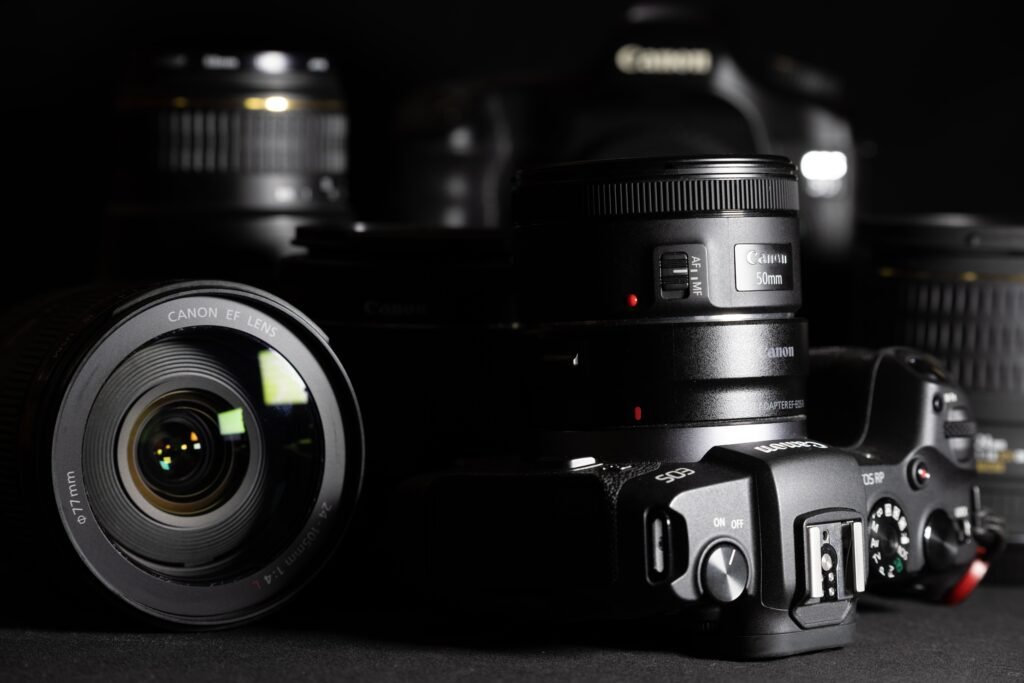


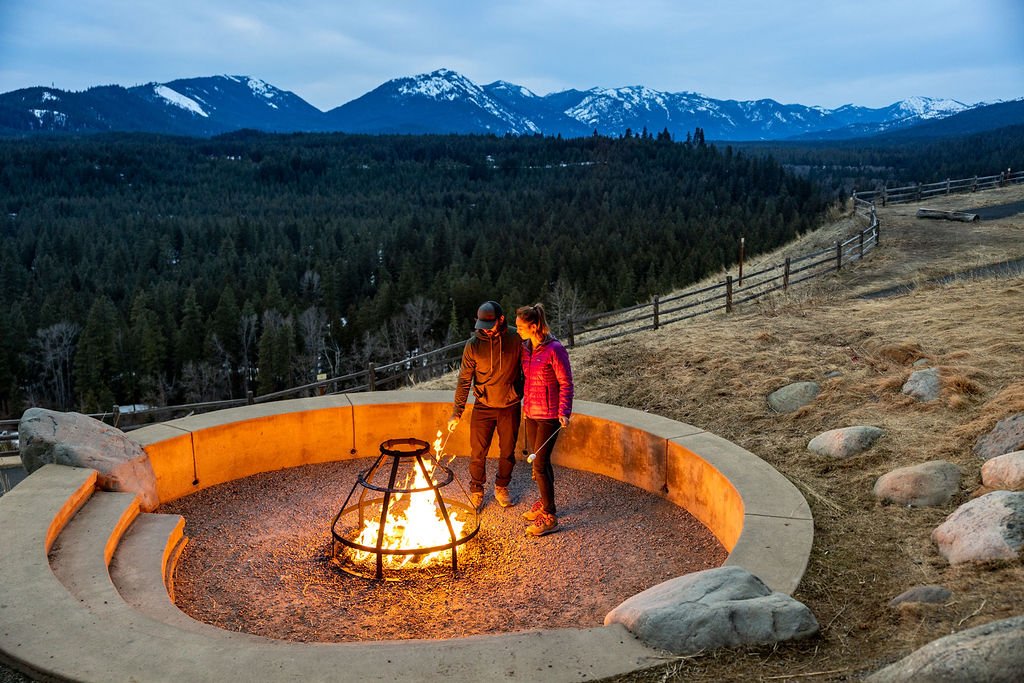


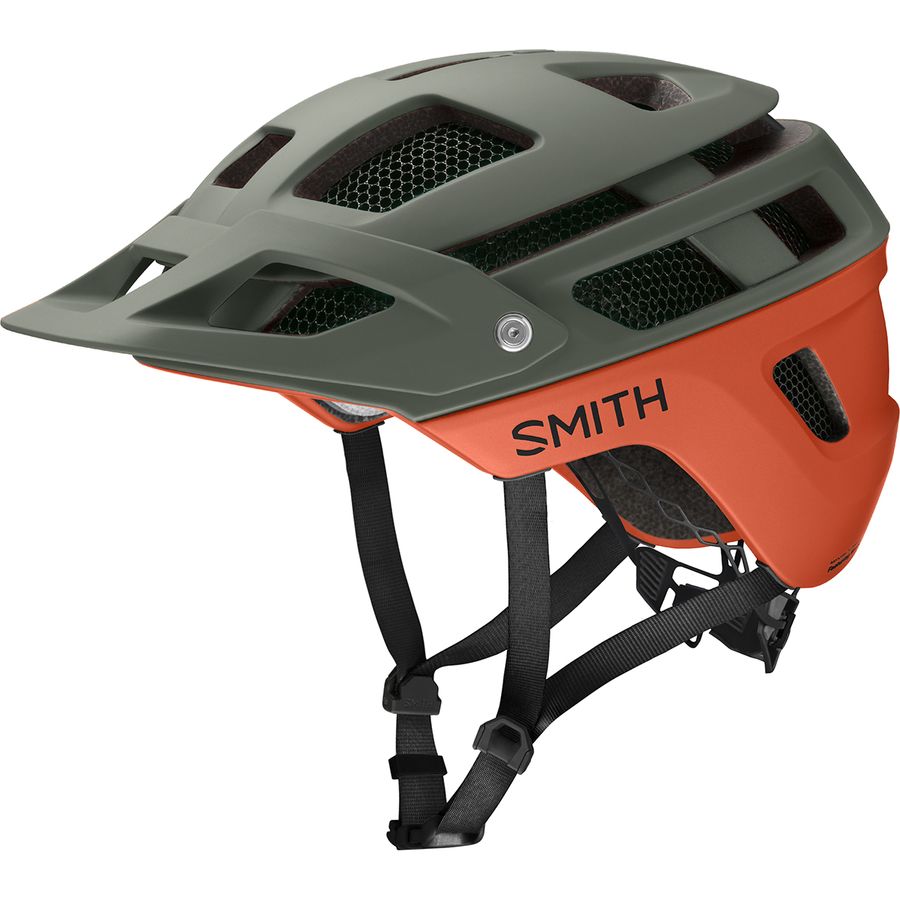


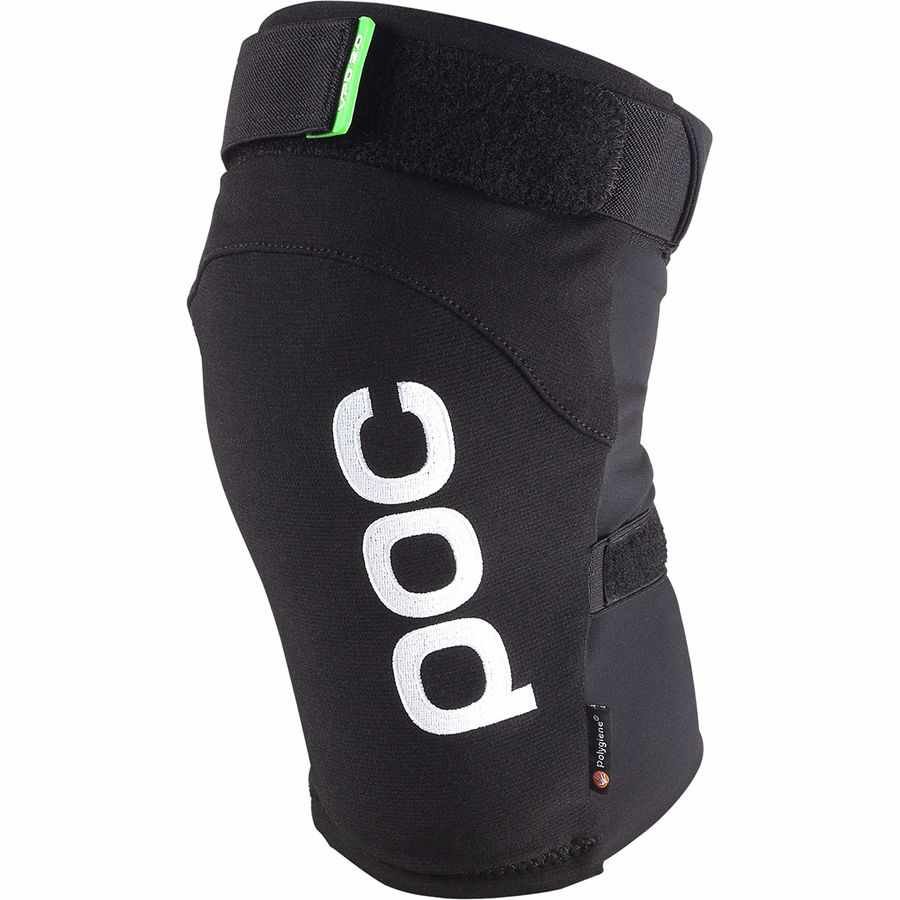
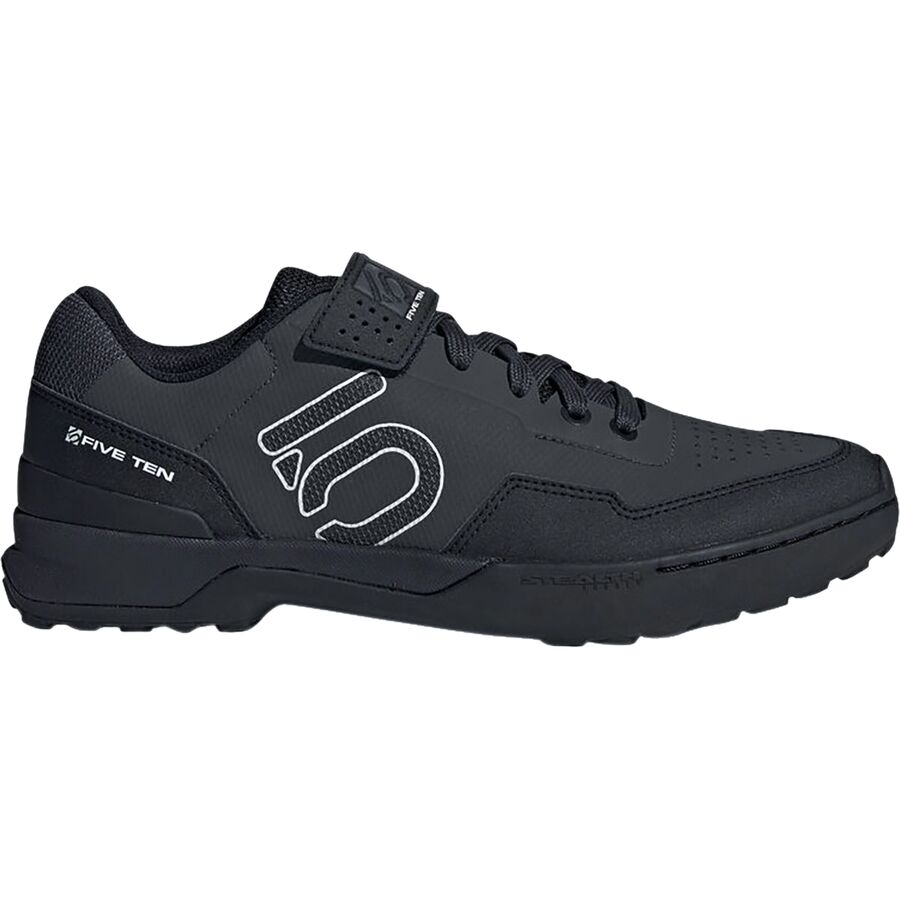


The best Black Friday deals for Ford Bronco owners. From racks and rooftop tents to storage, recovery gear, and camping upgrades—this is my full 2025 build list & wish list.