the feed
8 Useful Tips to Improve Your Travel Photography
Looking to improve your travel photography? I’ve spent 10-years shooting photos from destinations around the world. Here are my 8 favorite travel photography tips for beginners.
Ready to Step up Your Travel Photography?
Looking to improve your travel photography? I’ve spent 10-years shooting photos from destinations around the world.
Here are my 8 favorite travel photography tips for beginners.

Wake up Early (like, super early)
The early bird gets the worm. How does this apply to travel photography? The most fundamental element of great photography is light, and soft, warm morning light produces stunning photos.
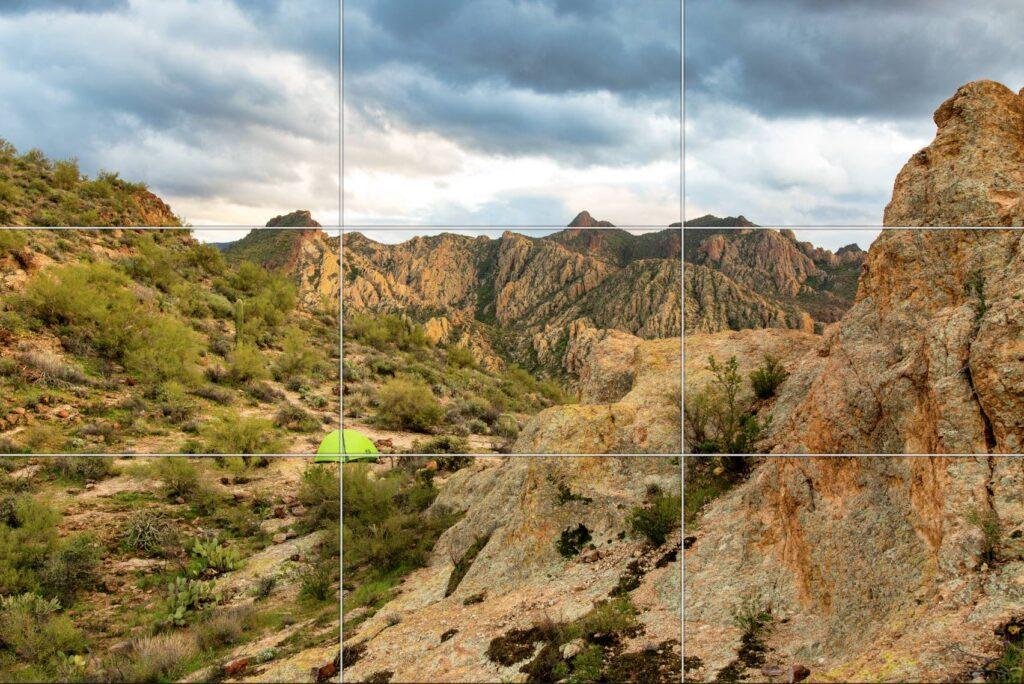
Rule of Thirds
This is a general rule of thumb to follow - don't go crazy trying to make it exact or work for every shot. It is more like something that you practice and think about when shooting so it starts to come naturally.
The gist of it is this: Place your points of interest where the lines intersect. In the example above, I placed my tent (the main subject) directly on the bottom-left intersection. The horizon line lines up with the grid lines as well.
Turning on your camera's "grid" feature will display a grid directly on your LCD screen making it simple to compose using the Rule of Thirds. This works on your phone as well!
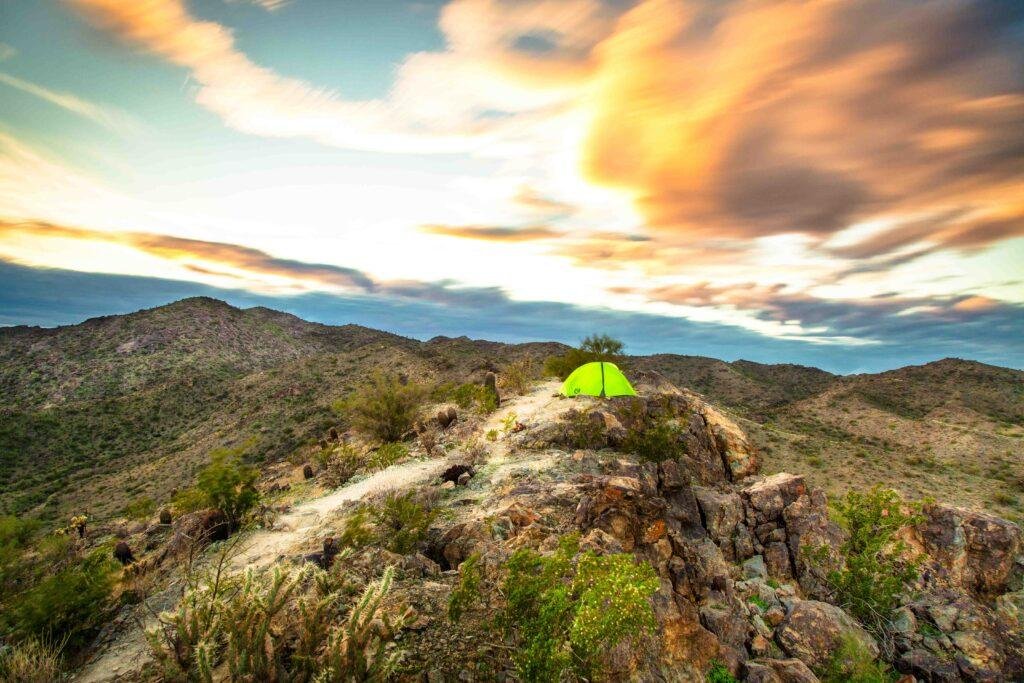
Use A Tripod for Travel Photography
Tripods allow you to shoot at much slower shutter speeds (waterfalls, low-light, stars, and so on) without having to worry about camera shake. For adventure and traveling, I use the Peak Design Carbon Fiber Travel Tripod.
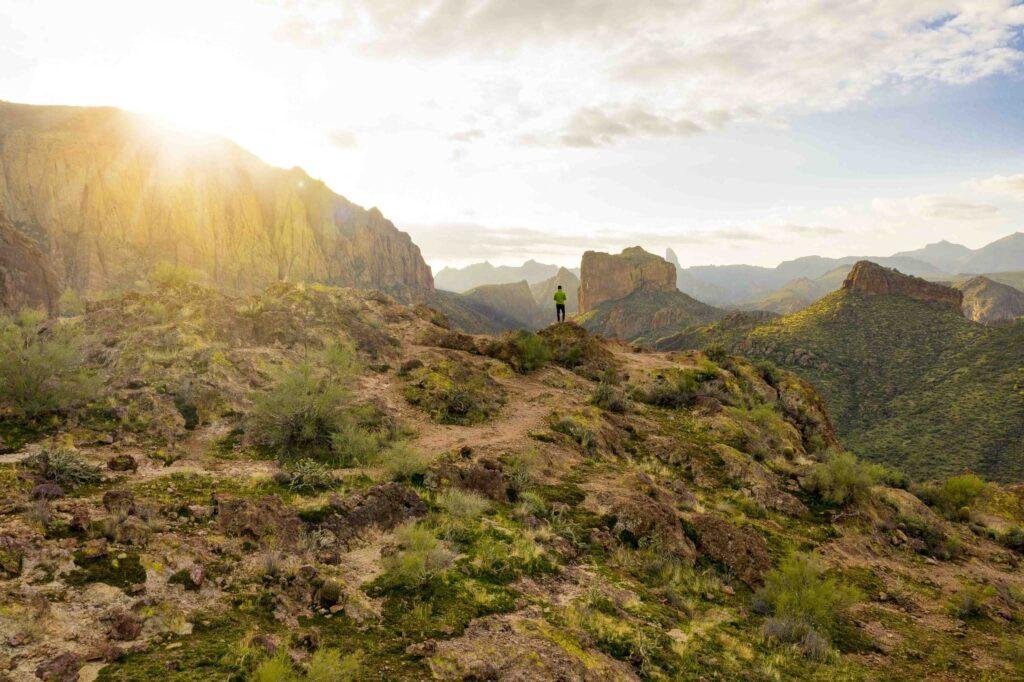
Use Some Human Element
A better sense of scale is also created by using a human element. You can get a better feel of how big those mountains are by placing your subject in the distance or using a wide-angle lens.

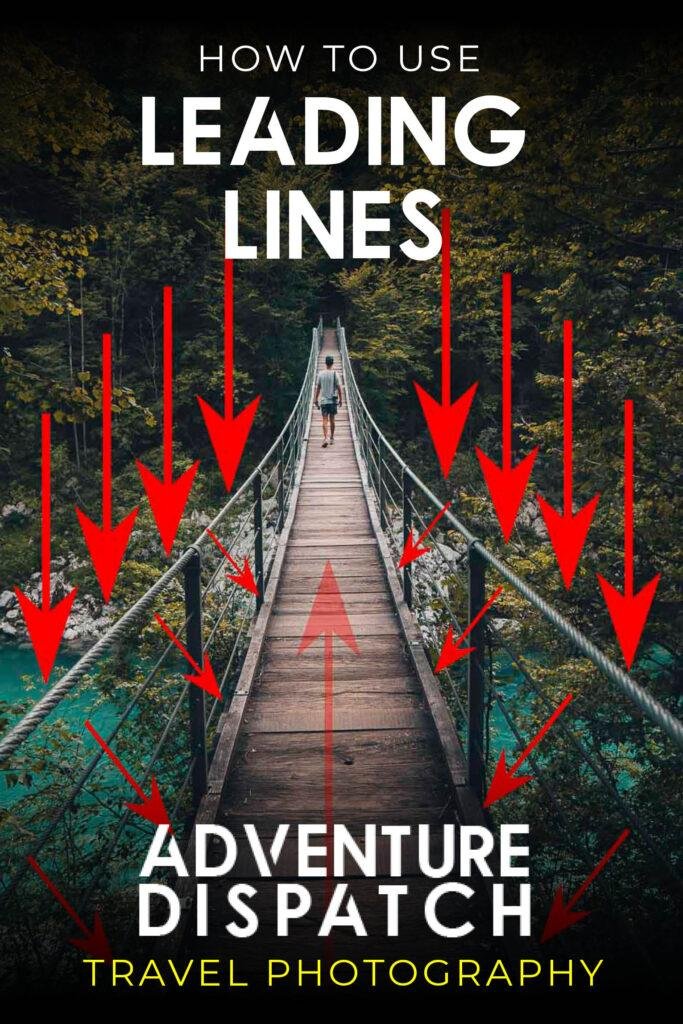
Use Leading Lines
Basically, you're trying to direct people further into your photo by using the land, objects, or other elements to take them to the main subjects. Roads, rivers, hiking paths, alleyways, and mountain ridges are all great examples of leading lines.

Ask the Locals
Don't be shy, but always be respectful and polite. Make friends with locals or do some research before your trip to seek out off-the-beaten path locations.
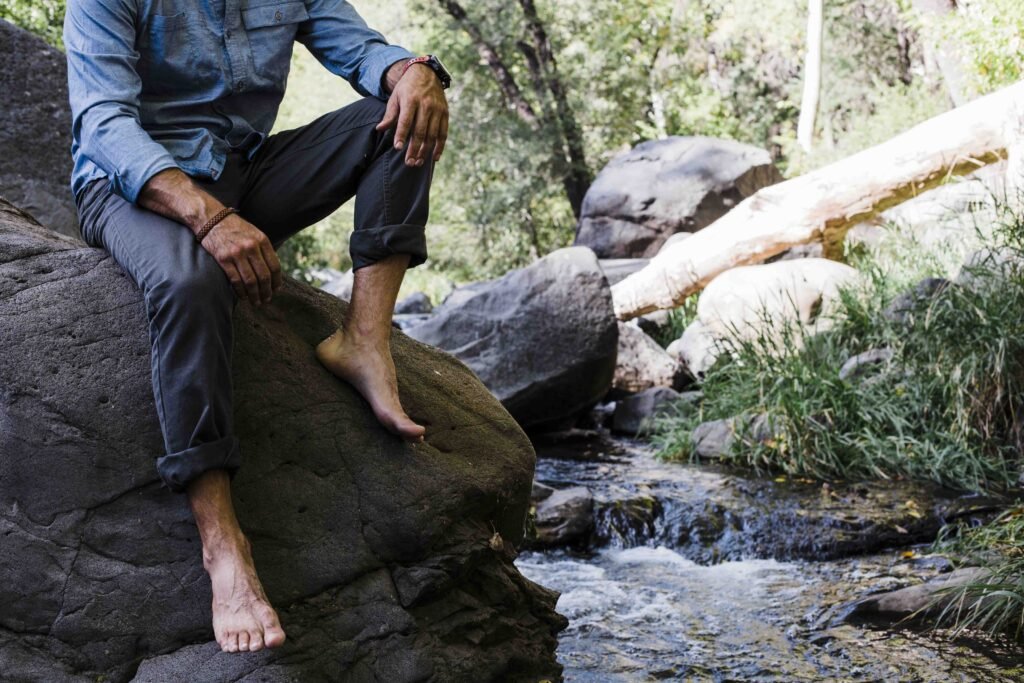
Mixing It Up
Always keep learning. Try different lenses, different poses, play with your composition or test ND filters. Maybe try to shoot an epic timelapse. Stay Fresh!
Travel Photography - Listen. Learn. Share
Take notes, take courses, make friends with people who are doing what you would like to be doing. Absorb what you can. Put yourself out there and just keep at it.
How to Hike to Cathedral Rock in Sedona, Arizona
So you're thinking of visiting Sedona? You're about to go on an incredible journey. The red pillars are among the most spectacular sights I've seen while hiking. It's one of the most beautiful spots I've ever seen. One of the best things to do in Sedona is hike Cathedral Rock which is why it made our Top 6 Hikes in Sedona.
Sedona is a place where you simply must go outside. Cathedral Rock Trail is one of my favorite Sedona hikes due to it's challenges.
Everything you need to know about climbing Cathedral Rock in Sedona is right here!

WHEN IS THE BEST TIME TO HIKE THE CATHEDRAL ROCK TRAIL?
The greatest time to hike Cathedral Rock Trail is without a doubt in the hours leading up to dusk. There are great views of Sedona from the top, and it is even more magical at sunset.

If you plan on lingering at the summit until sunset, carry a headlamp to assist you in descending the trail. You'll need your hands to get down the trail's steeper sections.
The best time of year to hike cathedral rock is fall to early spring for cooler temps and less crowds.
HOW TO GET TO THE CATHEDRAL ROCK TRAILHEAD IN SEDONA
Cathedral Rock is one of the most popular Sedona hikes. There are multiple trailheads that lead to Cathedral Rock but we found Cathedral Rock Trailhead No. 170 to be the closest.
Cathedral Rock Trail Head Coordinates: 34°49’30.7″N 111°47’18.3″W
The parking lot is a lot busier during the more popular hiking times. Typically, the earlier you are there, the easier parking will be.
There is overflow parking further down on Back O’Beyond Road.
DIRECTIONS TO THE CATHEDRAL ROCK TRAILHEAD
Head south on the junction of 89A and 179. Drive 179 south for about 3.5 miles until you reach Back O’ Beyond Road on the right. Then go approximately .6 miles. The parking lot turnout is on the left.
Note: There is a $5 cost for the Red Rock Pass for parking. The America the Beautiful Pass is also a valid parking pass.
CATHEDRAL ROCK VIA THE BALDWIN TRAILHEAD
There is an alternate way to get to Cathedral Rock if you want a longer and more scenic hike. It starts from the Baldwin Trailhead. The trail is 3.7 miles round trip, and it takes about 1.5 hours to get to the top of Cathedral Rock.
This route will have wonderful views of the west side of Cathedral Rock as you start your hike.
CATHEDRAL ROCK HIKE

HOW LONG DOES IT TAKE TO HIKE CATHEDRAL ROCK IN SEDONA?
Cathedral Rock in Sedona will take 30-40 minutes if you hike at a moderate to fast pace. It will take roughly 60 minutes to hike to the top if you hike slower, if you are hiking with children, if you take some breaks along the route, or if you stop to take photos.
I would recommend planning for about 3-4 hours for the entire adventure.
TRAIL STATS –
- Length: 1.2 miles
- Elevation Gain: 744 feet
- Route Type: Out & Back
- Difficulty: Moderate
CLIMBING CATHEDRAL ROCK IN SEDONA
In general, the Cathedral Rock route is simple to follow. Along the trail, there are basket cairns packed with rocks to direct you. The trail begins with a dried-up creek, followed by a short ascent to a plateau.
The plateau region offers stunning views over the Sedona area and is an excellent location for photographing Cathedral Rock in the background.
You'll climb up through the scramble from there. It's a little crag that you'll have to climb on your hands and knees to get to. This is the most difficult section of the hike, but if you go slow and steady, you'll be OK. The crack is about 40 feet long and has a 45-degree incline.
After the scramble, you'll come to another plateau, which is an excellent area to pause and snap photos if you want to. You'll continue climbing Cathedral Rock from there. There are few stone steps at the summit that will lead you to the top.
The end of the trail has a sign saying, “End of Trail”, but the views alone will tell you that you are there!
HOW DIFFICULT IS THE CATHEDRAL ROCK HIKE?
Although the hike to the summit of Cathedral Rock is short, it does include some steep sections. The Cathedral Rock Trail has certain sections where you must scramble over the rocks using your hands and feet.
For most people, it is not too much of a challenge to climb over the boulders, but this could be difficult depending on the physical abilities of those you are hiking with. The trail is well broken in with places for hand and footholds in the rock making the climb a little easier. Make sure you are wearing sturdy shoes or even better ---> CHACOS!!!
AT THE TOP

At the summit, there is a ledge that wraps around the top making a lot of places to explore and room for everyone. There is a very large drop-off at the top, but the ledge is pretty wide to have safe places for kids to sit.
The highlight and favorite viewpoint is off to the far right after you have reached the summit viewing area. There is a fun ledge that is a great place to take pictures and enjoy the views. It is known by some as the Edge of the World. There is a high and steep drop-off here so be careful.

HEADING DOWN THE TRAIL
There are some spots you will need to slide down on the rocks, but overall, the hike down is pretty easy going and simple to follow - just keep an eye out for the baslets of rocks that you passed by on the way up.
As you head down Cathedral Rock be sure to notice the beautiful views in the distance. Courthouse Butte will be visible as well as Sedona.

SEDONA GUIDED TOURS
Sedona is a lovely destination with plenty of options for independent exploration. However, with so many energy vortexes and gorgeous sites to visit, it can be tough to determine where to spend your time and easy to overlook many of Sedona's unique attractions.
If you want the best Sedona tour with a lot of flexibility, I suggest booking a guided tour with Sedona Spirit Journeys.
During this highly recommended tour, an experienced guide will teach about the area’s sacred nature and energy vortexes as well as the history and geology of the area. This is a great way to see everything Sedona has to offer.
The best part of it all? You pick your stops and then sit back and relax!
HIKING TIPS FOR CATHEDRAL ROCK IN SEDONA
- PLAN TO HIKE EARLY IN THE MORNING OR AT SUNSET - These two times of day will give you the best lighting and will help you beat the crowds.
- CHECK WHAT TIME SUNSET IS - Check to see what time sunset is expected for that day if you want to be there for sunset. To reach to the summit, you'll want to give yourself plenty of time. Depending on how quickly you hike, it normally takes 30-60 minutes.
- If you are planning on staying at the top of Cathedral Rock until sunset, make sure to bring some sort of flashlight to get down. Headlamps are the best so you can have your hands-free climbing down the rock.
- USE YOUR AMERICAN THE BEAUTIFUL ANNUAL PASS - The American the Beautiful Pass is honored for the daily pass for parking for all the Sedona trails. If you do not have a pass, you can purchase a pass for $5.00 at the fee machines at designated trailheads.
- BE PREPARED - This includes sunscreen, plenty of water, and snacks. Don’t be fooled into thinking the hike is only a mile. The pathway is steep and narrow in places making it more difficult. There is also little to no shade on the trail.

CAN YOU SEE CATHEDRAL ROCK IN SEDONA WITHOUT HIKING?
Whether you can see Cathedral Rock without hiking depends on what you are wanting to see. You can see the Cathedral Rock formation from below. Hikers will not be able to see the panoramic valley views or cradle of Cathedral Rock. You can only get to those by hiking to the top.
If you want to see Cathedral Rock from a distance, the Templeton Trail is a good alternative. Also, you can climb to the first plateau for a great picture area without making the steep ascent through the crack.
IS CATHEDRAL ROCK TRAIL DOG FRIENDLY?
Cathedral Rock is dog-friendly if the dogs are kept on a leash. There are some big steps and boulders to climb through, so it is recommended that your dog have hiking experience. In my opinion, once you get to the rock-climbing portion it really is not an ideal hike for dogs unless your dog has a high level of physical abilities.
LET'S TALK ABOUT THE VORTEX
Sedona is a lovely destination to visit where you can easily connect with nature. Some visitors travel to Sedona in search of powerful vortex encounters. Cathedral Rock is said to be one of Sedona's four vortexes.
This vortex energy is one of many reasons why people hike the Cathedral Rock Trail. This energy is meant to calm, inspire and ground you.
No matter what your beliefs, Cathedral Rock is a place that will make you feel something. Whether it is outer-worldly spirits or awe and appreciation for the beautiful world we live in, a climb to the top is well worth your time.
OTHER HIKING TRAILS IN SEDONA
Hiking Cathedral Rock in Sedona is my favorite trails in the area but there is still plenty of other fun and beautiful hikes to explore in the area. We recommend picking a hike or two every day because it is such a beautiful area to enjoy.
BIRTHING CAVE
- Hiking the Birthing Cave in Sedona is another family-friendly hike that we enjoyed. The trail is pretty flat until the final descent into the cave. The cave is a fun place to play and has beautiful views of the Sedona area. Be sure to download the coordinates of the cave before heading out before cell coverage is limited.
BELL ROCK TRAIL
- This is a fun area to explore, especially if you’re hiking with kids in Sedona. The Bell Rock Loop is about a mile long with lots of fun places to explore along the way. You can climb all over Bell Rock with great views of the Sedona area.
DEVILS BRIDGE
- The Devils Bridge hike is another great and popular photo opportunity in Sedona. It is a natural sandstone bridge with great views of Sedona. The trailhead is easy to access with an easy hiking trail. The only downside is the trail is about 4.2 miles roundtrip.
SOLDIERS PASS
- This is a relatively easy trail until the final descent into the cave. It is a heavily trafficked trail with plenty to see along the way like the Seven Sacred Pools and sinkhole. This is a popular hike for families.
MORE TO SEE!
Also, don’t forget that Sedona is only a two-hour drive to the Grand Canyon. You could easily add this in as a day trip during your time in Sedona! Visiting the Grand Canyon is a must-see in Arizona!
If you are going to be exploring the area around Sedona, Page is a fun city to visit. The Horseshoe Bend overlook and Antelope Canyon are fun places to explore.
How to Visit Horseshoe Bend in Arizona
Lower Antelope Canyon – Visiting the Famous Slot Canyon
Pin for Later –

WANT MORE ARIZONA INSPIRATION? FOLLOW OUR VISIT ARIZONA BOARD ON PINTEREST!
The 6 Best Hikes in Sedona You Need to Do
Here is a list of the Top 6 hikes in Sedona. Beautiful hikes can be found all throughout Sedona.
On my list of the top 6 hikes in Sedona, you'll find everything from a simple walking route to a heart-pumping hike up a mountain.
Check out this Web Story!
Top 6 Hikes in Sedona
Let's Get Into it

Cathedral Rock Hike (SEE TRAIL GUIDE HERE)
One of the best hikes in Sedona is Cathedral Rock. This hike is short and quick, and it's a lot of fun from start to end, with some rock scrambling and jaw-dropping views.
Expect no solitude on this trail due to its popularity. The hike to Cathedral rock and the reward of panoramic vistas are the highlights of this adventure.
On a much greater scale, it's very similar to the bell rock climb. You'll hike and scramble your way up to Cathedral rock from the trailhead until you reach the saddle between the sandstone massive spires.
Pro Tip: This is one of the most popular hikes in Sedona and getting a parking space can be a real challenge, so get there early.

Devils Bridge
In Sedona, this is a very popular hike. Hundreds of people hike to the bridge every day to take photos of the vistas and even propose.
Devils Bridge is only a 2-mile round-trip hike from the trailhead. It's largely level and fast, with a few series of inclines and stone steps right before reaching the bridge.
Getting to the trailhead is the tricky part. The Devils Bridge Trailhead is located on a dirt road that requires a high clearance vehicle to access. If you don't have a 4x4, you'll have to walk down Dry Creek Road from the Mezcal Trailhead.
Devils Bridge is the largest natural sandstone arch located in the Sedona area of Coconino National Forest.

Broken Arrow
The Broken Arrow Trail is one of the busiest short hikes in the area, because to its convenient location on the south side of Sedona, just off Highway 179, and its proximity to a popular jeep track.
Both routes rise gently up a large valley with colorful, jagged, eroded red cliffs and buttes on both sides, terminating at a low pass (Chicken Point) with good views south to Oak Creek Canyon and north to Sedona and the high mountains beyond.
The standard $5 Red Rock Pass is required for all parked vehicles.
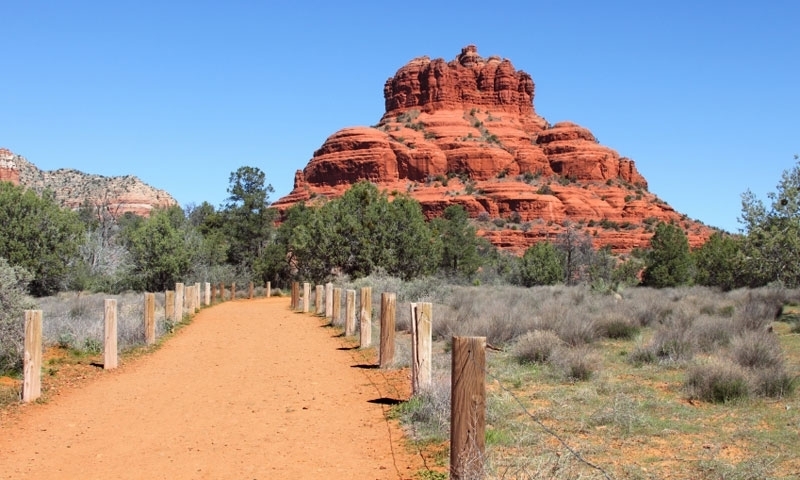
Bell Rock
One of Sedona's most well-known features is Bell Rock. Hiking up to Bell Rock is a lot of fun, which is why it's one of Sedona's most popular climbs.
The ascent begins with trail signs and wire baskets filled with boulders for the first.25 miles. The wire baskets vanish as you go further up Bell Rock, but you can continue hiking higher by figuring out your own route.
Rock scrambling up to the top levels of bell rock is part of the fun of this hike. It's entirely up to you how far you want to go. You won't be able to climb all the way to the summit of the rock, but you can get quite close.
It is quite clear how it received its name; it looks like a giant red bell melting into the landscape.

Soldiers Pass
There are a number of reasons why the Soldier Pass Trails is one of Sedona's top hikes. For one thing, it's a short and simple hike. But it also passes along some rad features like the seven sacred pools, the Devil's Kitchen Sinkhole, and if you can find it, the famous Soldier Pass Cave.
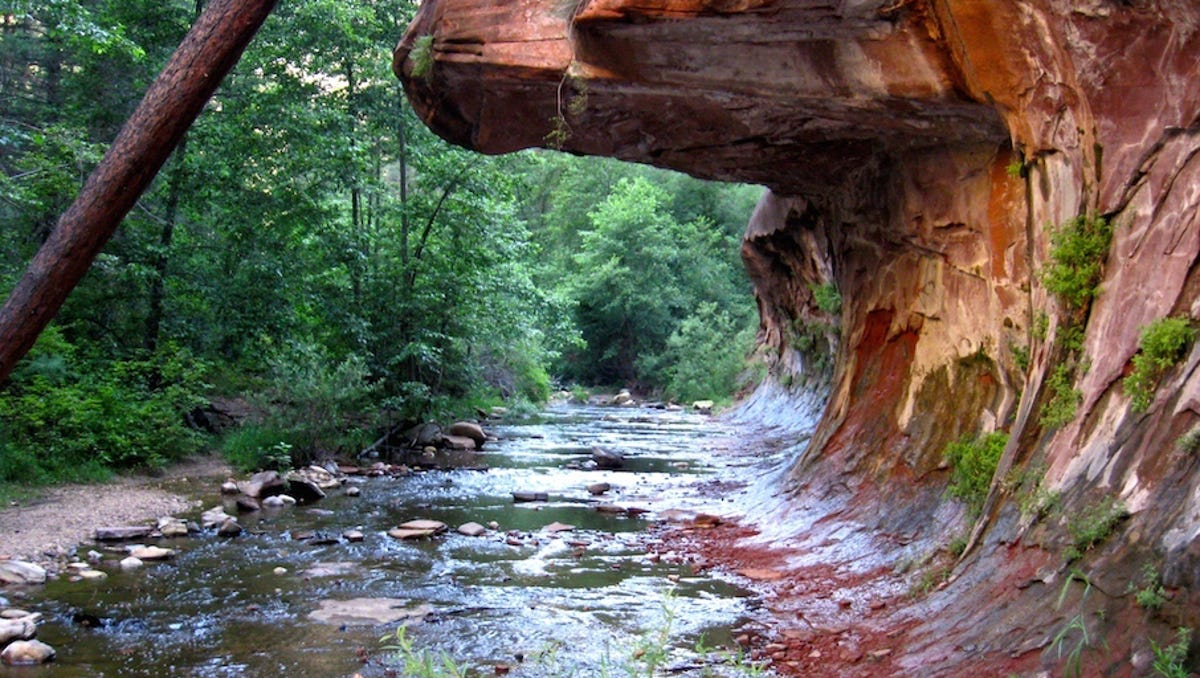
West Fork Trail
The super-easy and insanely picturesque hike follows Oak Creek. Because of its shady route and tranquility, this hike in Sedona is unlike any other in the area.
You stroll along the creek for virtually the entire hike and get to see how the creek chiseled away the canyon walls. It resembles the subway in Zion National Park in a lot of ways.
This is a nice hike to do on a hot day in Sedona because you're in the shade of the trees.
What to Bring on your Top 6 Hikes in Sedona Adventures
- Footwear – Chacos
- Hydration – Camelback Hydration Backpack (Bring lots of water!)
- Camera – Canon EOS R
- UV - Sunglasses / Hat / Sunscreen
Share these Top 6 hikes in Sedona on Pinterest


How to Take Long Exposure Photos of Waterfalls And Water
Tutorial: How to Take Long Exposure Photos of Waterfalls And Water. Super simple breakdown for anyone looking to learn how.
How to Shoot Long Exposure Water Photos
Long Exposure Photography might have an impact on the viewers similar to magic, but trust me, it is not. Cascading water is exciting to watch and photograph. Raging rivers also make beautiful photographs. Surging white water rapids, briny mist, and cascading spray are all the elements you need for a great picture.
Here are 8 tips to consider when photographing water in motion:
1 - Use a shutter speed of 1/15 of a second or slower. A slow shutter speed renders moving water as a silky white blur. Using an ND filter can help slow down the shutter speed.
2 - Use a low ISO setting. A low ISO setting gives you a relatively small aperture, which ensures a large depth of field.

3 - Use a tripod. When you use a slow shutter speed, stabilize the camera to get a sharp picture. Having a solid travel tripod is a must.
4 - Use a neutral density filter in bright light. In bright light, you won’t be able to use a slow shutter speed and get a properly exposed image. A neutral density filter cuts down on the amount of light reaching the sensor, which means you can get a properly exposed image using a slow shutter speed.If you use neutral density filters on a regular basis, consider purchasing a variable neutral density filter. This is actually two filters in one. You rotate the outer ring to dial in the strength of the filter.
5 - Use a fast shutter speed when you want to freeze the motion of a raging river. You can also use a fast shutter speed when you want to show the details of a waterfall. You may have to increase the ISO setting when using a fast shutter speed to achieve a large depth of field, which requires a small aperture. Don’t increase the ISO too high or you’ll end up with a noisy image; use a tripod instead.
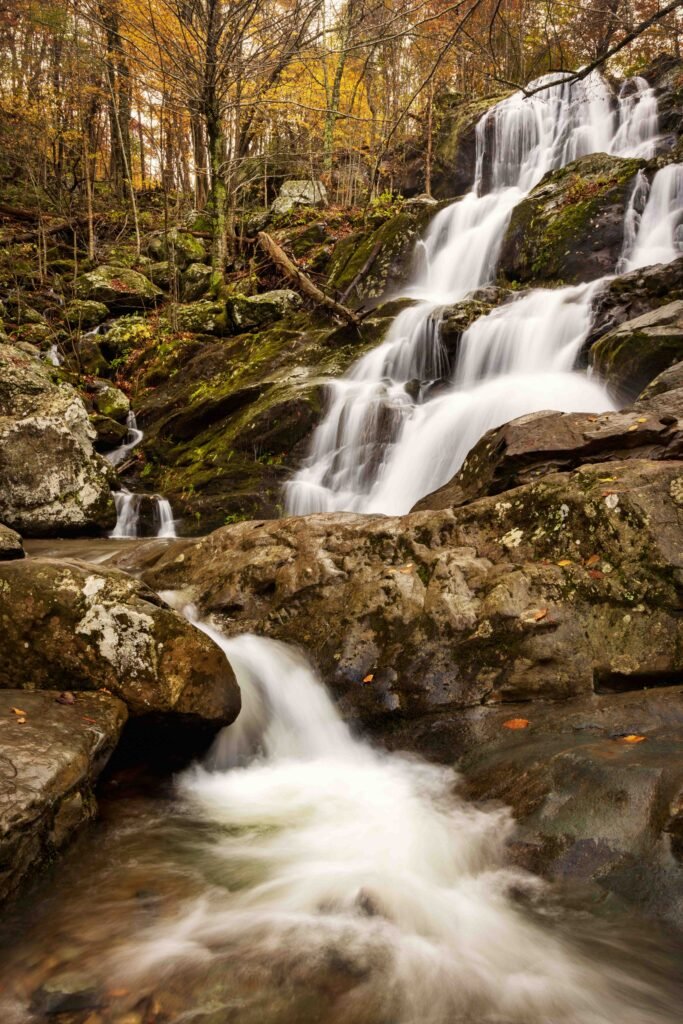
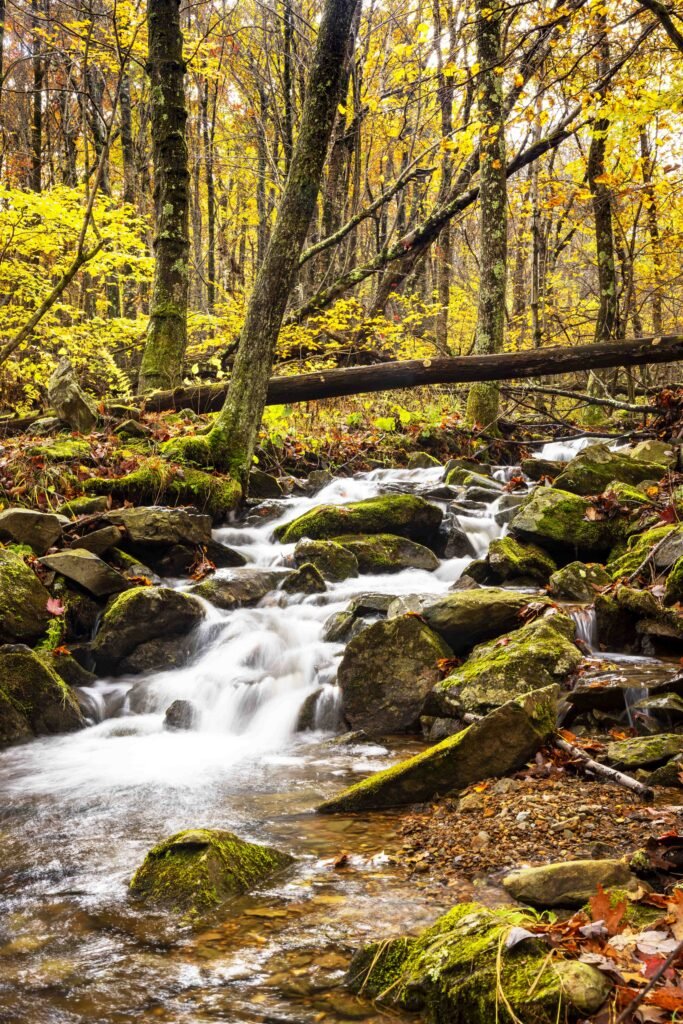
When you compose the image, position the horizon line in the lower third of the image. It’s also a good idea to place the waterfall to one side of the image.
6 - Rotate the camera 90 degrees when photographing a waterfall. This is known as portrait format. Rotate the camera 90 degrees any time you photograph a subject that is taller than it is wide. The only exception to this rule would be a waterfall like Niagara Falls that is actually wider than it is tall. I always have an L-bracket on my camera so I can quickly switch from landscape to portrait.
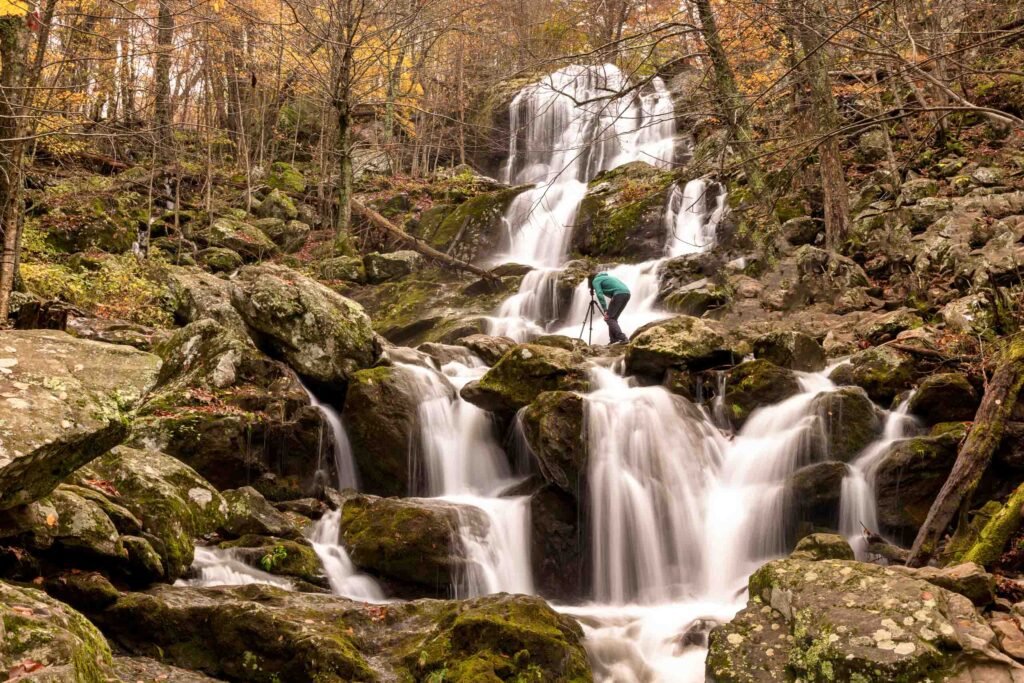
7 - Take a picture downstream from a waterfall. You’ll often find wonderful details when you venture a couple of hundred feet downriver from a waterfall, such as this image that was photographed a few hundred feet down a waterfall in Shenandoah National Park.
Camera Gear I use for These:
- Camera: Canon EOS R5
- Lens: Canon EF 24-105mm f/4L IS USM Zoom Lens
- Tripod: Peak Design CF Travel Tripod
- Polarizer Lens: B + W Circular Polarizer Kaesemann - Xtra Slim Mount
- L-Bracket : SUNWAYFOTO PCLO-R5 L Bracket
Wrapping Up
This will be added to my travel photography tutorial series. These long exposure photos make a huge impact on your travel photos or videos. Pair this with an Iphone Hyperlapse and you've got a banger of a travel video!
Toyota Tacoma Build: Black Rhino Warlord Wheels Are Awesome
Toyota Tacoma Build Update - The new Black Rhino Warlord truck rims live up to that aggressive name in more ways than one. Here's Why!
Black Rhino Warlords
I went with Black Rhino Warlord Wheels as my first big mod I did to the taco: replacing it's shoes (and legs, or ankles, or whatever you want to make a metaphor with).
Everything was based around these wheels: The Black Rhino Warlord Wheels. I wanted wheels that were different from most trucks I have seen. Something that stood out, looked badass AF, and possibly look even more rad when dirty. As bonus points, the color sheen actually matches the Quicksand from certain angles.
I also was in a big debate about whether to go all black. It's classic. It's gnar gnar, but everyone else is already doing it. I admit I was nervous because I had never seen these wheels in person - only online, but I hopped on the phone with www.wheelpros.com and drilled them about it! They were super helpful and I highly recommend going through them for your wheels!
The Wheels
For sizing, I went with the WARLORD 17X9 6X5.5 with -12MM offset in the MATTE BLACK WITH MACHINED DARK TINT LIP. this would step up my original wheel size from 16" to 17" giving me just a bit more clearance.
The Rubber
BF Goodrich 285/70R17 Tire, All-Terrain T/A KO2. I kept is as standard as possible. If it ain't broke don't fix it. These tires are tried and true, look aggressive and have a pretty good tread life.
The Lift
Bilstein B8 6112 Suspension Leveling Kit in the front and a set of Bilstein 5100 Series Shock Absorbers in the back on top of spacers. Just enough to level the Taco out and give me some more clearance. I will most likely be adding some leafs to the back because it sags under any type of weight, and I want to make sure the truck stays level when driving. This will also help to avoid that front-end duck down when braking hard.

Black Rhino Wheels supports www.stoprhinopoaching.com - very cool
Important Side Note about Black Rhino Wheels
Black Rhino Wheels was borne of a South African heritage, and is named after the tough and mighty Black Rhino, an icon of the African bush. Black Rhino Wheels is passionate about supporting conservation efforts that will help to protect the Rhino from extinction. They have donated over $60,000 to rhino conservation so far and formed a new partnership with StopRhinoPoaching.com and we donate a portion of our sales to them every quarter. You can find out more about their important and effective work here.
From the BR Site:
The new Black Rhino Warlord truck rims live up to that aggressive name in more ways than one. Start with the eight brawny spokes, bifurcated as they reach the thick, detailed lip. It’s a beefy, take-no-prisoners design, entirely in keeping with the spirit of stock and lifted trucks prepped for off highway gambols.
Black Rhino Warlords may look better the dirtier they get
Warload off-road wheels are aggressively sized, too, from 17x8, 17x9, 18x8, 18x9, and 20x9, all with oversized lips to provide a sturdy bead seat for the big fat tires offroaders prefer. Warlord truck wheels are available in 5, 6 and 8-lug bolt patterns, including5x110, 5x114, 6x120, 5x120 for the VW Amarok and the newer 6x130 pattern for Chevy Colorado, GMC Canyon and 8x180 for bigger GMC trucks. Offsets range from -23mm to +12mm, and there are versions available for Sprinter vans and CUVs.
Black Rhino Wheels mixing them blacks and browns
Black Rhino Wheels on the CA Sand Dunes
Warlord wheels are available in a striking matte gunmetal finish and in matte black with a machined dark-tint lip. Like all Black Rhino wheels, Warlord off-road rims are engineered for strength, durability and long-lasting good looks.
Jackery Explorer 1000 Portable Power Station Complete Review
The Jackery 1000W Portable Generator is the most powerful and biggest model in Jackery's portable power station portfolio. In-depth Review
Jackery 1000W Portable Generator is a beast. I wouldn't consider any camping, overlanding, or van-lifing setup complete without a source of power - especially if you're like me and you have to keep all of your gidgets and gadgets and tools of the trade juiced up. I have tried out a few different brands, but this thing takes the cake for a few reasons. Is it perfect? Nah. Is it damn close? You betcha!
How does the Jackery Explorer 1000 perform in real-world situations? Is it capable of powering the essentials of life on the road, or is it more suited to weekend camping? How does it compare in terms of cost and capacity to DIY electrical systems?
I put the Jackery Explorer 1000 and SolarSaga 100W foldable solar panels through a battery of tests that were meant to simulate a range of conditions you could face on the road. Continue reading for an in-depth look at the Jackery 1000W Portable Generator, as well as my honest thoughts on it.

What tf is a Portable Solar Generator?
A battery, charging system, inverter, and AC/DC outputs are all included in a portable "solar generator." These power stations do not generate energy on their own; however, they may be charged using solar panels (or by connecting into an AC wall socket or DC power source), and they can be used to power both AC and DC equipment while traveling.
They allow you to rapidly and easily have a mobile off-grid power supply — simply buy one, toss it in your vehicle, and go.
Portable power stations are available in a variety of sizes and outputs, ranging from little battery packs that can only charge your phone and maybe operate some lights to much bigger ones that will meet all of your power demands.
The Jackery 1000W Portable Generator is aimed towards this market.

About the Jackery 1000W Portable Generator
The Explorer 1000 is the most powerful and biggest model in Jackery's portable power station portfolio.
It's advertised as an all-in-one power solution that can keep you off the grid indefinitely to the vanlife, camping, and overlanding groups. But is it possible?
Let's jump into the nitty gritty deets.
Battery Capacity
When compared to other portable power stations at this price point, the Jackery 1000 has a very big battery:
- 1002Wh Lithium-ion NMC battery (21.6V, 46.4ah capacity. Rough equivalent of an 83ah 12V Lithium battery, or a 165ah 12V lead acid or AGM battery)
- Rated for 500 cycles to 80% capacity
But, in order to compare 1002 Watt-hours to your other battery alternatives, how much is 1002 Watt-hours in amp-hours (ah)?
The Jackery's battery, for example, is 21.6V, rather than the typical 12V found in most deep cycle batteries. The Jackery battery is officially 46.4 ah (ah = watts / voltage), however it functions similarly to an 83ah 12V lithium battery or a 165ah 12V lead-acid or AGM battery (since you can only discharge these down to 50%).
Because you can't daisy-chain the Explorer 1000 with another Jackery or an external battery, you get what you get with the Explorer 1000's built-in capacity.
The Jackery 1000's battery is rated for 500 discharge cycles at 80% capacity. That means the battery will have 80 percent of its original capacity after 500 cycles of draining from 100% to 0%. The Jackery will continue to work after 500 cycles, although batteries are typically decommissioned after 80% capacity.

Charging and Charge Times
You can charge up the Jackery via solar, or with the included AC and DC adapters.
Here are the specs:
- MPPT solar charge controller with Anderson Powerpole inputs (solar panels not included)
- 30V / 163W maximum input
- 8 hours charge time
- AC adapter (through an 8mm input)
- 24V maximum input
- 7 hours charge time
- DC adapter (through an 8mm input)
- 12V maximum input
- 14 hours charge time
The Jackery 1000W Portable Generator has an MPPT solar charge controller for solar charging. You'll need to buy Jackery's SolarSaga foldable solar panels separately, but you can plug them into the Anderson Powerpole connectors on the front of the device and you'll be ready to go (or just get an adapter and use whatever panels you want).
How long does it take for the Jackery to charge up using solar power? With two 100W panels, the Explorer 1000 takes around 8 hours to fully charge from the sun (from 0%).
The Jackery can only receive solar power of up to 30 volts or 163 watts. Solar panels produce around 18V each, therefore you can't connect them in sequence to the Jackery since it would produce 36V. You can't operate more than two 100W panels in tandem since the total output would be over 163W during peak daylight hours.
The supplied AC adapter takes around 7 hours to charge from a wall outlet.
It takes around 14 hours to charge using your vehicle's 12V cigarette lighter socket.

Output Ports (What can You Plug into the Jackery 1000W Portable Generator?)
The Jackery Explorer 1000 includes a nice variety of AC/DC output ports:
- 3 x AC outlets tied to a 1000W pure sine inverter (2000W surge)
- 2 x USB-C (up to 3A output)
- 2 x USB-A (one 5V/2.4A, one Quickcharge 3.0)
- 1 x 12V cigarette lighter plug (up to 10A; 13.2V regulated output)
The Jackery's inverter is a pure sine wave inverter with a constant output of 1000W and a surge output of 2000W. This is more than adequate to power most AC appliances in a camper.
The 12V DC cigarette lighter plug has a controlled 13.2V output and can supply up to 10A. This means it maintains a constant voltage, which is crucial for powering equipment with a low voltage cutoff, such as 12V refrigerators. For contemporary gadgets, the USB ports are enough.
Display
The input wattage, output watts, and charge percentage are all displayed on the Explorer 1000's informative LED display. This allows you to quickly and easily obtain all of the information you need at a quick glance.

Shape & Form
For what it is, the Jackery 1000W Portable Generator has an appealing form aspect and is tiny and lightweight.
- LED flashlight on the side of a rugged molded ABS structure
- Handle for convenient transport
- At barely 22 pounds, it's extremely light.
The Explorer 1000 has a beautiful appearance and a robust, high-quality feel about it. It also features a handy carrying handle and weighs only 22 pounds, which is many pounds less than competitors, making it extremely portable. With one hand, you can simply transport this to and from campgrounds.
On the side of the Jackery is an LED flashlight which comes in handy in a pinch, but it doesn't put off too much light.
Warranty
All Jackery power stations come with a 2-year limited warranty.
In The Box
The Jackery comes with everything you need for on-the-go power (except for solar panels):
- Jackery Explorer 1000
- AC adapter
- DC adapter
- Parallel adapter cable for SolarSaga panels (panels not included)
- Carrying pouch for all the cables

About the SolarSaga 100W Foldable Solar Panels
The monocrystalline SolarSaga panels are made of sturdy nylon and plastic/rubber. For mobility, they fold in half and include molded carrying handles. The cord is contained in a zipped pouch on the rear, which is a great touch and contributes to the simplicity of carrying these panels around. They also have USB-A and USB-C connections integrated right into the back of the panel for extra device charging options.
Each panel has two kickstands attached to the rear (and held in place with velcro). Simply unfold the panels and flip out the kickstands to put them up. Furthermore, each panel weighs just 9.1 lbs, making them easy to transport to anywhere you need them.
These are hard to beat when it comes to portable solar panels. However, they are costly, as are all portable panels, at approximately $300 apiece — much more than purchasing a solid aluminum solar panel and constructing your own folding mount. The SolarSaga panels, on the other hand, are handy, lightweight, and well-designed, so the extra cost may be worth it to you.
Another difficulty is the issue of lifespan (and this goes for portable panels in general). We don't know how long the SolarSaga panels will survive, but they won't live as long as solid aluminum panels, which may last up to 20 years (flexible solar panels generally last about 5 years, for example). If you're the sort that changes all of your gadgets every few years, this may not be an issue for you, but it's something to consider.
The cost and durability of the SolarSaga panels are comparable to those of other portable panels. They work great and are among the most effective folding panels available.

The Pros and Cons of the Jackery 1000W Portable Generator
The Jackery Explorer 1000 is a well-made and handy portable power station that comes with a number of advantages as well as some drawbacks. These restrictions may be insignificant to you, or they may be a deal breaker. It all relies on your circumstances and requirements.
Pros
- Build quality is excellent. The Jackery (as well as the SolarSaga panels) appear to be well-made.
- It is quite transportable. The Jackery 1000 is compact and easy to transport. This also means that you may park your van in the shade and leave the portable solar panels in the sun on hot days. It also has a built-in LED illumination that makes moving it in the dark much easier.
- It's simple to use. Everything about it is simple to use, it has all of the necessary ports, and it just works. Simply connect it to some solar panels or the supplied AC/DC adapters to charge it.
- Versatile. This little device can supply your van's basic electrical demands and can also be utilized for things outside of your van.
Cons
- There is a limit of 200W of solar power that may be plugged in. The Jackery can only receive 30V or 163W of solar power, which is a significant restriction. Adding extra panels is the simplest method to improve bad solar conditions, but this is not possible with the Jackery.
- It is not possible to charge from both AC/DC and solar at the same time. When you're running short on power, being able to charge the device from the AC/DC port while driving and simultaneously charge from roof-mounted solar panels hooked into the Anderson port would be quite helpful
- It is not possible to daisy-chain another Jackery or an external battery. This is a feature that several rival power stations offer, and it would greatly assist the Jackery in making sense in a larger range of scenarios. You may never require more than the Jackery's 1002Wh battery capacity, but if you do, you're out of luck. This restricts the Jackery's potential as a real full-time vanlife option.
- A Jackery or an external battery cannot be daisy-chained. This is a feature that several rival power stations offer, and it would really help the Jackery make sense in more scenarios. You may never require more than the Jackery's 1002Wh battery capacity, but if you do, you're out of luck. The Jackery's potential as a full-time vanlife option is hampered as a result of this.
SHARE ON YOUR FAVORITE PINTEREST BOARD!


Echo Canyon Trail on Camelback Mountain - What You Need to Know
Echo Canyon Trail on Camelback Mountain is one of the most popular hikes to do around Scottsdale and Phoenix, AZ. Here's Why!
Hike Echo Canyon Trail - Camelback Mountain
Camelback Mountain via Echo Canyon Trail is a 2.5 mile heavily trafficked out and back trail located near Scottsdale, Arizona that offers scenic views and is rated as difficult.
Getting There:
The parking lot is off Squaw Peak drive and leads to many more hiking trails in the Phoenix Mountain Preserve. The route starts on a short connector trail and then goes straight up to the summit.
The Trail:
The trail begins from the top of the parking lot, just beyond the restrooms and benches. An easy incline at first, the path passes a smaller rock formation, then approaches the base of a larger one known as the “Praying Monk”. If you look up from the Echo Canyon trail, you may see roped-up rock climbers scaling the face above you. And if you turn around and look the other way, you can see Piestewa Peak rising up behind you.
At around 0.4 miles the trail picks up with a set of wooden stairs. Soon after this, the route becomes so steep that there are metal railings anchored into the mountain to safely assist hikers in this potentially dicey situation.
At first, a metal pole will only be on your left-hand side but soon after there will be a pole in the middle and then to the right. From my experience, the pole on your left (as you are going up) is the best pole to hang onto. There are carved out foot notches in the rock that will help your feet up. The other poles will not have these little notches, so it feels a little uncertain to walk on since it’s so steep and smooth you can easily slide on it, even with good gripping shoes.
Once at the top of this steep section, you might think the tough part is over — but it’s only just begun! The trail now will require scrambling pretty much up all the way to the top. For this reason, you might want to consider bringing gloves along, although it isn’t completely necessary.
There are steep piles of bigger rocks that you will need to hike up. At times, it feels as if you’re back in that aquarium climbing up big pieces of gravel to get the relief of freedom up at the top. There is a small dip just before the one mile mark, then the trail rises steady and even steeper as it nears the summit. It’s easy to get a little off track in the last section – just keep looking for the path of least resistance.
The trail makes one final bend to the left as it leads you to the top! Take in the awesome 360-degree view of the valley, with Piestewa close by to the northwest. But make sure you pay attention to which way you came up – it’s easy to mistakenly go down the wrong trail. When you are done soaking in the views, return down the way you came up.
Echo Canyon Trail Map:
Nearby Adventures
Hike Pinnacle Peak
Mountain Bike Pemberton Trail
SHARE THESE TOP 5 HIKES IN PHOENIX ON PINTEREST
Camelback Mountain Hiking Resources
Overview of the Camelback Mountain Trails from Phoenix Parks and Recreation. Best resource for the latest information on closures, maintenance and other official notices.
Please #RecreateResponsibly and Leave No Trace
The 5 Best Hikes In and Around Phoenix
Here is a list of the best 5 hikes in and around Phoenix. Everything from a simple walking route to a heart-pumping hike up a mountain.
Here is my list of the Top 5 hikes in Phoenix. Beautiful hikes can be found all throughout Phoenix. You don't even have to leave the city boundaries!
Within a short drive of the Greater Phoenix area, there is a terrific trail for every skill level.
On my list of the top 5 hikes in Phoenix, you'll find everything from a simple walking route to a heart-pumping hike up a mountain.
Check out this Quick Web Story!
Top 5 Hikes in Phoenix - Let's Get Into it
Echo Canyon Summit
Echo Canyon Summit
Echo Canyon - Camelback Mountain
This short yet picturesque hike in Scottsdale is the most well-known and popular hike in the Phoenix area.
This trail is an intense and difficult anaerobic hike the entire 1.23 miles to the summit. It ascends approximately 1,280 ft, from 1,424 ft above sea level to 2,704 ft.
Bring lots of water, and if you're not a seasoned hiker, enlist the help of a local guide or a buddy to show you the ropes. The trek will take around 2 to 3 hours round trip.
Only experienced hikers or those in the company of someone who understands what to anticipate should undertake this trip. It's steep, with portions where you'll have to rely on your hands and feet. On the harder/steeper sections, there are handrails. These help many hikers but also add points of congestion.
The initial part of the trek is a moderate ascent to a saddle. The next section is a hard ascent up rocks that follows a wall up a series of stairs. To aid hikers, a handrail runs along the length of this stretch.
The Echo Trail is regarded as extremely tough. This hike has the highest number of rescues and deaths per year of any hike in a major urban region in the United States.
Top 5 Hikes in Phoenix - Piestewa Peak
Summit Trail - Piestewa Peak
Piestewa Peak Park has a variety of trails that range from simple to brutal. Serious hikers go for the Summit Trail. It is considered the cousin to Echo Canyon on Camelback, though they have a very different "feel" to the trail and, obviously, views.
Piestewa Peak is nearly in the heart of Phoenix, and it can be viewed from almost anywhere in the city. As a result, the path to the top is quite popular, so expect large crowds of walkers, hikers, and trail runners.
You'll be rewarded with views of Camelback, the Superstitions, the White Tanks Mountains, and the red slopes of Papago Park.
The route is well-designed, with handrails in certain places to assist with the numerous stairwells. On the way back, you should expect a sequence of knee-jarring steps down.
Parking for the trails is limited. Arrive early in the day. At the trailhead, there are restrooms and drinking fountains.
Top 5 Hikes in Phoenix - Siphon Draw to Flatiron
Siphon Draw Trail - Superstition Mountains
The Flatiron Summit via Siphon Draw is recommended for experienced hikers in good physical condition who want a challenge.
If you're thinking about taking on this hike, keep in mind that it's a 6.2-mile round-trip adventure with nearly 3,000-foot elevation gain, and much of it is in direct sunlight. The roundtrip usually takes 4-6 hours.
At the summit, you'll be rewarded with breathtaking 360-degree vistas and a profound sense of accomplishment.
White and blue dots indicate the main trail. The path is rough in places, with gravel, and some boulder climbing is necessary.
Lost Dutchman State Park is home to the Flat Iron Summit Trail. There is a daily charge to park here. Camping in the park is a practical alternative if you want to get an early start on this adventure.
Pinnacle Peak - McDowell Mountains
This hike is one of Scottsdale's most popular and busiest. It is filled with beautiful surroundings and relative simplicity. No list of the Top 5 hikes in Phoenix could exist without it!
A slow rise up a boulder-covered ridge studded with Sonoran Desert vegetation, marked by tiny signposts, leads to a breathtaking perspective of the surrounding region. Tom's Thumb, Troon North Golf Club, and the Four Seasons Resort can be seen from the summit.
This is a 3.5-mile out-and-back trek with a 1,300-foot elevation gain. This path attracts a diverse range of hikers, from fully equipped trail runners to those out for a stroll in their flip flops, and even some pausing to practice yoga postures along the way. Depending on the season, you may see some rock climbers attempting to reach the summit.
This trek has almost no shade. It is best to start early in the day to avoid the heat and congestion.
A fully-staffed tourist center with washrooms and information is located at the base.
Top 5 Hikes in Phoenix - Tom's Thumb Trail in the McDowell Mountains
Tom's Thumb Trail - McDowell Mountains
The Tom's Thumb Trailhead is used by a wide range of people as a starting point for their adventures. Explorers enjoy the aerobic exercise that comes with climbing over 1,300 feet in just 2.4 miles (each way). They're rewarded with panoramic city views at the summit, which give them well-deserved bragging rights for months.
This route is 4.9 miles long and has an elevation gain of around 1,374 feet.
Set out early in the morning to beat the heat. A facility with bathrooms, a big covered outdoor space, and information is located at the trailhead.
What to Bring on your Top 5 Hikes in Phoenix Adventures
Footwear – Chacos
Hydration – Camelback Hydration Backpack (Bring lots of water!)
Camera – Canon EOS R
UV - Sunglasses / Hat / Sunscreen (there is no shade on this entire trail for the majority of the day)
NEARBY ADVENTURES
Hike Pinnacle Peak
Mountain Bike Pemberton Trail
Share these Top 5 hikes in Phoenix on Pinterest
TRAIL RUNNING 101 - The Basics
Trail Running Basics 101. Bored with running the same old roads? Trail running opens up a whole new world for you beyond paved surfaces. As with road running, it’s a healthy, simple activity with few gear requirements.
Note: This post originally appeared on the REI.com website and has been republished here in its entirety.
Trail Running 101 - Find the Right Shoes

Shoes are the main gear consideration for trail runners. If your first trail run will be on a mellow gravel road you can get by with your road-running shoes but as soon as you encounter roots, rocks and slippery mud you’ll realize the importance of having trail-running shoes.
How are trail-running shoes different? Trail-running shoes are generally beefier than road-running shoes and emphasize traction, foot protection and stability. For a good analogy, think of the difference between tires on a mountain bike and a road bike. Within the trail-running category, you’ll find a range of shoes that are suited for everything from easy, groomed trails up to highly technical, variable terrain.
You can also choose from stripped-down minimalist shoes that give you an enhanced feel for the trail and your own biomechanics or maximalist shoes that have lots of cushioning to reduce impact on joints and fatigue on high-mile days.
Both traditional, minimalist and maximalist styles are designed to offer better traction than road-running shoes.
Trail Running 101 - Gear Up to Run

The beauty of trail running is that you don’t need a bunch of gear to do it. Going for a quick, short trail run can be as simple as pulling on shorts and a T-shirt, lacing up a pair of running shoes and heading out the door. With that said, there are several gear considerations that can make your run more enjoyable and comfortable, especially as you begin taking on higher mileage and more challenging terrain.
Carrying Water
Water is a must for all but the shortest runs. Your water-carrying options include hydration packs, hydration vests, handheld water bottles or waistpacks with water bottles.
If you’re going for a shorter run, you’ll likely be fine with a handheld water bottle or a small waistpack. You’ll be able to carry enough water for the run while also having room to store your house key, some cash, and an energy bar or gel.
For longer runs, consider a larger waistpack, a running hydration vest or a running hydration pack. These offer more storage for larger amounts of water, extra clothing, food, first-aid supplies, navigation tools and other items you may need on a half-day or full-day adventure. If choosing a hydration pack, look for a running-specific style with a narrow design that allows you to swing your arms freely.
Clothing
Your running wear should be made of moisture-wicking merino wool or synthetics rather than cotton, which is very slow to dry. Socks, too, should be merino wool or synthetic. For cool or wet weather, a lightweight rain shell or windbreaker is advisable.
Dressing in layers is a smart approach, especially on longer runs. This technique helps you manage your comfort throughout the day. You might start out cold but as you warm up on a long hill climb you can shed layers and when you cool off during a break or if bad weather moves in, you can pull them back on.
Also consider the breathability of the clothing you're wearing. Trail running generates lots of heat and perspiration, so avoid clothing that creates an impenetrable barrier. Lightweight knit fabrics work well and shirts with zippered necks give you a way to vent. Although most waterproof rain jackets are breathable, they can still get wet and clammy inside when you're really working hard. Unless the rain is really coming down, you'll likely be more comfortable wearing quick-drying, breathable synthetic or wool layers or a soft-shell jacket rather than a fully waterproof one.
Food
For runs lasting less than an hour you may not need to carry more than an energy gel or two, but if you’ll be out for a couple hours or more you’ll want to have a selection of energy food such as bars, gels and chews.
Finding what foods sit well in your tummy during a run takes some experimenting. Generally, for shorter, high-intensity runs you’ll want to stick with simple energy foods like gels or chews. If you get into running longer distances, such as ultramarathons, you may find that heartier foods like bars, nuts, peanut butter and jelly sandwiches, and other “real” foods sit OK because you're typically moving at a slower pace.
Watch
There are many options among watches, from basic sport watches that tell the time and include a stopwatch to activity trackers that monitor your steps to high-end GPS watches that track distance and speed and can be used to help navigate. Some of these devices include a heart rate monitor that can help maximize the effectiveness of your workout.
Navigation Tools
If you’re running trails in an unfamiliar area, don’t forget navigational tools such as a map and compass or, additionally, a GPS unit.
Lights
Like to run at night? A headlamp is a must. Your headlamp that you take backpacking may be sufficient but if you plan to do a lot of nighttime running you’ll want a light with a minimum output of about 200 lumens. Some trail runners like to carry a handheld flashlight in addition to a headlamp to really light up the night and be able to look around while always keeping the flashlight aimed at the trail.
Choosing a headlamp that allows you to adjust the beam shape can be helpful. You can set the beam on the wide flood setting for good peripheral illumination or change it to the spot setting when you need to see farther down the trail.
Sun Protection
Sun protection can include a combination of sunscreen (SPF 30 or higher is recommended), lip balm, hat and sun-protective clothing. Keep in mind that fair-skinned folks can get skin damage in as little as 15 minutes of midday sun.
If you spend all your time running under the protective cover of trees, you can likely use less sun protection or perhaps none at all. But if the trail will take you to an open ridgeline or the top of a mountain, be sure you’re prepared.
First-Aid Kit
The size of your first-aid kit depends a lot on the location and duration of your trail run. For runs lasting an hour or less and that aren’t too far from civilization, many people don’t carry much at all. But, if you’re setting out on a rugged trail or an adventure that will last several hours or more, a simple first-aid kit can be invaluable if you have a fall. The essentials such as bandages and antibacterial ointment for treating minor wounds and medications for treating pain are recommended.
For trail runs in remote locations consider also bringing an emergency shelter, emergency splint, elastic wrap, water treatment tablets and medical supplies for more serious injuries.
Also, be sure your kit has items specific to treating foot issues, such as moleskin, athletic tape and blister bandages.
Trail Running 101 - Decide Where to Trail Run

When planning your first outing, it’s important to remember that trail running typically takes longer than road running does for a similar distance. Start slowly and don't commit to a distance you're not ready for since the tougher terrain and undulating trails will slow you down and activate muscles you're not used to working, so start slow and don't commit to a distance you're not ready for.
Local roads and trails:
A great introduction to trail running can be found on the local network of gravel roads and dirt trails that many towns and cities have. Look for city or state parks in your area or head out on a quiet gravel road. These low-commitment outings are a great way to get used to the terrain and try out your new gear.
Guidebooks and websites:
When you’re ready for more challenge or to look farther afield than your local trails, guidebooks and online resources are especially helpful. They give you all that you’re likely to need: trail difficulty, distance, elevation gain, directions, trail features and details such as whether dogs are allowed. Websites may also include recent trip reports that may give you a sense of what the trip will really be like at the time you plan to run it. Don’t limit yourself to only trail-running-specific resources. Many hiking or backpacking guidebooks and websites offer information that can be useful when planning a trail run.
Running clubs:
Another way to discover trails is to join a local trail-running club. Many communities have these and they’re an excellent way to find new places to run as well as meet experienced trail runners who can share tips.
Topo maps:
If you know the region you want to visit and you’re comfortable reading a topo map, you may be able to choose a route based on the map details. It’s still probably a good idea to cross-reference your choice with a guidebook or website that might have more current information about the trail—maps can become out of date quickly.
Trail Running 101 - Work on Your Technique

The uneven terrain of trails presents you with different challenges than paved surfaces. Common obstacles include rocks, logs and roots. Working on your trail-running-specific technique can help you negotiate this type of terrain.
Trail Running 101 - Basic Trail-Running Technique
- Use a short stride, especially as compared with road running. Keep your feet underneath you at all times to maintain your balance on variable terrain. Don’t overstride.
- Keep your eyes down and scan the trail 10 to 15 feet in front of you for obstacles. Try not to stare at your feet.
- Swing your arms. This helps you to relax your core and keep your balance.
- Lots of obstacles ahead? Be like a goat and pick the most sure-footed route.
Hills
- When terrain steepens, further shorten your stride. Maintain your cadence by taking small, frequent steps.
- Keep your back straight. On uphills, avoid the temptation to lean forward as this can reduce your ability to breathe effectively. On downhills, avoid leaning back as this can strain your body and lead to injury.
- Super steep? There’s no shame in walking. Bonus: You minimize erosion by not bombing down steep trails.
Similar Posty Posts:
The Seven Principles of Leave No Trace
The Seven Principles of Leave No Trace provide an easily understood framework of minimum impact practices for anyone visiting the outdoors.
Although Leave No Trace has its roots in backcountry settings, the Principles have been adapted so that they can be applied anywhere — from remote wilderness areas, to local parks and even in your own backyard. They also apply to almost every recreational activity. Each Principle covers a specific topic and provides detailed information for minimizing impacts.
The Seven Principles are well established and widely known, but they are not static. The Leave No Trace Center for Outdoor Ethics continually examines, evaluates and reshapes the Principles. The Center’s Education Department conducts research — including publishing scholarly articles in independent journals — to ensure that the Principles are up to date with the latest insights from biologists, land managers and other leaders in outdoor education.
© 1999 by the Leave No Trace Center for Outdoor Ethics: www.LNT.org.
Principle 1: Plan Ahead and Prepare
Adequate trip planning and preparation helps backcountry travelers accomplish trip goals safely and enjoyably, while simultaneously minimizing damage to the land. Poor planning often results in miserable campers and damage to natural and cultural resources. Rangers often tell stories of campers they have encountered who, because of poor planning and unexpected conditions, degrade backcountry resources and put themselves at risk.
Why Is Trip Planning Important?
It helps ensure the safety of groups and individuals.
It prepares you to Leave No Trace and minimizes resource damage.
It contributes to accomplishing trip goals safely and enjoyably.
It increases self-confidence and opportunities for learning more about nature.
Seven Elements to Consider When Planning a Trip
Identify and record the goals (expectations) of your trip.
Identify the skill and ability of trip participants.
Gain knowledge of the area you plan to visit from land managers, maps, and literature.
Choose equipment and clothing for comfort, safety, and Leave No Trace qualities.
Plan trip activities to match your goals, skills, and abilities.
Evaluate your trip upon return note changes you will make next time.
Other Elements to Consider
Weather
Terrain
Regulations/restrictions
Private land boundaries
Average hiking speed of group and anticipated food consumption (leftovers create waste which leaves a trace!)
Group size (does it meet regulations, trip purpose and Leave No Trace criteria?)
Planning for one-pot meals and light weight snacks requires a minimum of packing and preparation time, lightens loads and decreases garbage. One-pot meals require minimal cooking utensils and eliminate the need for a campfire. Two backpack stoves can be used to cook all meals for large groups if you have two large pots (one large pot can be balanced on two stoves when quick heating is desired). Remember, a stove Leaves No Trace.
Most food should be removed from its commercial packing and placed in sealable bags before packing your backpacks. Sealable bags secure food and reduce bulk and garbage. Empty bags can be placed inside each other and packed out for reuse at home. This method can reduce the amount of garbage your group must pack out at the end of the trip and eliminate the undesirable need of stashing or burying unwanted trash.
Examples of Poor Trip Planning
A group that is inexperienced or unfamiliar with the geography of an area may put people at risk by traveling through areas susceptible to flash floods or along ridge tops vulnerable to lightning activity. Groups traveling arid lands often fail to carry adequate water or a way of purifying water from natural sources. Checking with local land managers and studying maps and weather conditions can contribute to a low-risk existence.
A poorly prepared group may plan to cook meals over a campfire only to discover upon arrival at their destination that a fire ban is in effect or that firewood is in scarce supply. Such groups often build a fire anyway breaking the law or impacting the land simply because they have not planned for alternatives. Fire bans and scarce wood supplies are signs that an area is experiencing the cumulative effects of heavy recreation use.
A group that has failed to develop good travel plans may be unable to travel as fast as expected. The terrain may be too steep or the trails too rugged. These groups often resort to setting up camp late at night, sometimes in an unsafe location. Poor campsite selection usually leads to unnecessary resource damage. In addition, the group may never even reach their planned destination.
© 1999 by the Leave No Trace Center for Outdoor Ethics: www.LNT.org.
Principle 2: Travel & Camp on Durable Surfaces
The goal of travel in the outdoors is to move through natural areas while avoiding damage to the land or waterways. Understanding how travel causes impacts is necessary to accomplish this goal. Travel damage occurs when surface vegetation or communities of organisms are trampled beyond recovery. The resulting barren area leads to soil erosion and the development of undesirable trails. Backcountry travel may involve travel over both trails and off-trail areas.
Travel on Trails
Land management agencies construct trails to provide identifiable routes that concentrate foot and stock traffic. Constructed trails are themselves an impact on the land; however, they are a necessary response to the fact that people travel through natural areas.
Concentrating travel on trails reduces the likelihood that multiple routes will develop and scar the landscape. It is better to have one well-designed route than many poorly chosen paths. Trail use is recommended whenever possible. Encourage travelers to stay within the width of the trail and not shortcut trail switchbacks (trail zigzags that climb hillsides).
Travelers should provide space for other hikers if taking breaks along the trail. The principles of off-trail travel should be practiced if the decision is made to move off-trail for breaks. Hikers in the same group should periodically stop to rest and talk. Avoid shouting to communicate while hiking. Loud noises usually are not welcome in natural areas.
Travel Off-trail
All travel that does not utilize a designed trail such as travel to remote areas, searches for bathroom privacy, and explorations near and around campsites is defined as off-trail. Two primary factors increase how off-trail travel affects the land: durability of surfaces and vegetation, and frequency of travel (or group size).
Durability refers to the ability of surfaces or vegetation to withstand wear or remain in a stable condition.
Frequency of use and large group size increase the likelihood that a large area will be trampled, or that a small area will be trampled multiple times.
Surface Durability
The concept of durability is an important one for all backcountry travelers to understand. The natural surfaces described below respond differently to backcountry travel.
Rock, sand and gravel: These surfaces are highly durable and can tolerate repeated trampling and scuffing. (However, lichens that grow on rocks are vulnerable to repeated scuffing).
Ice and snow: The effect of travel across these surfaces is temporary, making them good choices for travel assuming good safety precautions are followed and the snow layer is of sufficient depth to prevent vegetation damage.
Vegetation: The resistance of vegetation to trampling varies. Careful decisions must be made when traveling across vegetation. Select areas of durable vegetation, or sparse vegetation that is easily avoided. Dry grasses tend to be resistant to trampling. Wet meadows and other fragile vegetation quickly show the effects of trampling. Trampling ensures new travelers to take the same route and leads to undesirable trail derailment. As a general rule, travelers who must venture off-trail should spread out to avoid creating paths that encourage others to follow. Avoid vegetation whenever possible, especially on steep slopes where the effects of off-trail travel are magnified.
Living soil: Sometimes referred to as ͞cryptobiotic crust,͟ or ͞crypto,͟ living soil is often found in desert environments, and is extremely vulnerable to foot traffic. Living soil consists of tiny communities of organisms that appear as a blackish and irregular raised crust upon the sand. This crust retains moisture in desert climates and provides a protective layer, preventing erosion. One footstep can destroy this fragile soil. It is important to use developed trails in these areas. Travel across living soil should only be done when absolutely necessary. Walk on rocks or other durable surfaces if you must travel off-trail. In broad areas of living soil where damage is unavoidable it is best to follow in one another’s footsteps so the smallest area of crust is affected, exactly the opposite rule from travel through vegetation. Living soil is also extremely vulnerable to mountain bicycle travel.
Desert puddles and mud holes: Water is a preciously scarce resource for all living things in the desert. Don’t walk through desert puddles, mud holes or disturb surface water in any way. Potholes are also home to tiny desert animals.
Camp on Durable Surfaces
Selecting an appropriate campsite is perhaps the most important aspect of low-impact backcountry use. It requires the greatest degree of judgment and information, and often involves making trade-offs between minimizing ecological and social impacts. A decision about where to camp should be based on information about the level and type of use in the area, the fragility of vegetation and soil, the likelihood of wildlife disturbance, an assessment of previous impacts, and your party’s potential to cause or avoid impact.
Choosing a Campsite in High-use Areas
Avoid camping close to water and trails, and select a site which is not easily visible to others. Even in popular areas, the sense of solitude can be enhanced by screening campsites and choosing an out-of-the-way site. Camping 200 feet (70 adult steps) away from the water’s edge is recommended because it allows access routes for wildlife. Be sure to obey regulations related to campsite selection. Allow enough time and energy at the end of the day to select an appropriate site. Fatigue, bad weather, and late departure times are not acceptable excuses for choosing poor or fragile campsites. Generally, it is best to camp on sites that are so highly impacted that further careful use will cause no noticeable impact. In popular areas, these sites are obvious because they have already lost their vegetation cover. Also, it is often possible to find a site which naturally lacks vegetation, such as exposed bedrock or sandy areas.
For high-impact sites, tents, traffic routes and kitchen areas should be concentrated on already impacted areas. The objective is to confine impact to places which already show use and avoid enlarging the area of disturbance. When leaving camp, make sure that it is clean and appealing for other campers who follow.
Camping in Undisturbed Remote Areas
Pristine areas are usually remote, see few visitors and show no obvious impacts. Visit these special places only if you are committed to, and highly skilled in, Leave No Trace techniques. In pristine places, it is best to spread out tents, avoid repetitive traffic routes and move camp every night. The objective is to minimize the number of times any part of the site is trampled. In setting up camp, disperse tents and the kitchen on durable sites. Wear soft shoes around camp. Minimize activity around the kitchen and places where packs are stashed. The durable surfaces of large rock slabs make good kitchen sites. Watch where you walk to avoid crushing vegetation and take alternate paths to water. Minimize the number of trips to water by carrying water containers. Always check regulations, but camping 200 feet (70 adult steps) from water is a good rule of thumb.
girl walking on trail in silverton colorado
When breaking camp, take time to naturalize the site. Covering scuffed areas with native materials (such as pine needles), brushing out footprints, and raking matted grassy areas with a stick will help the site recover and make it less obvious as a campsite. This extra effort will help hide any indication where you camped and make it less likely that other backcountry travelers will camp in the same spot. The less often a pristine campsite is used the better chance it has of remaining pristine.
The most appropriate campsites in arid lands are on durable surfaces, such as rock and gravel, or on sites that have been so highly impacted further use will cause no additional disturbance. Previously impacted sites are obvious because they have already lost their vegetation cover or the rocky soils have been visibly disturbed. If choosing this type of site, make sure your spot is large enough to accommodate your entire group.
A pristine campsite, with no evidence of previous use, is appropriate in arid lands provided it is on a non-vegetated, highly resistant surface. Expenses of rock, gravel or sand are all excellent choices. It should never be necessary to camp on living soil, islands of vegetation or within the precious green ribbons of desert creeks or streams. Beware when camping on sandy river bottoms and areas susceptible to flash floods.
Cooking areas, tents and backpacks should be located on rock, sand or gravel. Consciously choose durable routes of travel between parts of your camp so that connecting trails do not develop. Vary your routes since the objective is to minimize the amount of trampling and compaction on any specific part of the campsite. Limit your stay to no more than two nights. Never scrape away or clean sites of organic litter like leaves, and always minimize the removal of rocks and gravel. The organic litter will help to cushion trampling forces, limit the compaction of soils, release plant nutrients and reduce the erosive forces of rainfall. Disturbing the lichen-coated and varnished rocks known as desert pavement can leave a visible impact for hundreds of years. Once overturned, these rocks are difficult to replace and the lichens and varnish will not grow back within our lifetime.
Camping in River Corridors
River corridors are narrow strips of land and water with little room to disperse human activities. Campsites are often designated. It is generally best to camp on established sites located on beaches, sandbars or non-vegetated sites below the high-water line.
Principle 3: Dispose of Waste Properly
The Center encourages outdoor enthusiasts to consider the impacts that they leave behind, which will undoubtedly affect other people, water and wildlife.
Human Waste
Proper disposal of human waste is important to avoid pollution of water sources, avoid the negative implications of someone else finding it, minimize the possibility of spreading disease and maximize the rate of decomposition.
In most locations, burying human feces in the correct manner is the most effective method to meet these criteria. Solid human waste must be packed out from some places, such as narrow river canyons. Land management agencies can advise you of specific rules for the area you plan to visit.
There are several EPA-approved, commercially produced pack-out systems available that are easy to use and sanitary for backpacking/hiking use. Other systems (including reusable, washable toilet systems) are bulkier and may be better suited for paddling/rafting trips. As more and more people enjoy parks and protected areas every year, packing out human waste is likely to become a more common practice to ensure long-term sustainability of our shared lands. In some environments, particularly in fragile alpine settings, land managers may require that all solid human waste must be packed out.
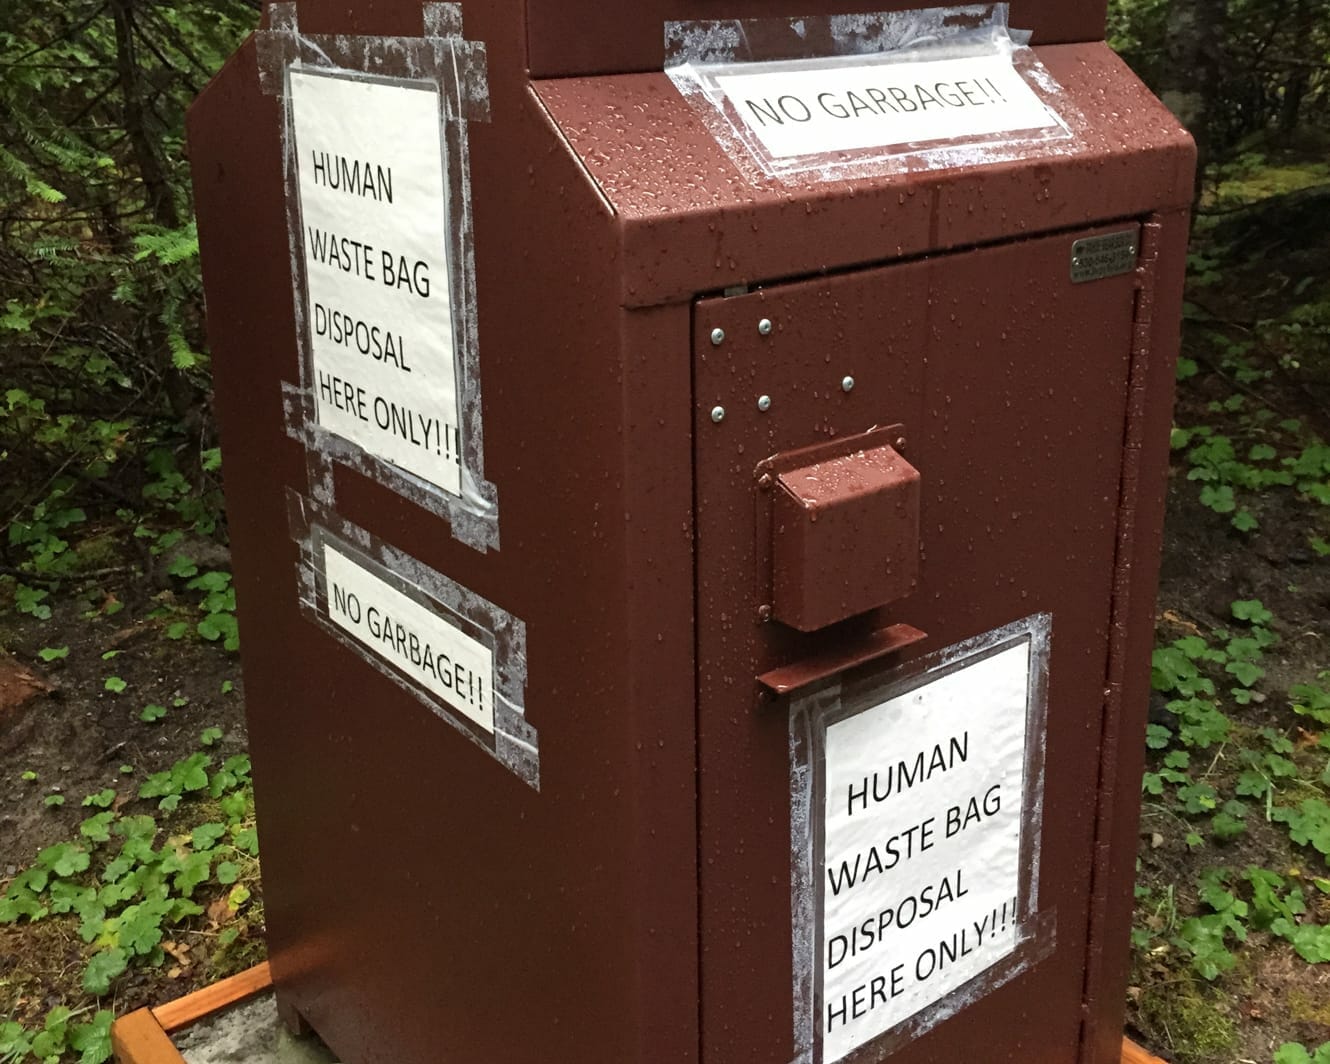
Cat Holes
Cat holes are the most widely accepted method of waste disposal. Locate cat holes at least 200 feet (about 70 adult paces) from water, trails and camp. Select an inconspicuous site where other people will be unlikely to walk or camp. With a small garden trowel, dig a hole 6-8 inches deep and 4-6 inches in diameter. The cat hole should be covered and disguised with natural materials when finished. If camping in the area for more than one night, or if camping with a large group, cat hole sites should be widely dispersed.
Select a cat hole site far from water sources, 200 feet (approximately 70 adult paces) is the recommended range.
Select an inconspicuous site untraveled by people. Examples of cat hole sites include thick undergrowth, near downed timber or on gentle hillsides.
If camping with a group or if camping in the same place for more than one night, disperse the cat holes over a wide area; don’t go to the same place twice.
Try to find a site with deep organic soil. This organic matter contains organisms which will help decompose the feces. (Organic soil is usually dark and rich in color.) Refer to the jars used to demonstrate decomposition. The desert does not have as much organic soil as a forested area. (See number 2 under Digging a Cat hole below.)
If possible, locate your cat hole where it will receive maximum sunlight. The heat from the sun will aid decomposition.
Choose an elevated site where water would not normally go during runoff or rain storms. The idea here is to keep the feces out of water. Over time, the decomposing feces will percolate into the soil before reaching water sources.
Follow these steps to dig a cat hole.
A small garden trowel is the perfect tool for digging a cat hole.
Dig the hole 6-8 inches deep (about the length of the trowel blade) and 4-6 inches in diameter. In a hot desert, human waste does not biodegrade easily because there is little organic soil to help break it down. In the desert, the cat hole should be only 4-6 inches deep. This will allow the heat and sun to hasten the decay process.
When finished, the cat hole should be filled with the original dirt and disguised with native materials.
Avoid areas where water visibly flows, such as sandy washes, even if they are dry at the moment. Select a site that will maximize exposure to the sun in order to aid decomposition. Because the sun’s heat will penetrate desert soils several inches, it can eventually kill pathogens if the feces are buried properly. South-facing slopes and ridge tops will have more exposure to sun and heat than other areas.
Latrines
Though cat holes are recommended for most situations, there are times when latrines may be more applicable, such as when camping with young children or if staying in one camp for longer than a few nights. Use similar criteria for selecting a latrine location as those used to locate a cat hole. Since this higher concentration of feces will decompose very slowly, location is especially important. A good way to speed decomposition and diminish odors is to toss in a handful of soil after each use. Ask your land manager about latrine-building techniques.
Toilet Paper
Use toilet paper sparingly and use only plain, white, non-perfumed brands. Toilet paper must be disposed of properly! It should either be thoroughly buried in a cat hole or placed in plastic bags and packed out. Natural toilet paper has been used by many campers for years. When done correctly, this method is as sanitary as regular toilet paper, but without the impact problems. Popular types of natural toilet paper include stones, vegetation and snow. Obviously, some experimentation is necessary to make this practice work for you, but it is worth a try! Burning toilet paper in a cat hole is not recommended.
Toilet Paper in Arid Lands: Placing toilet paper in plastic bags and packing it out as trash is the best way to Leave No Trace in a desert environment. Toilet paper should not be burned. This practice can result in wildfires.
Tampons
Proper disposal of tampons requires placing them in plastic bags and packing them out. Do not bury them because they don’t decompose readily and animals may dig them up. It will take a very hot, intense fire to burn them completely—campfires are not an adequate solution.
Urine
Urine has little direct effect on vegetation or soil. In some instances, urine may draw wildlife which are attracted to the salts. They can defoliate plants and dig up soil. Urinating on rocks, pine needles, and gravel is less likely to attract wildlife. Diluting urine with water from a water bottle can help minimize negative effects.
Other Forms of Waste
“Pack it in, Pack it out” is a familiar mantra to seasoned wildland visitors. Any user of recreation lands has a responsibility to clean up before he or she leaves. Inspect your campsite and rest areas for trash or spilled foods. Pack out all trash and garbage.
Plan meals to avoid generating messy, smelly garbage. It is critical to wildlife that we pack out kitchen waste, such as bacon grease and leftovers. Don’t count on a fire to dispose of it. Garbage that is half-burned or buried will still attract animals and make a site unattractive to other visitors.
Overlooked trash is litter, and litter is not only ugly—it can also be deadly. Plastic bags, cigarette butts, fishing line and other trash can be harmful to our environment when not properly disposed of.
Carry plastic bags to haul your trash (and maybe someone else’s). Before moving on from a camp or resting place, search the area for micro-trash such as bits of food and trash, including organic litter like orange peels or pistachio shells. Invite the kids in your group to make a game out of scavenging for human sign.
Wastewater
To wash yourself or your dishes, carry water 200 feet away from streams or lakes. Scatter strained dishwater. Hand sanitizers that don’t require rinsing allow you to wash your hands without worrying about wastewater disposal.
For dishwashing, use a clean pot or other container to collect water, and take it to a wash site at least 200 feet away from water sources. This lessens trampling of lakeshores, riverbanks and springs, and helps keep soap and other pollutants out of the water. Use hot water, elbow grease, and soap if absolutely necessary. Strain dirty dishwater with a fine mesh strainer before scattering it broadly. Do this well away from camp, especially if bears are a concern. Pack out the contents of the strainer in a plastic bag along with any uneaten leftovers.
In developed campgrounds, food scraps, mud and odors can accumulate where wastewater is discarded. Contact your campground host for the best disposal practices and other ways to Leave No Trace at your campsite.
Soaps and Lotions
Soap, even when it’s biodegradable, can affect the water quality of lakes and streams, so minimize its use. Always wash yourself well away from shorelines (200 feet), and rinse with water carried in a pot or jug. This allows the soil to act as a filter. Where fresh water is scarce, think twice before swimming in creeks or potholes. Lotion, sunscreen, insect repellent and body oils can contaminate these vital water sources.
Principle 4: Leave What You Find
Allow others a sense of discovery by leaving rocks, plants, archaeological artifacts and other objects of interest as you find them.
Minimize Site Alterations
Leave areas as you found them. Do not dig trenches for tents or construct lean-tos, tables, chairs or other rudimentary improvements. If you clear an area of surface rocks, twigs or pine cones replace these items before leaving. For high-impact sites, it is appropriate to clean up the site and dismantle inappropriate user-built facilities, such as multiple fire rings and constructed seats or tables. Consider the idea that good campsites are found and not made.
In many locations, properly located and legally constructed facilities, such as a single fire ring, should be left in place. Dismantling them will cause additional impact because they will be rebuilt with new rocks and thus impact a new area. Learn to evaluate all situations you find.
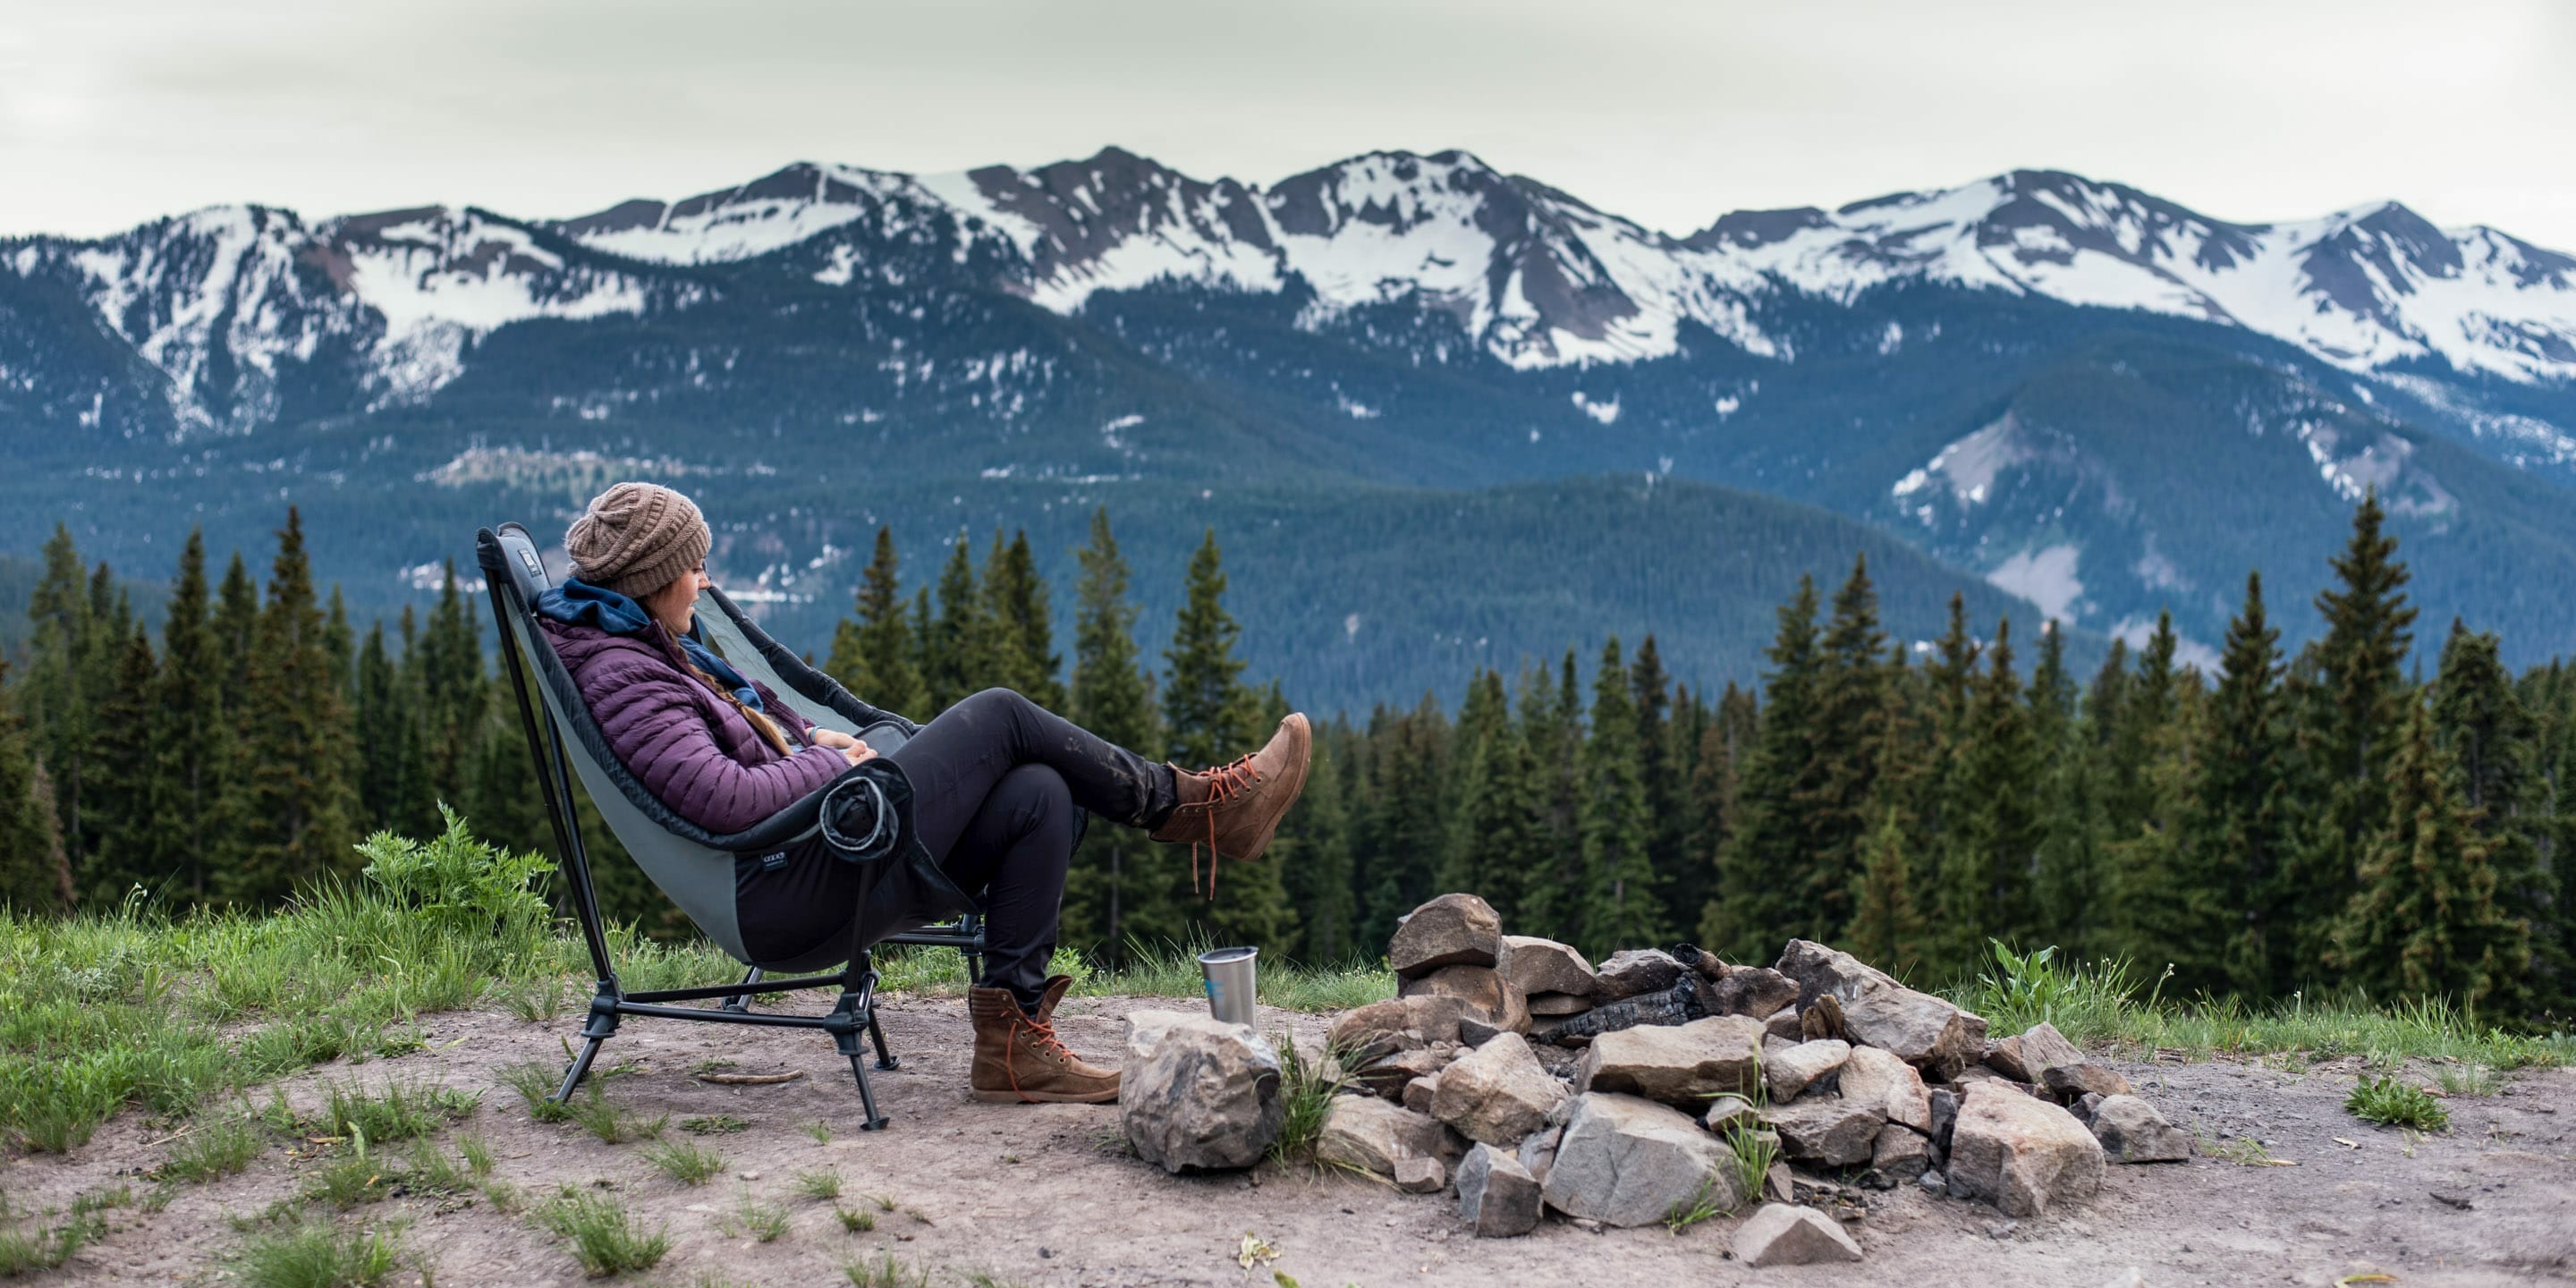
Avoid Damaging Live Trees and Plants
Avoid hammering nails into trees for hanging things, hacking at them with hatchets and saws, or tying tent guy lines to trunks—thus girdling the tree. Carving initials into trees is unacceptable. The cutting of boughs for use as sleeping pads creates minimal benefit and maximum impact. Sleeping pads are available at stores catering to campers.
Picking a few flowers does not seem like it would have any great impact and, if only a few flowers were picked, it wouldn’t. But, if every visitor thought “I’ll just take a few,” a much more significant impact might result. Take a picture or sketch the flower instead of picking it. Experienced campers may enjoy an occasional edible plant, but they are careful not to deplete the surviving vegetation or disturb plants that are rare or are slow to reproduce.
Leave Natural Objects and Cultural Artifacts
Natural objects of beauty or interest such as antlers, petrified wood or colored rocks add to the mood of the backcountry and should be left so others can experience a sense of discovery. In national parks and many other protected places, it is illegal to remove natural objects.
The same ethic is applicable to cultural artifacts found on public lands. Cultural artifacts are protected by the Archaeological Resources Protection Act. It is illegal to remove or disturb archeological sites, historic sites or artifacts such as pot shards, arrowheads, structures and even antique bottles found on public lands.
Principle 5: Minimize Campfire Impacts
Fires vs. Stoves: The use of campfires, once a necessity for cooking and warmth, is steeped in history and tradition. Some people would not think of camping without a campfire. Campfire building is also an important skill for every camper. Yet, the natural appearance of many areas has been degraded by the overuse of fires and an increasing demand for firewood. The development of lightweight efficient camp stoves has encouraged a shift away from the traditional fire for cooking. Stoves have become essential equipment for minimum-impact camping. They are fast, flexible and eliminate firewood availability as a concern in campsite selection. Stoves operate in almost any weather condition—and they Leave No Trace.
Should You Build a Fire?
The most important consideration when deciding to use a fire is the potential damage to the backcountry.
What is the fire danger for the time of year and the location you have selected?
Are there administrative restrictions from the agency that manages the area?
Is there sufficient wood so its removal will not be noticeable?
Does the harshness of alpine and desert growing conditions for trees and shrubs mean that the regeneration of wood sources cannot keep pace with the demand for firewood?
Do group members possess the skills to build a campfire that will Leave No Trace?
Lessening Impacts When Campfires Are Used
Camp in areas where wood is abundant if building a fire. Choose not to have a fire in areas where there is little wood at higher elevations, in heavily used areas, or in desert settings. A true Leave No Trace fire shows no evidence of having been constructed.
Existing Fire Rings
The best place to build a fire is within an existing fire ring in a well-placed campsite. Keep the fire small and burning only for the time you are using it. Allow wood to burn completely to ash. Put out fires with water, not dirt. Dirt may not completely extinguish the fire. Avoid building fires next to rock outcrops where the black scars will remain for many years.
Mound Fire
Construction of a mound fire can be accomplished by using simple tools: a garden trowel, large stuff sack and a ground cloth or plastic garbage bag.
To build this type of fire:
Collect mineral soil, sand or gravel from an already disturbed source. The root hole of a toppled tree is one such source. Lay a ground cloth on the fire site and then spread the soil into a circular, flat-topped mound at least 3 to 5 inches thick. The thickness of the mound is critical to insulate the ground below from the heat of the fire. The ground cloth or garbage bag is important only in that it makes cleaning up the fire much easier. The circumference of the mound should be larger than the size of the fire to allow for the spreading of coals. The advantage of the mound fire is that it can be built on flat exposed rock or on an organic surface such as litter, duff or grass.
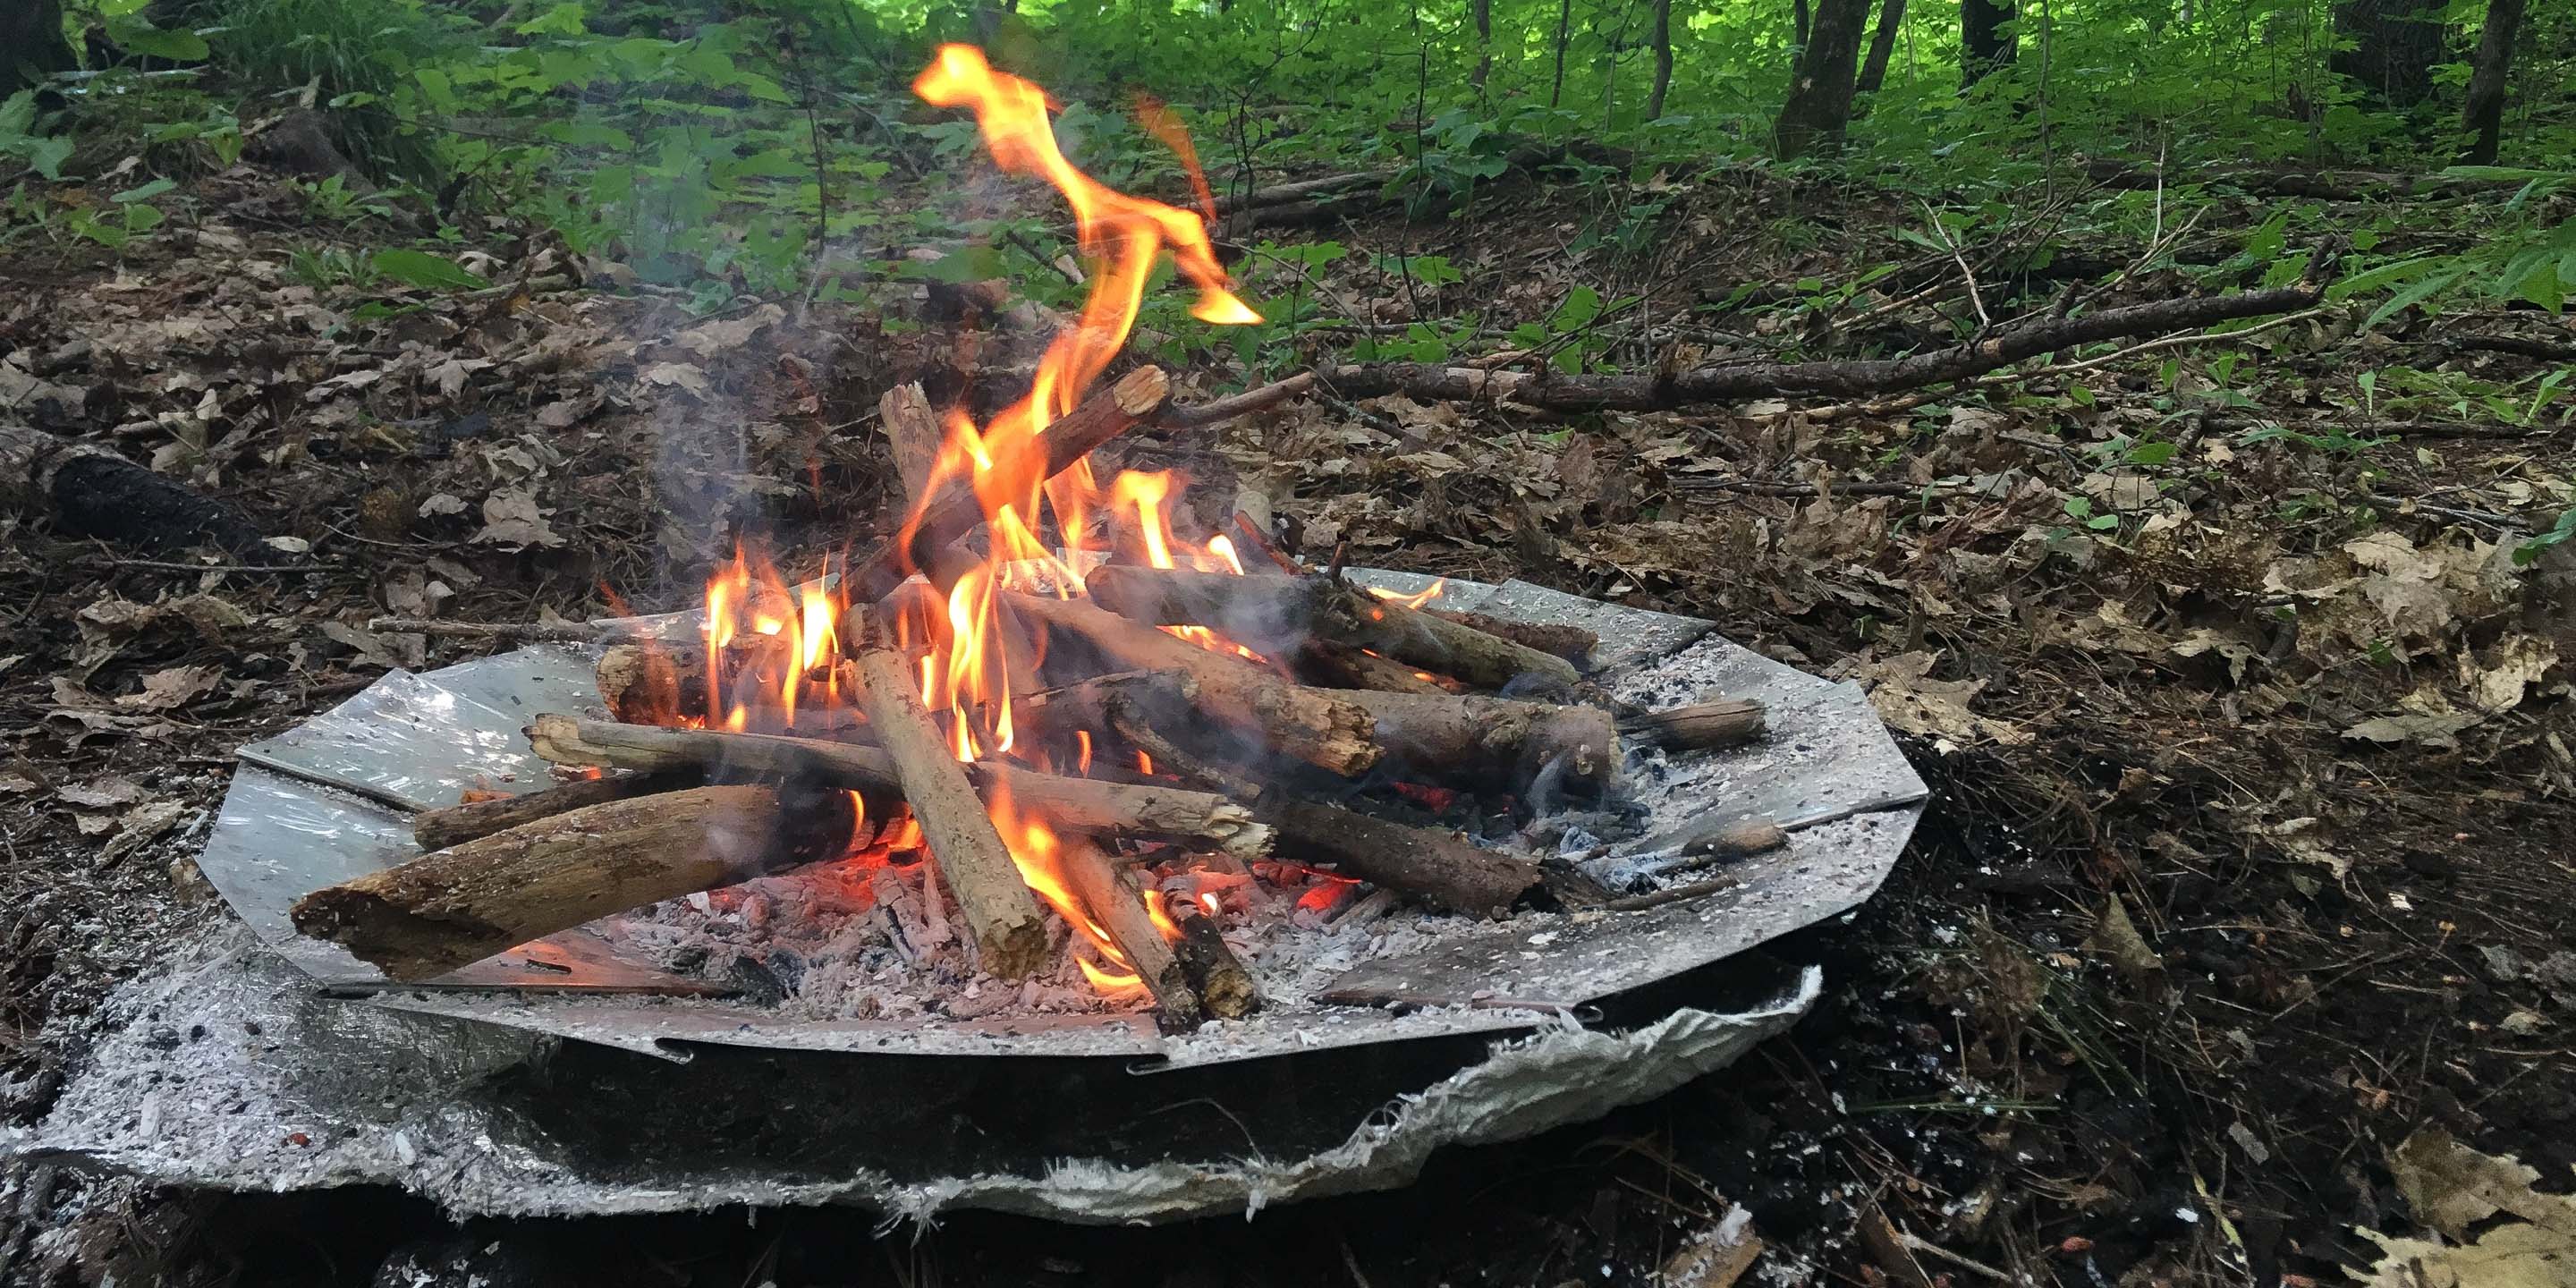
Fire Pans
A fire pan is another good alternative to a traditional campfire. Metal oil drain pans and some backyard barbecue grills make effective and inexpensive fire pans. The pan should have at least three-inch-high sides. It should be elevated on rocks or lined with mineral soil so the heat does not scorch the ground.
Firewood and Cleanup
Standing trees, dead or alive, are home to birds and insects, so leave them intact. Fallen trees also provide bird and animal shelter, increase water holding capacity of the soil, and recycle nutrients back into the environment through decomposition.
Stripping branches from standing or fallen trees detracts from an area’s natural appearance.
Avoid cutting or breaking branches from standing or downed trees. Dead and down wood burns easily, is easy to collect and leaves less impact.
Use small pieces of wood, no larger than the diameter of an adult wrist, that can be broken with your hands.
Gather wood over a wide area away from camp. Use dry driftwood on rivers and seashores.
Don’t bring firewood from home. Either buy it from a local source or gather it responsibly where allowed.
Burn all wood to white ash, grind small coals to ash between your gloved hands, thoroughly soak with water, and scatter the remains over a large area away from camp. Ashes may have to be packed out in river corridors.
Replace soil where you found it when cleaning up a mound or pan fire.
Scatter unused wood to keep the area as natural looking as possible.
Pack out any campfire litter. Plastic items and foil-lined wrappers should never be burned in a camp fire.
Safety
Provide adequate supervision for young people when using stoves or fires.
Follow all product and safety labels for stoves.
Use approved containers for fuel.
Never leave a fire unattended.
Keep wood and other fuel sources away from fire.
Thoroughly extinguish all fires.
Principle 6: Respect Wildlife
Learn about wildlife through quiet observation. Do not disturb wildlife or plants just for a “better look.” Observe wildlife from a distance so they are not scared or forced to flee. Large groups often cause more damage to the environment and can disturb wildlife so keep your group small. If you have a larger group, divide into smaller groups if possible to minimize your impacts.
Quick movements and loud noises are stressful to animals. Travel quietly and do not pursue, feed or force animals to flee. (One exception is in bear country where it is good to make a little noise so as not to startle the bears.) In hot or cold weather, disturbance can affect an animal’s ability to withstand the rigorous environment. Do not touch, get close to, feed or pick up wild animals. It is stressful to the animal, and it is possible that the animal may harbor rabies or other diseases.
Sick or wounded animals can bite, peck or scratch and send you to the hospital. Young animals removed or touched by well-meaning people may cause the animals parents to abandon them. If you find sick animals or animals in trouble you should notify a game warden.
Considerate campers observe wildlife from afar, give animals a wide berth, store food securely and keep garbage and food scraps away from animals. Remember that you are a visitor to their home.
Allow animals free access to water sources by giving them the buffer space they need to feel secure. Ideally, camps should be located 200 feet or more from existing water sources. This will minimize disturbance to wildlife and ensure that animals have access to their precious drinking water. By avoiding water holes at night, you will be less likely to frighten animals because desert dwellers are usually most active after dark. With limited water in arid lands, desert travelers must strive to reduce their impact on the animals struggling for survival.
Washing and human waste disposal must be done carefully so the environment is not polluted, and animals and aquatic life are not injured. Swimming in lakes or streams is okay in most instances—but in deserts and other very arid areas it’s best to leave scarce water holes undisturbed and unpolluted so animals may drink from them.
Principle 7: Be Considerate of Other Visitors
One of the most important components of outdoor ethics is to maintain courtesy toward other visitors. It helps everyone enjoy their outdoor experience. Many people come to the outdoors to listen to nature. Excessive noise, uncontrolled pets and damaged surroundings take away from the natural appeal of the outdoors.
The feeling of solitude, especially in open areas, is often enhanced when group size is small, contacts are infrequent and behavior is unobtrusive. To maximize your feeling of privacy, avoid trips on holidays and busy weekends or take a trip during the off season.
Technology continues to shape the outdoor experience. Personal preferences range from high-tech outdoor travelers, who might want to listen to music and collect images on their devices, to an anti-tech perspective that favors a minimal use of gadgets. Different strokes for different folks, but be sure to thoroughly consider how your experience is affecting the way someone else enjoys the outdoors. For example, earbuds may be a less obtrusive way to enjoy music than external speakers, but if you have the volume turned so high that you can’t hear someone behind you who wants to pass, your personal preference for music will negatively affect other people.
The general assumption on a narrow trail is that hikers headed downhill will step aside to allow an uphill foot traveler to easily pass. In many places, there’s an expectation that hikers will yield to equestrians, and that bicyclists will yield to both hikers and equestrians on trails. Stay in control when mountain biking. Before passing others, politely announce your presence and proceed with caution.
Groups leading or riding pack stock have the right-of-way on trails. Hikers and bicyclists should move off the trail to the downhill side. Talk quietly to the riders as they pass, since horses are spooked easily.
Take rest breaks on durable surfaces well off the designated trail. Keep in mind that visitors to seldom used places require an extra commitment to travel quietly and lightly on the land. When selecting a campsite, choose a site where rocks or trees will screen it from others view. Keep noise down in camp so as not to disturb other campers or those passing by on the trail.
Bright clothing and equipment, such as tents, that can be seen for long distances are discouraged. Especially in open natural areas, colors such as day-glow yellow may contribute to a crowded feeling; consider earth-toned colors (ie. browns and greens) to lessen visual impacts. Keep pets under control at all times — Bowser is not in the wildlife category. Please pick up dog feces from camps and trails. Some areas prohibit dogs or require them to be on a leash at all times.
The Ultimate Guide to 2023’s Top Fishing Socks
Our picks for the best fly fishing and wading socks of 2023
Dive into the fishing groove with the ultimate game-changers for your water escapades – killer wading socks! No more soggy struggles or frosty toes messing with your fishing mojo. Whether you’re soaking up summer vibes or tackling winter’s icy challenge, these socks are your ticket to fishing bliss. We’re not just talking about any socks; we’ve curated the lowdown on the freshest wading gear, from boots to winter wonders. Meet the top 8 titans designed for your fishing frenzy. Check out the reviews, snag your favorites with our Amazon links, and join the ranks of savvy anglers who know that epic socks are unsung heroes. Step into the angler’s world with style.
(This post contains affiliate links. If you use these links to buy something we may earn a commission. Thanks!)
In addition to socks, quality wading gear like waders and wading boots shields you from the elements. To help you choose the right wading socks, here is a quick list of the top 8 fishing socks for various needs:
Best Budget: Carhartt Men’s Arctic Heavyweight
Best Wet Wading Socks: Simms Guide Wet Wading Socks
Best Winter Wading Socks: Sealskinz Unisex Cold Weather
Best Waterproof: SuMade 100% Waterproof Socks
Best Merino: Simms Merino Thermal OTC Sock
Best with Gravel Guards: Korkers I-Drain
Best Thin Neoprene: Korkers I-Drain Neoprene 2.5mm
Best Thick Neoprene: Riverrun Frictionless Wader Socks
Wading socks are essential because venturing into the water without proper protection can lead to discomfort and potential dangers. While some may prefer sandals, frequent wet waders benefit from the reliability of wading boots and socks, preventing chafing and ensuring a secure fit.
In fly fishing, wading is crucial for reaching targeted spots, making a good pair of wading socks essential for an enjoyable experience. When selecting fishing socks, consider factors like comfort, warmth, and breathability. Look for features such as flat seams and padded soles for extended comfort during longer wading sessions.
There are two main types of fishing socks: wet wading socks for summer fly fishing, typically made from neoprene, and wader socks worn with waders for fishing in colder waters. Merino wool is an excellent material choice, offering fast drying, odor resistance, and natural moisture-wicking properties.
To help you make an informed decision, here are detailed reviews of the best wading socks in 2023:
Carhartt Men’s Arctic Heavyweight:
A budget-friendly option with 68% wool composition and anti-odor technology. For ultimate protection in extreme weather, rely on Carhartt Men’s Arctic Heavyweight Merino Wool Blend Boot Socks. These USA-made socks, featuring heavyweight merino wool, provide exceptional warmth. With abrasion-resistant yarns, sweat-wicking technology, and strategic cushioning on heels, arches, toes, insteps, and legs, these socks ensure comfort all day long. The blend of 50% merino wool, 14% virgin wool, and 36% synthetics offers a soft feel, while mesh insteps and ribbed channels enhance breathability. Keep your feet dry and cozy with these durable, temperature-regulating socks. Buy Now on Amazon
Simms Guide Wet Wading Socks:
Ideal for wet wading, featuring quick-drying hydrophobic materials and Right Angle® arch support. Crafted from quick-drying hydrophobic yarns, they’re ideal for exploring cool summer flows or salt flats. Built for durability, these water-resistant socks feature reinforced cushioning and an anti-abrasion design, ensuring comfort during wet wading. Not only are they highly durable, but they’re also anti-odor, machine washable, and quick-drying, making them perfect for fishing and outdoor activities. With a mid-calf height and Right Angle arch support, these socks deliver both quality and comfort, providing stability across diverse underwater terrain. Buy Now on Amazon
Sealskinz Unisex Cold Weather:
The best for winter fly fishing, with waterproofing technology, merino wool lining, and flat-toe seams. The authentic knee-length sock that is 100% waterproof, windproof, and breathable. Its inner lining, meticulously crafted from fine Merino Wool, provides insulation and temperature regulation, making it an ideal choice for colder weather conditions. Buy Now on Amazon
SuMade 100% Waterproof Socks:
Excellent for rainy or snowy conditions, offering optimal waterproofing, breathability, and cushioning. The pioneering knee-length sock, boasting 100% waterproof, windproof, and breathable features. Its inner lining is meticulously crafted from fine Merino Wool, ensuring insulation and temperature regulation, making it an ideal choice for colder weather conditions. Buy Now on Amazon
Simms Merino Thermal OTC Sock:
The top choice for merino wading socks, providing thermal regulation, moisture-wicking, and odor resistance. The heavyweight Merino wool over-the-calf socks, proudly made in the USA, combine natural wicking and odor-resistant features for lasting comfort. With reinforced midfoot support, heel, and toe, these socks ensure durability. The over-the-calf height adds extra coverage, making them suitable for various activities. Buy Now on Amazon
Korkers I-Drain Neoprene:
They fit well, have great build quality, and they drain fast. Crafted from cushy 3.5mm neoprene, these socks feature a form-fitted construction for an improved fit and great in-boot feel. The built-in gravel guard adds convenience, preventing debris from getting inside your boots. Additionally, the perforated footbed ensures rapid water drainage, keeping your feet dry and comfortable. Buy Now on Amazon
Riverrun Frictionless Wader Socks:
Riverruns’ neoprene wading socks offer essential comfort for outdoor activities, particularly wading. While not fully waterproof on their own, they pair seamlessly with waders to prevent cold discomfort. Noteworthy features include a frictionless design for easy boot entry, a snake scale silicone coating for enhanced grip, and high-durability construction with advanced stitching. The three-layer neoprene ensures a balance between warmth and breathability, and the socks are suitable for various seasons. Buy Now on Amazon
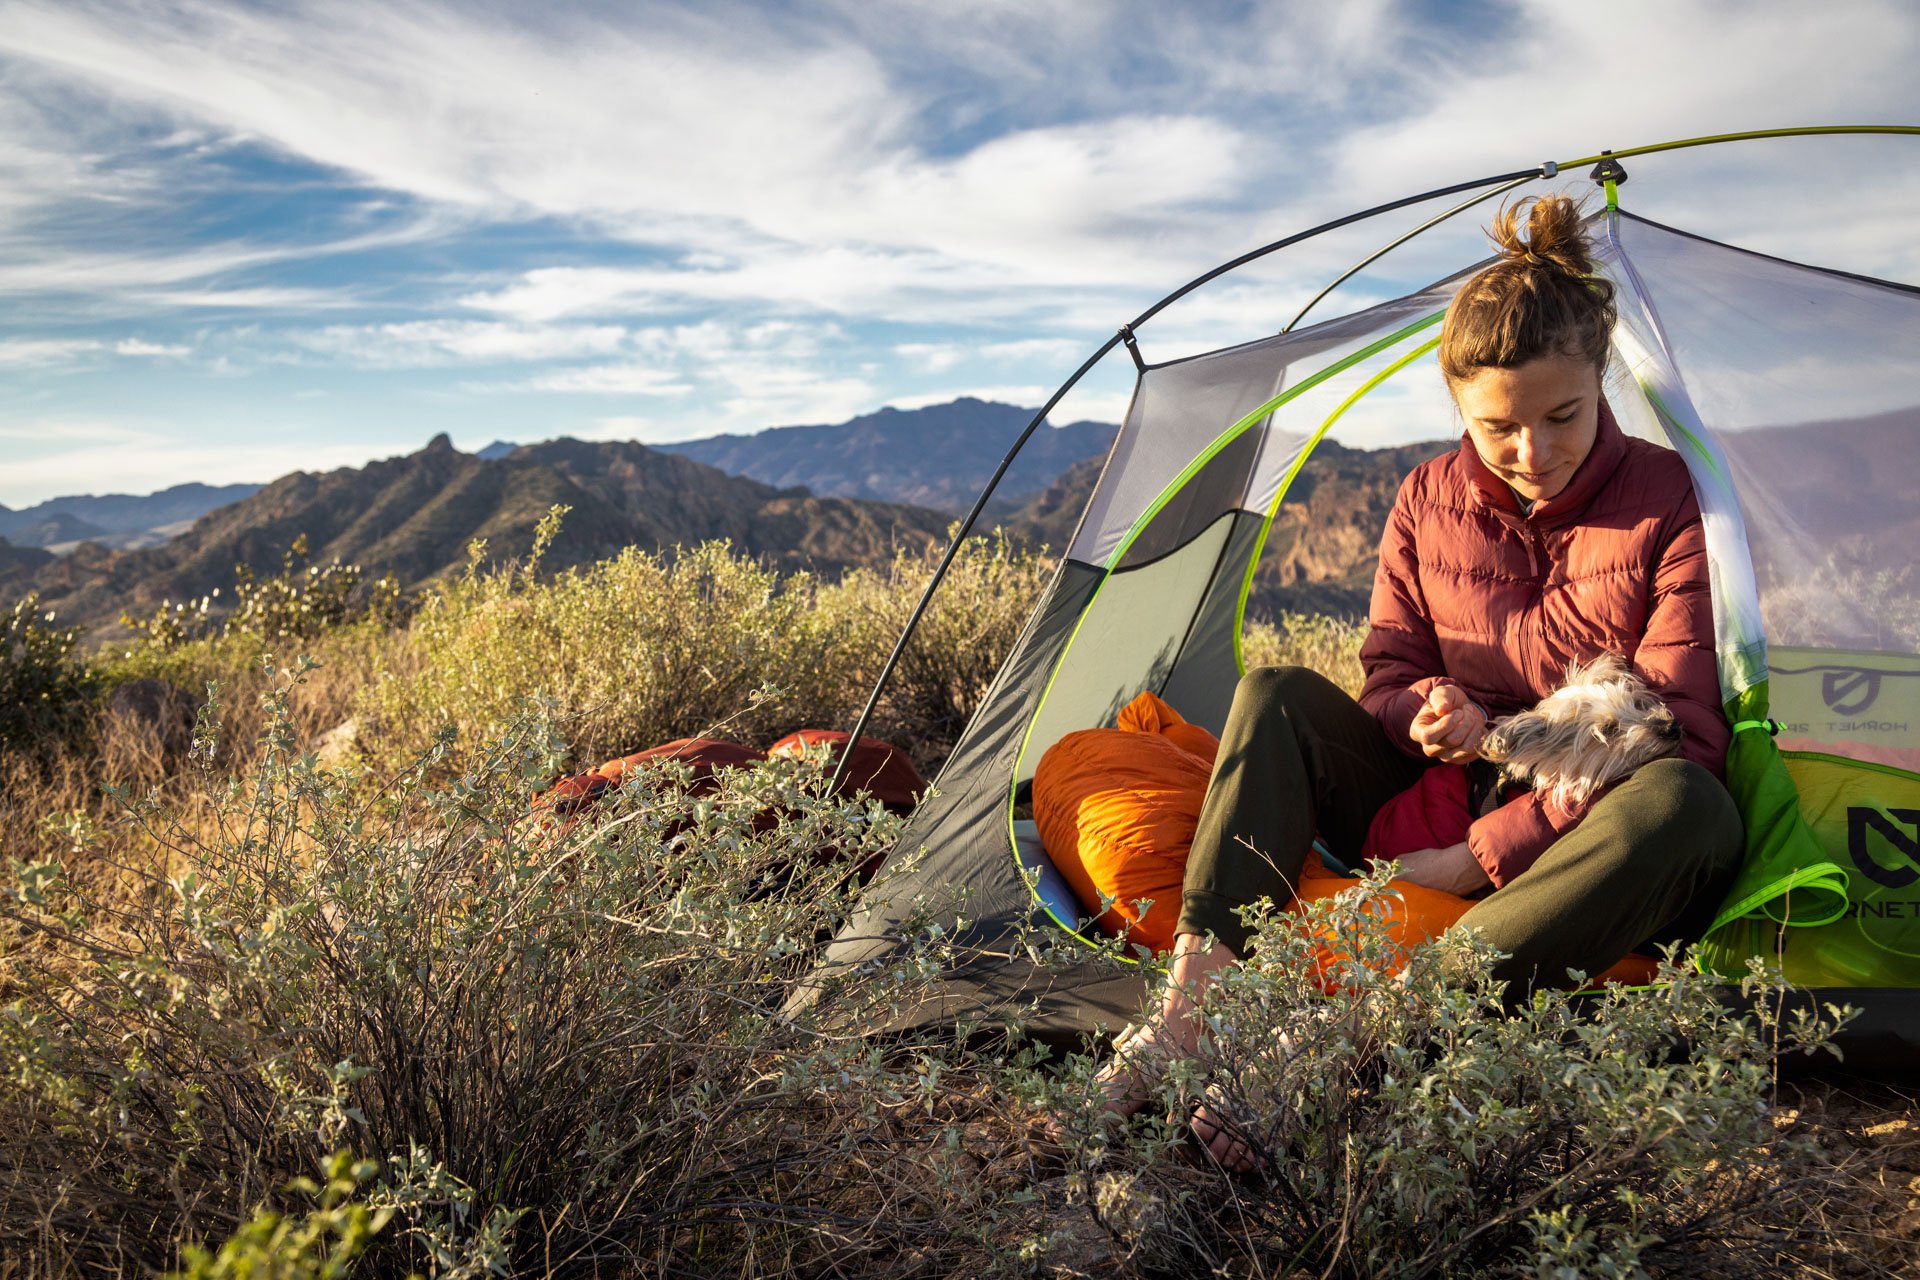
OUTDOOR
ADVENTURE
Featured Posts
HIKING
|
FLY FISHING
|
CAMPING
|
BACKPACKING
|
GEAR REVIEWS
|
HIKING | FLY FISHING | CAMPING | BACKPACKING | GEAR REVIEWS |
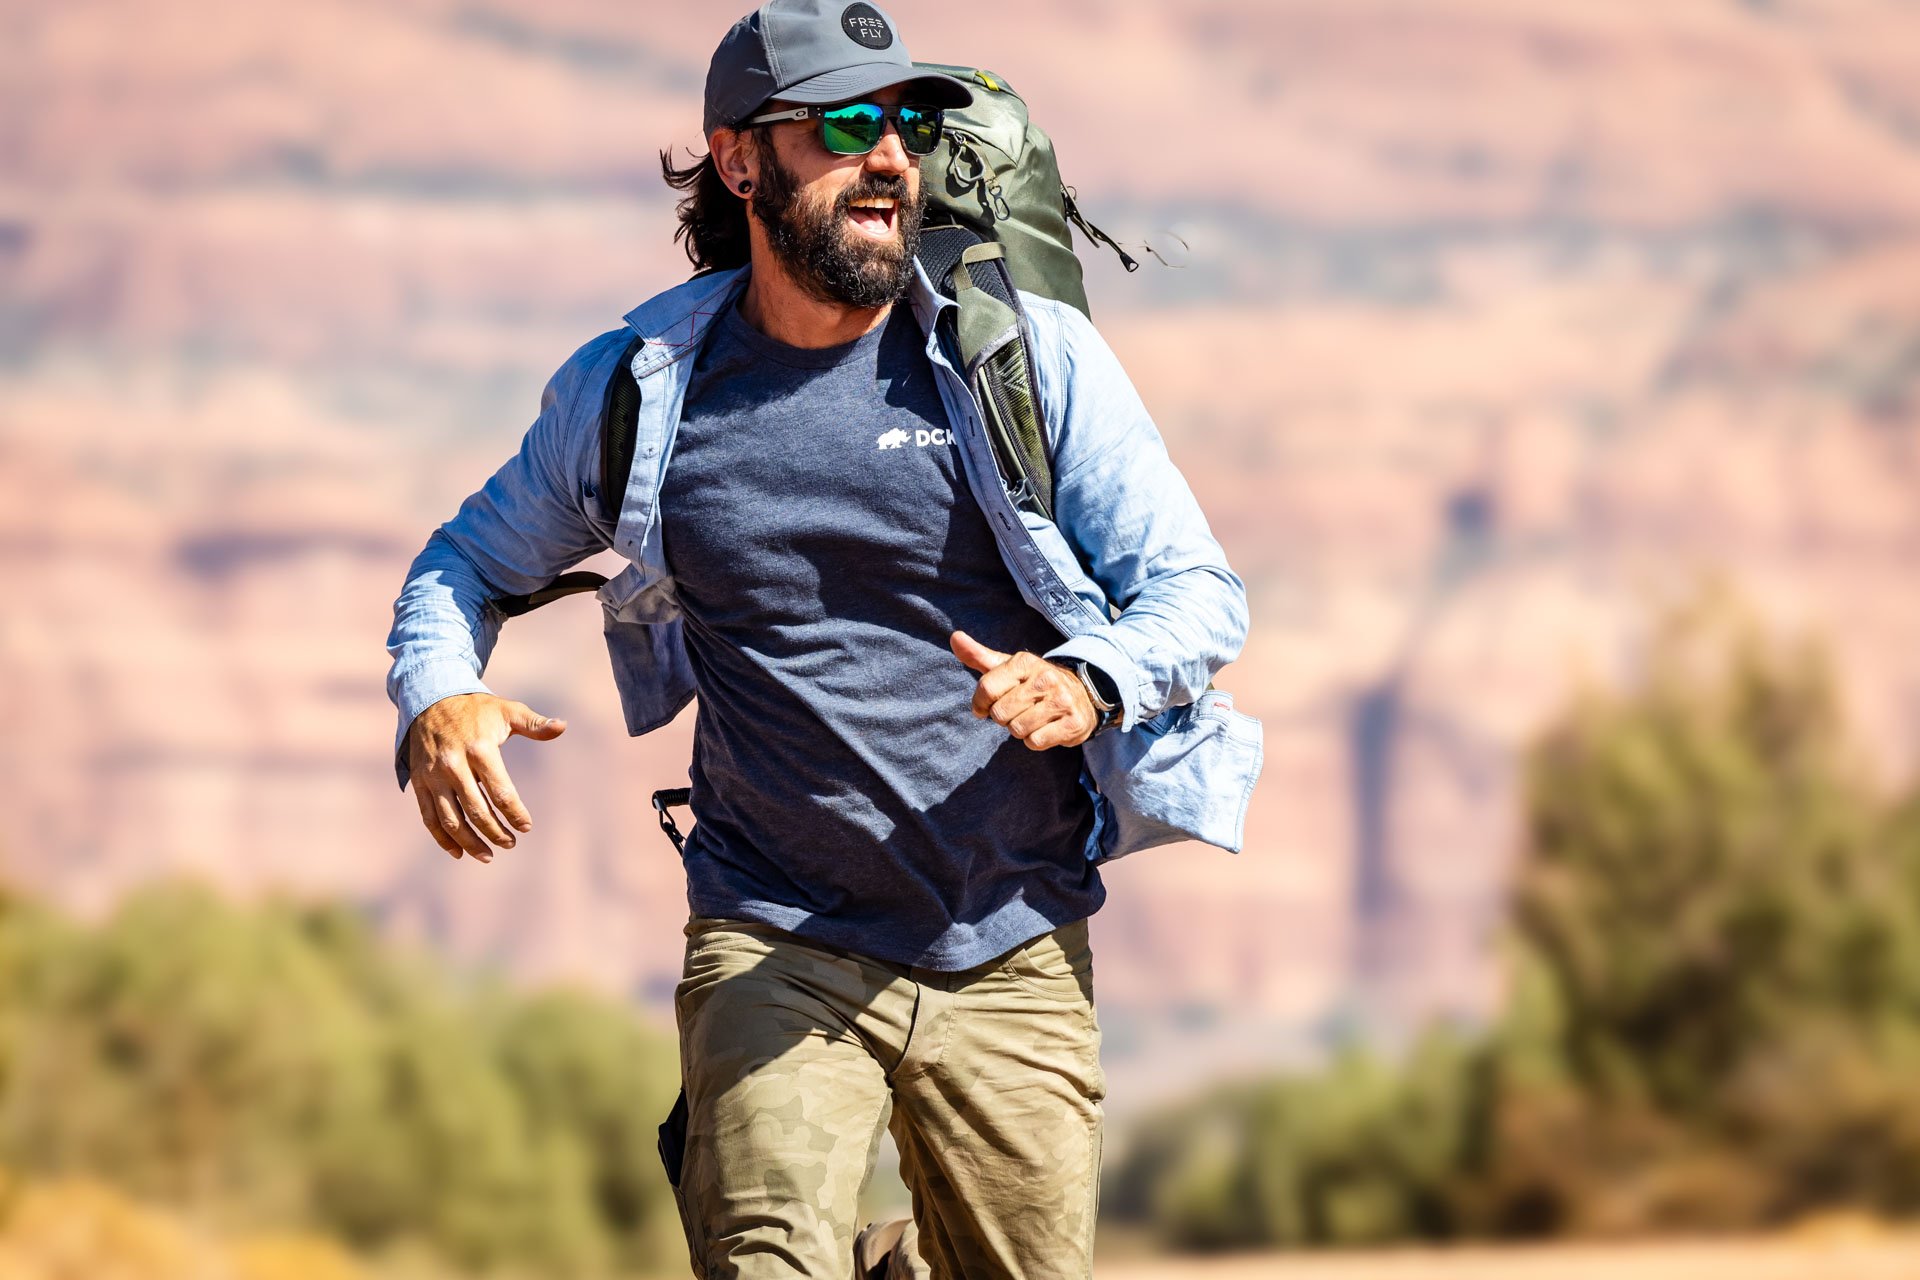
Best of
Top Clothing Brands of 2023
Discover unbeatable deals on Patagonia winter essentials at the REI Outlet sale! Get up to 40% off on jackets, parkas, and more.
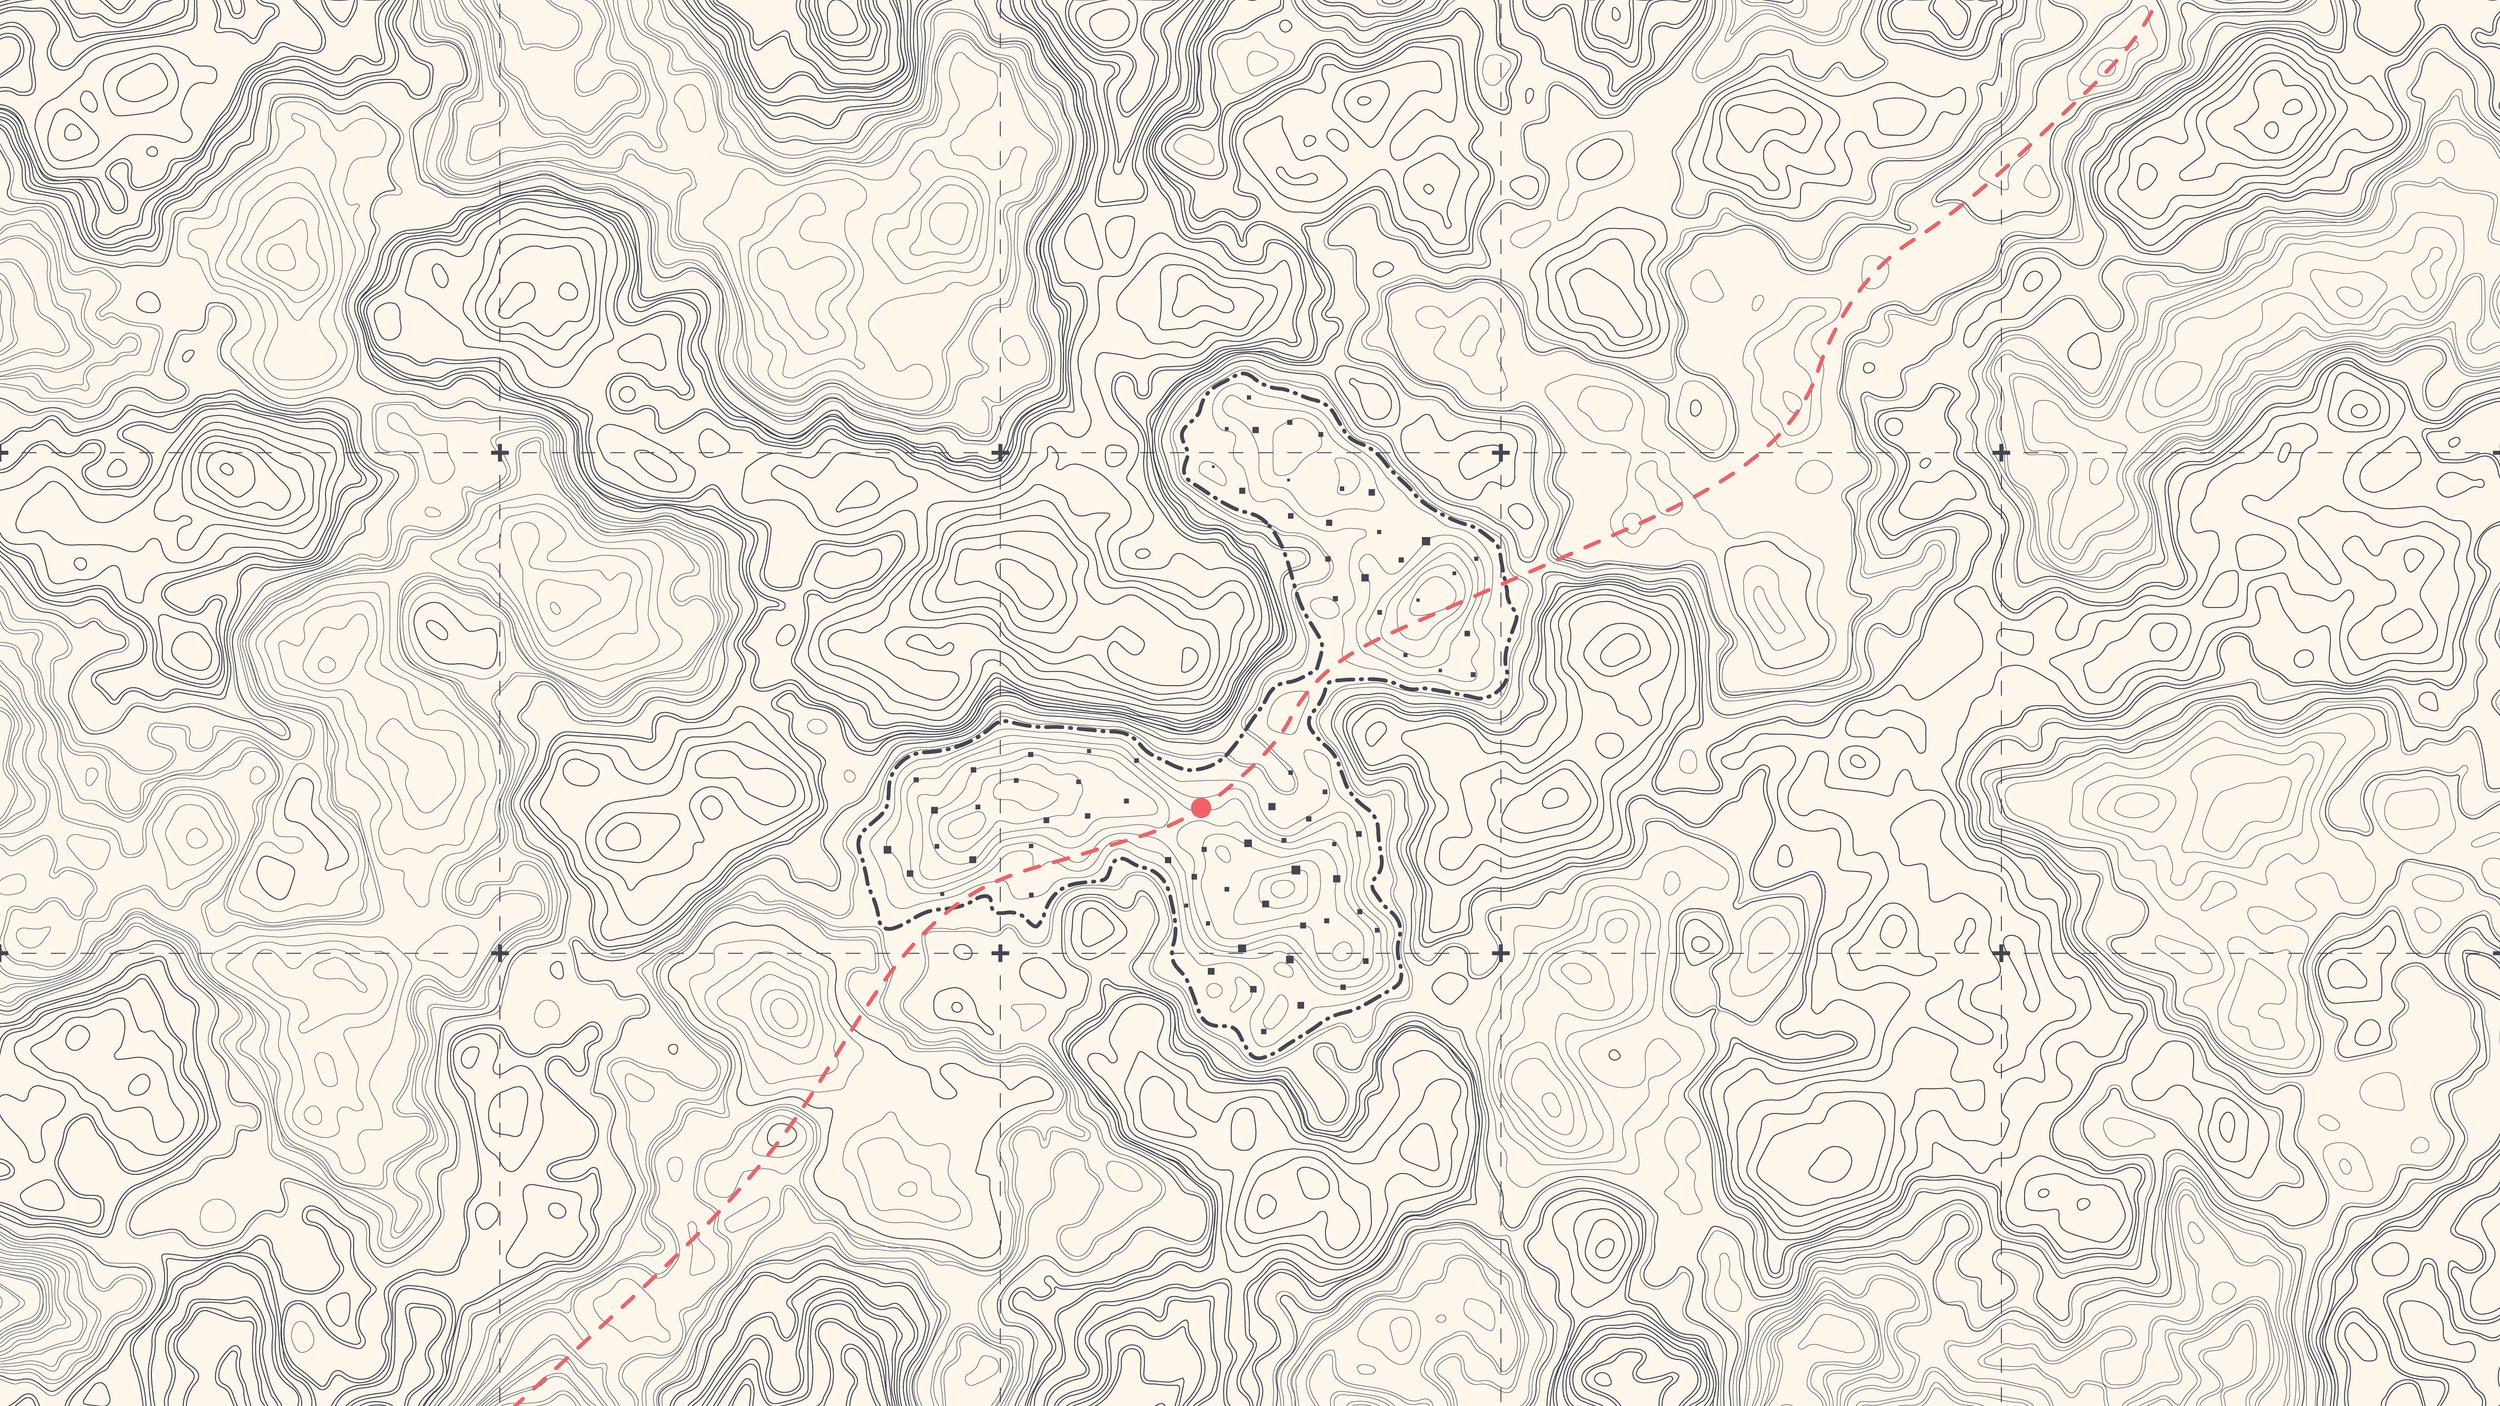
Subscribe to Our Newsletter
Sign up with your email address to receive news and updates.
Get in touch.
Just like in a hardcore round of intense pickleball, communication is key! Reach out with any questions, comments, beer recommendations, inquiries, critiques and jokes.





Master the art of fly fishing for carp with essential flies and techniques. Catch these elusive freshwater giants with precision and skill.