the feed
The Best Outdoor Clothing Brands for 2024
Discover unbeatable deals on Patagonia winter essentials at the REI Outlet sale! Get up to 40% off on jackets, parkas, and more.
Embarking on an outdoor adventure demands the right gear, and when it comes to hiking, backpacking, and camping, having the best outdoor clothing is non-negotiable. The market is flooded with options, but certain brands stand out for their durability, functionality, and style. In this guide, we'll dive into the realms of Patagonia, Kuhl, Arc'teryx, REI Co-op, and Outdoor Research, uncovering the best products each has to offer for your next escapade into the great outdoors.
Patagonia: Sustainably Stylish
When it comes to environmentally conscious outdoor clothing, Patagonia is a trailblazer. Known for its commitment to sustainability, Patagonia crafts high-quality gear that not only withstands the elements but also treads lightly on the planet.
Nano Puff Jacket
One of Patagonia's iconic offerings, the Nano Puff Jacket, combines lightweight warmth with compressibility. Perfect for unpredictable weather, this jacket is filled with PrimaLoft Gold insulation, ensuring you stay cozy even in wet conditions. Its eco-friendly credentials are enhanced by its recycled materials, making it a standout choice for the environmentally conscious hiker. Buy Now at REI
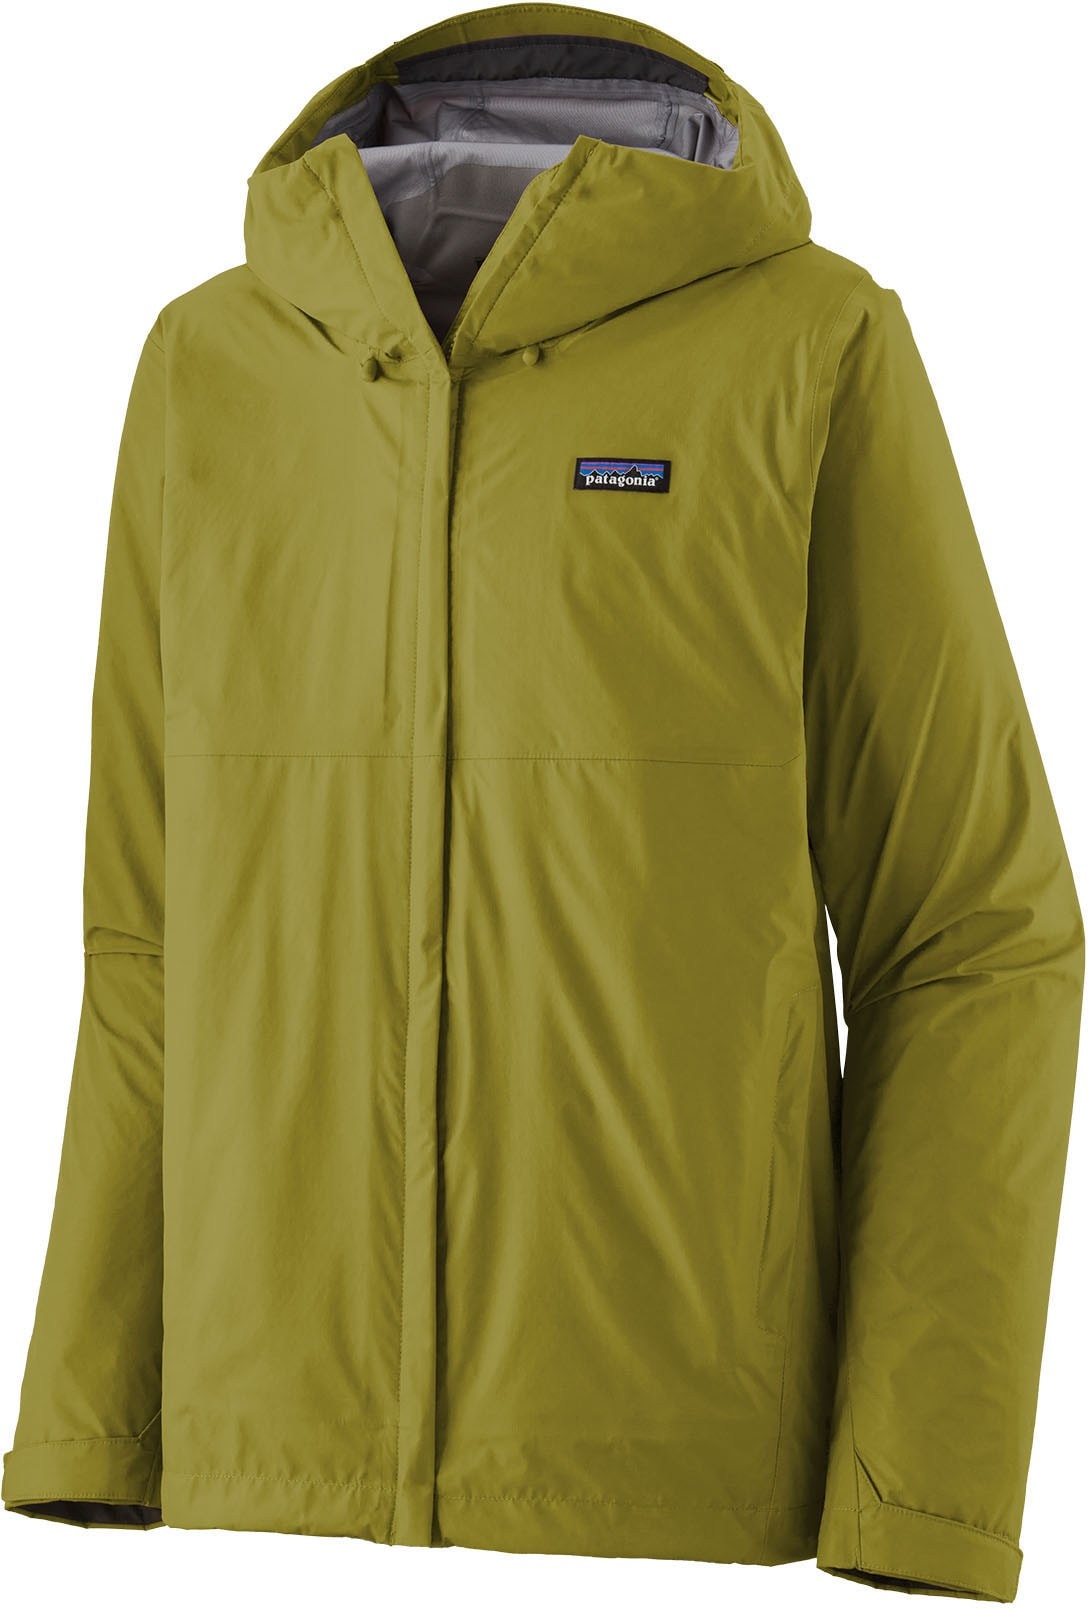
Torrentshell 3L Jacket
For those who embrace the unpredictable nature of the outdoors, the Torrentshell 3L Jacket is a game-changer. Waterproof and breathable, this jacket features a 3-layer H2No Performance Standard shell, keeping you dry without sacrificing comfort. It's the ideal companion for backpackers who demand reliable protection against the elements. Buy at REI
Kuhl: Rugged Comfort Redefined
Kuhl takes outdoor clothing to a new level by combining rugged durability with unmatched comfort. Designed for those who seek adventure off the beaten path, Kuhl's products are as tough as the terrain you'll traverse.
Radikl Pant
Versatility and comfort merge seamlessly in the Radikl Pant from Kuhl. Designed for maximum mobility, these pants feature innovative panels and a gusseted crotch, ensuring unrestricted movement on the trail. With a stylish design and durable construction, the Radikl Pant is a go-to choice for hikers and backpackers who prioritize both comfort and functionality. Buy at REI
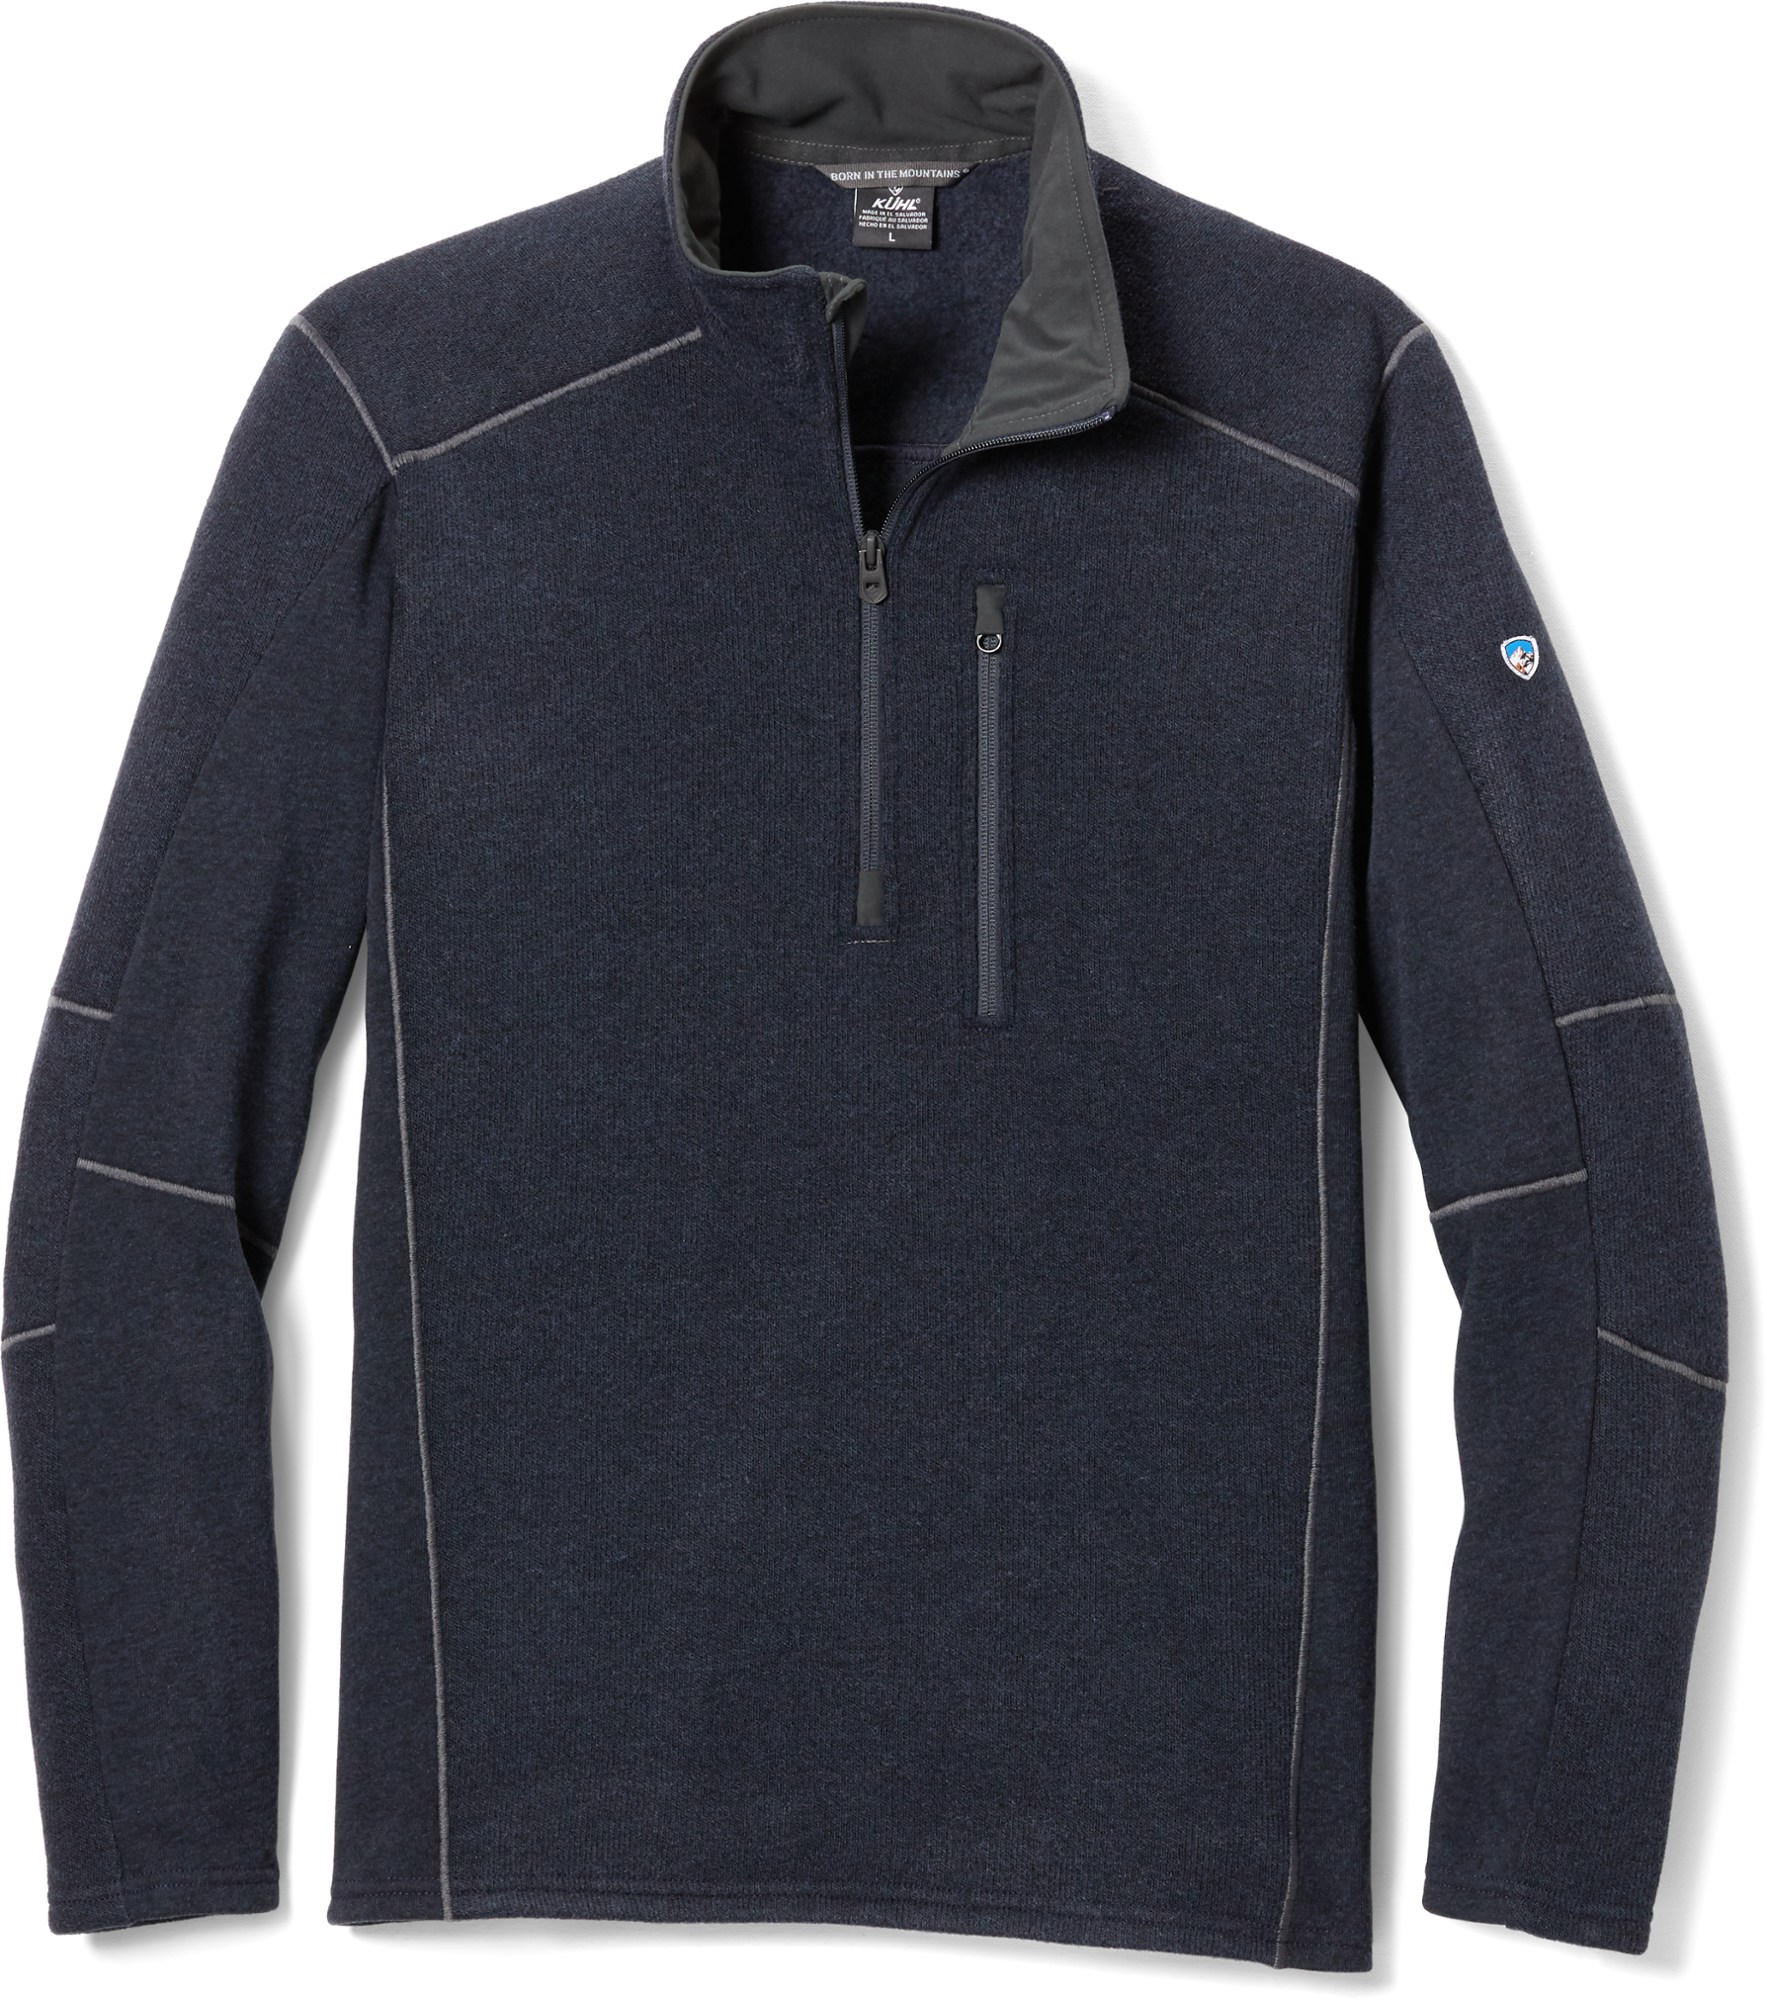
Interceptr Hoodie
For chilly nights around the campfire or early morning hikes, the Interceptr Hoodie from Kuhl delivers warmth without sacrificing style. Its unique Alfpaca Gold fleece provides superior insulation, and the articulated sleeves ensure unrestricted movement. Stay warm and agile with this essential layer. Buy at REI
Verbier/switzerland- 09.09-18 : Arcteryx mountain clothe boutique shop sport
Arc'teryx: Cutting-Edge Performance
When it comes to cutting-edge technology and performance, Arc'teryx is a frontrunner in the outdoor apparel industry. Known for its precision engineering, Arc'teryx products are crafted to excel in the most demanding environments.
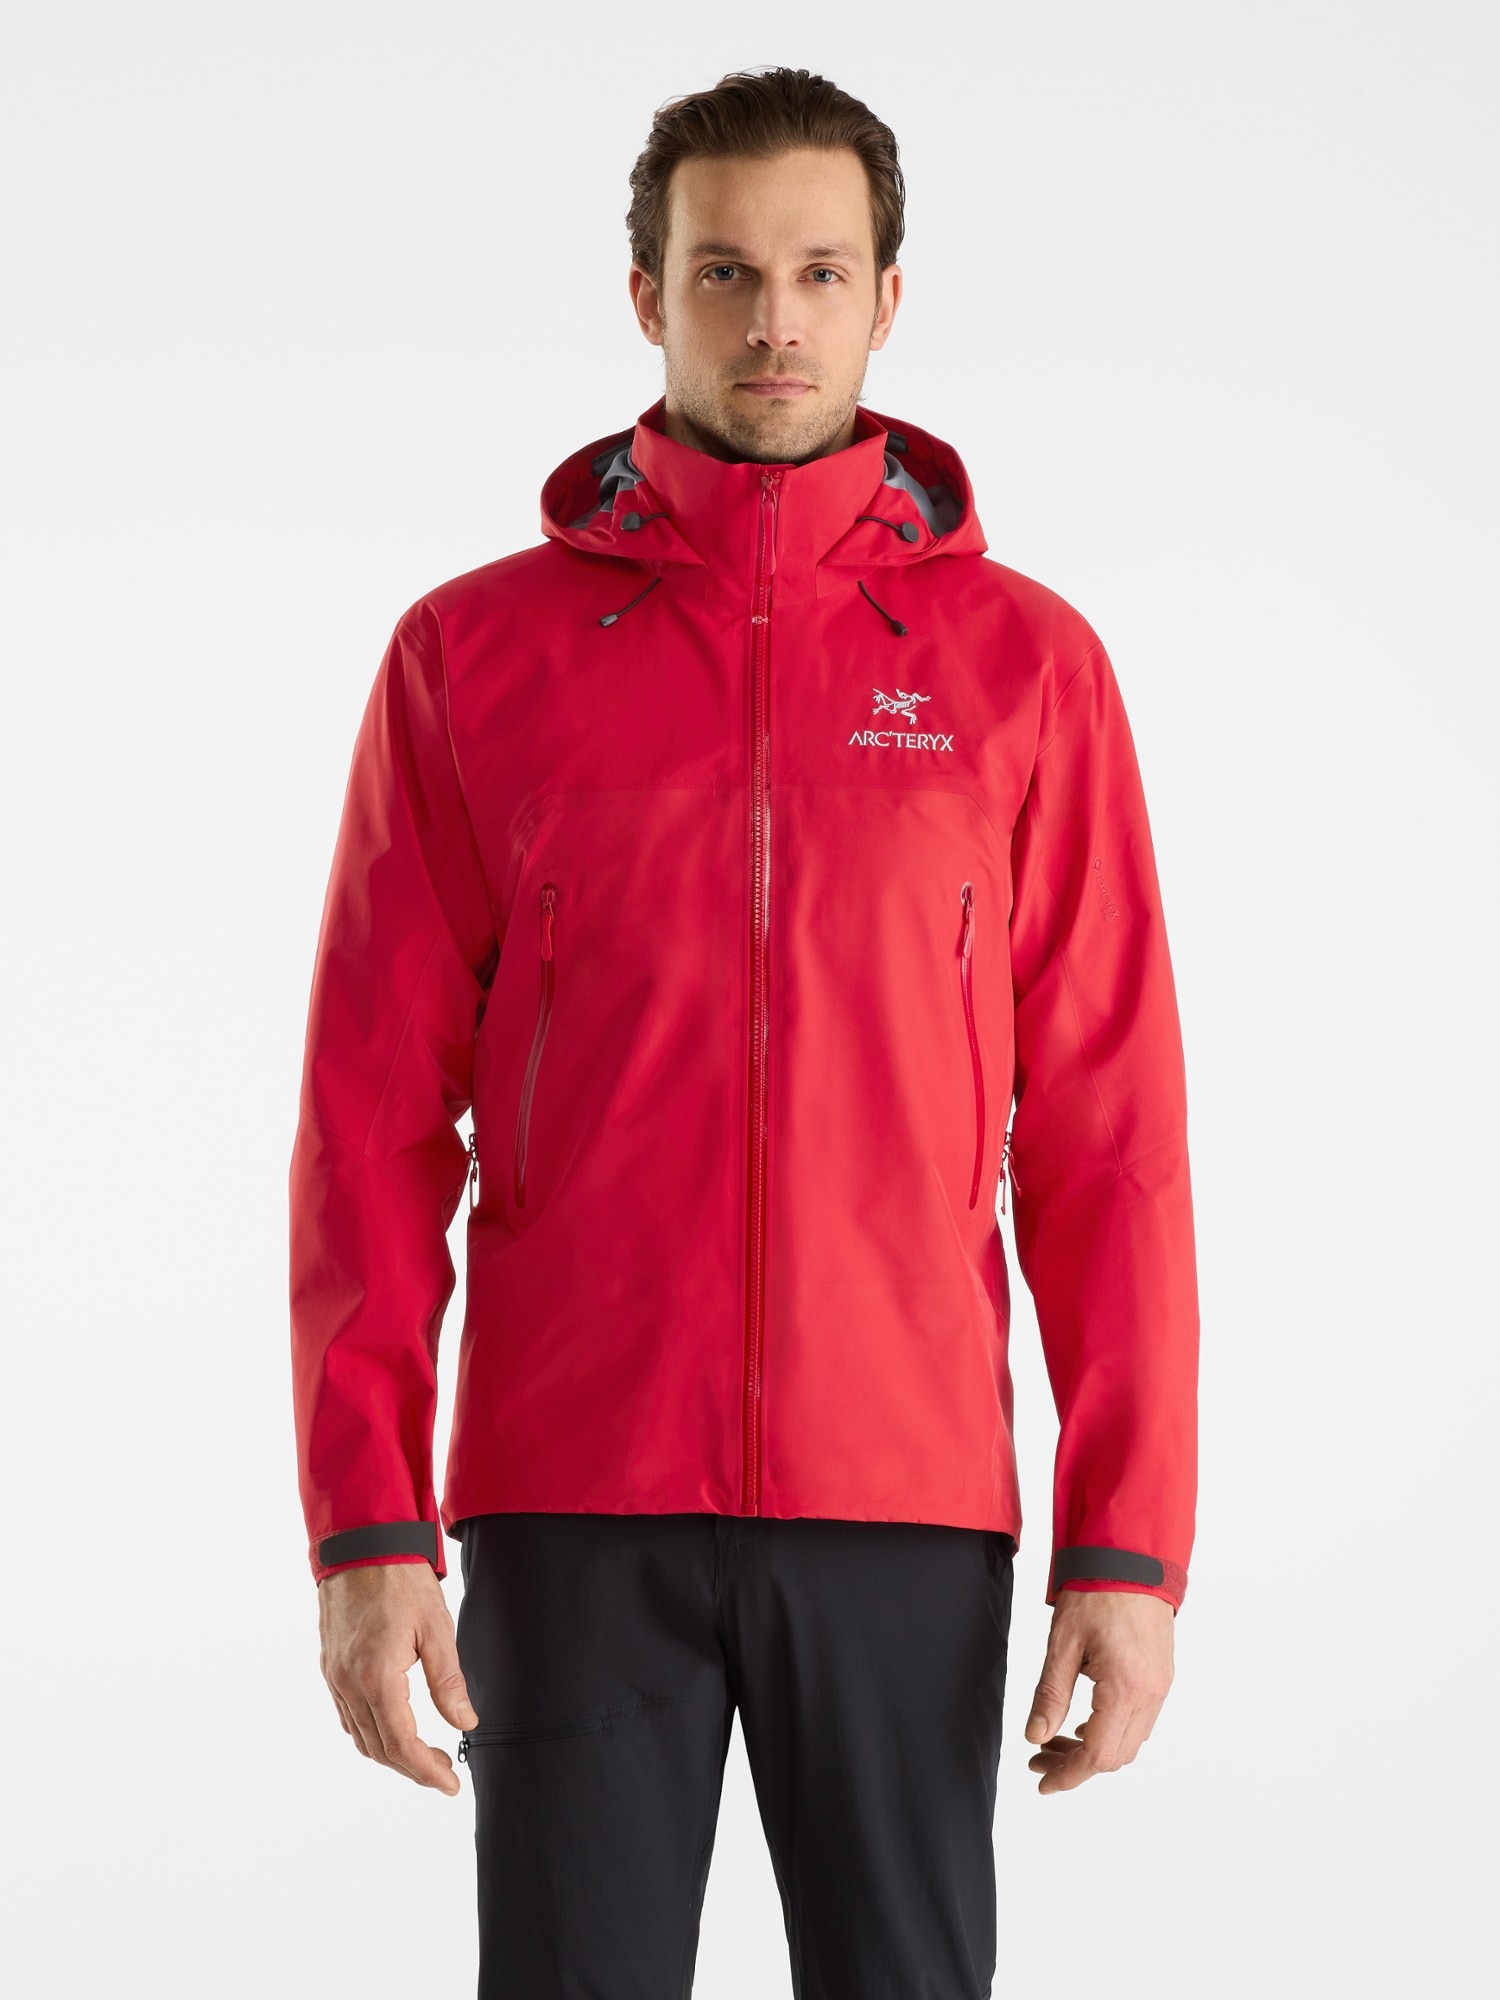
Beta AR Jacket
For those facing harsh weather conditions, the Beta AR Jacket from Arc'teryx is the pinnacle of protection. This Gore-Tex Pro shell provides exceptional waterproofing and breathability, making it a reliable choice for serious hikers and backpackers. With a helmet-compatible hood and reinforced high-wear areas, this jacket is designed for the toughest adventures. Buy now at REI
Atom LT Hoody
This is a staple piece in my backpacking kit. Balancing warmth and breathability, the Atom LT Hoody is a versatile mid-layer for outdoor enthusiasts. Its Coreloft insulation retains heat even when wet, and the lightweight design makes it easy to pack. Whether worn alone on cool days or as part of a layering system in colder conditions, this hoody adapts to your needs. Buy Now at REI
REI Co-op: Affordable Quality
For outdoor enthusiasts on a budget, REI Co-op offers a range of affordable yet high-quality options. Whether you're a seasoned backpacker or a weekend camper, REI Co-op has you covered.
Rainier Rain Jacket
When unexpected rain threatens your adventure, the Rainier Rain Jacket from REI Co-op is your reliable shield. Waterproof and breathable, this jacket features a durable water repellent (DWR) finish to keep you dry in a downpour. Its affordable price point makes it an excellent choice for those seeking dependable rain protection without breaking the bank. Buy Now at REI
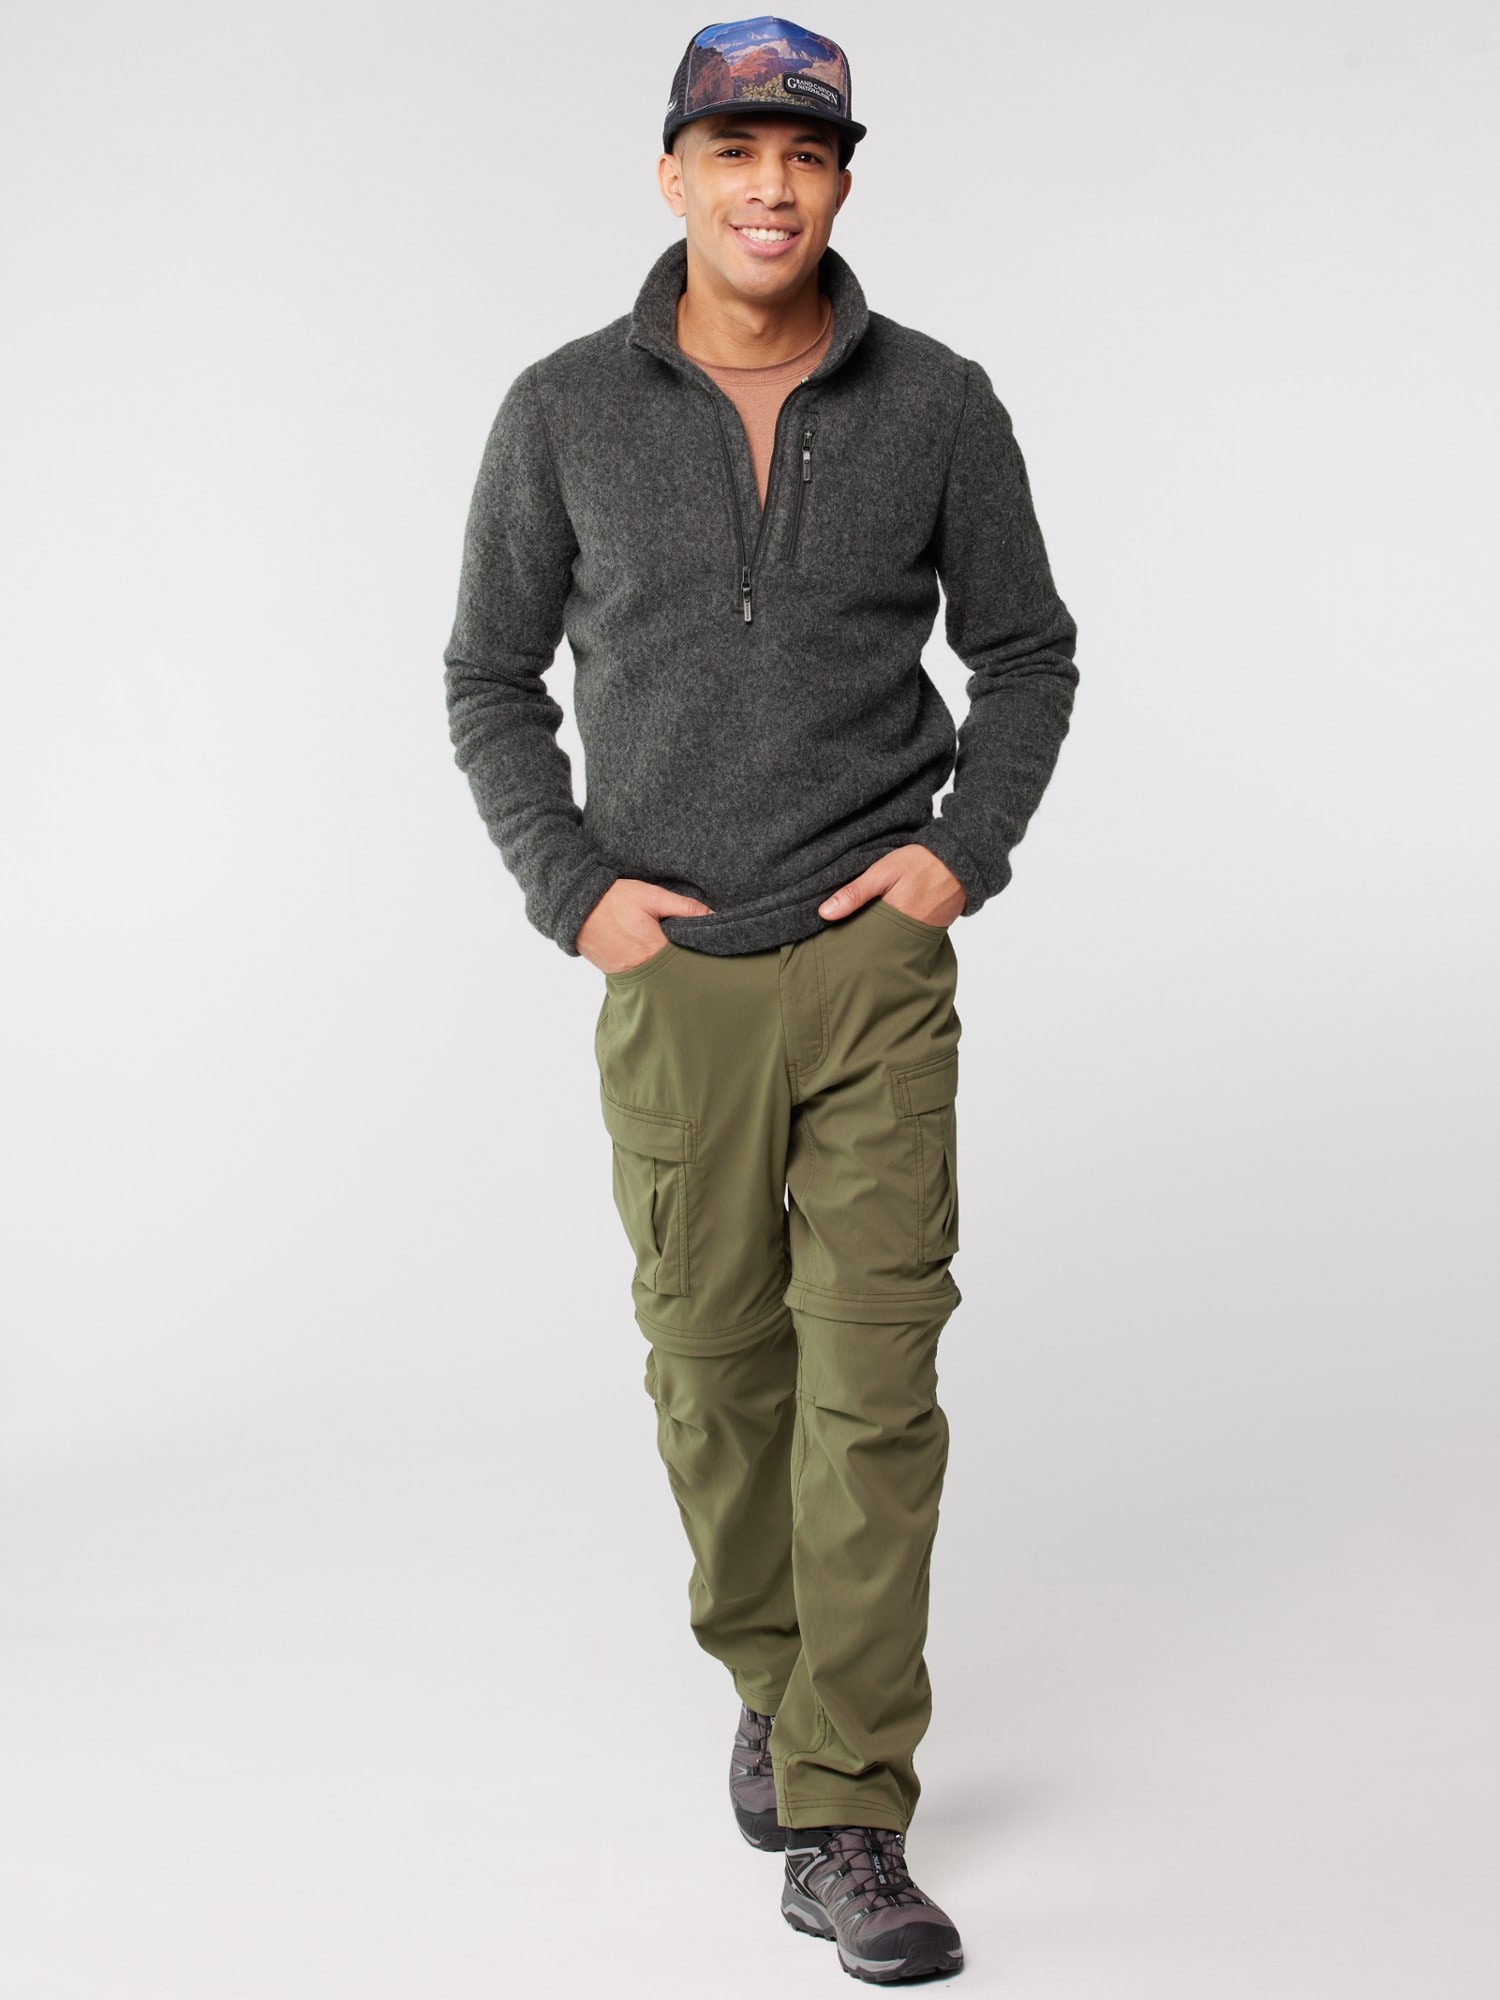
Sahara Convertible Pants
Embrace changing weather with the Sahara Convertible Pants from REI Co-op. These pants seamlessly transform into shorts, adapting to the ever-changing conditions of the trail. With UPF 50+ sun protection and a durable, quick-drying fabric, they are a practical and budget-friendly choice for hikers and backpackers. Buy Now at REI
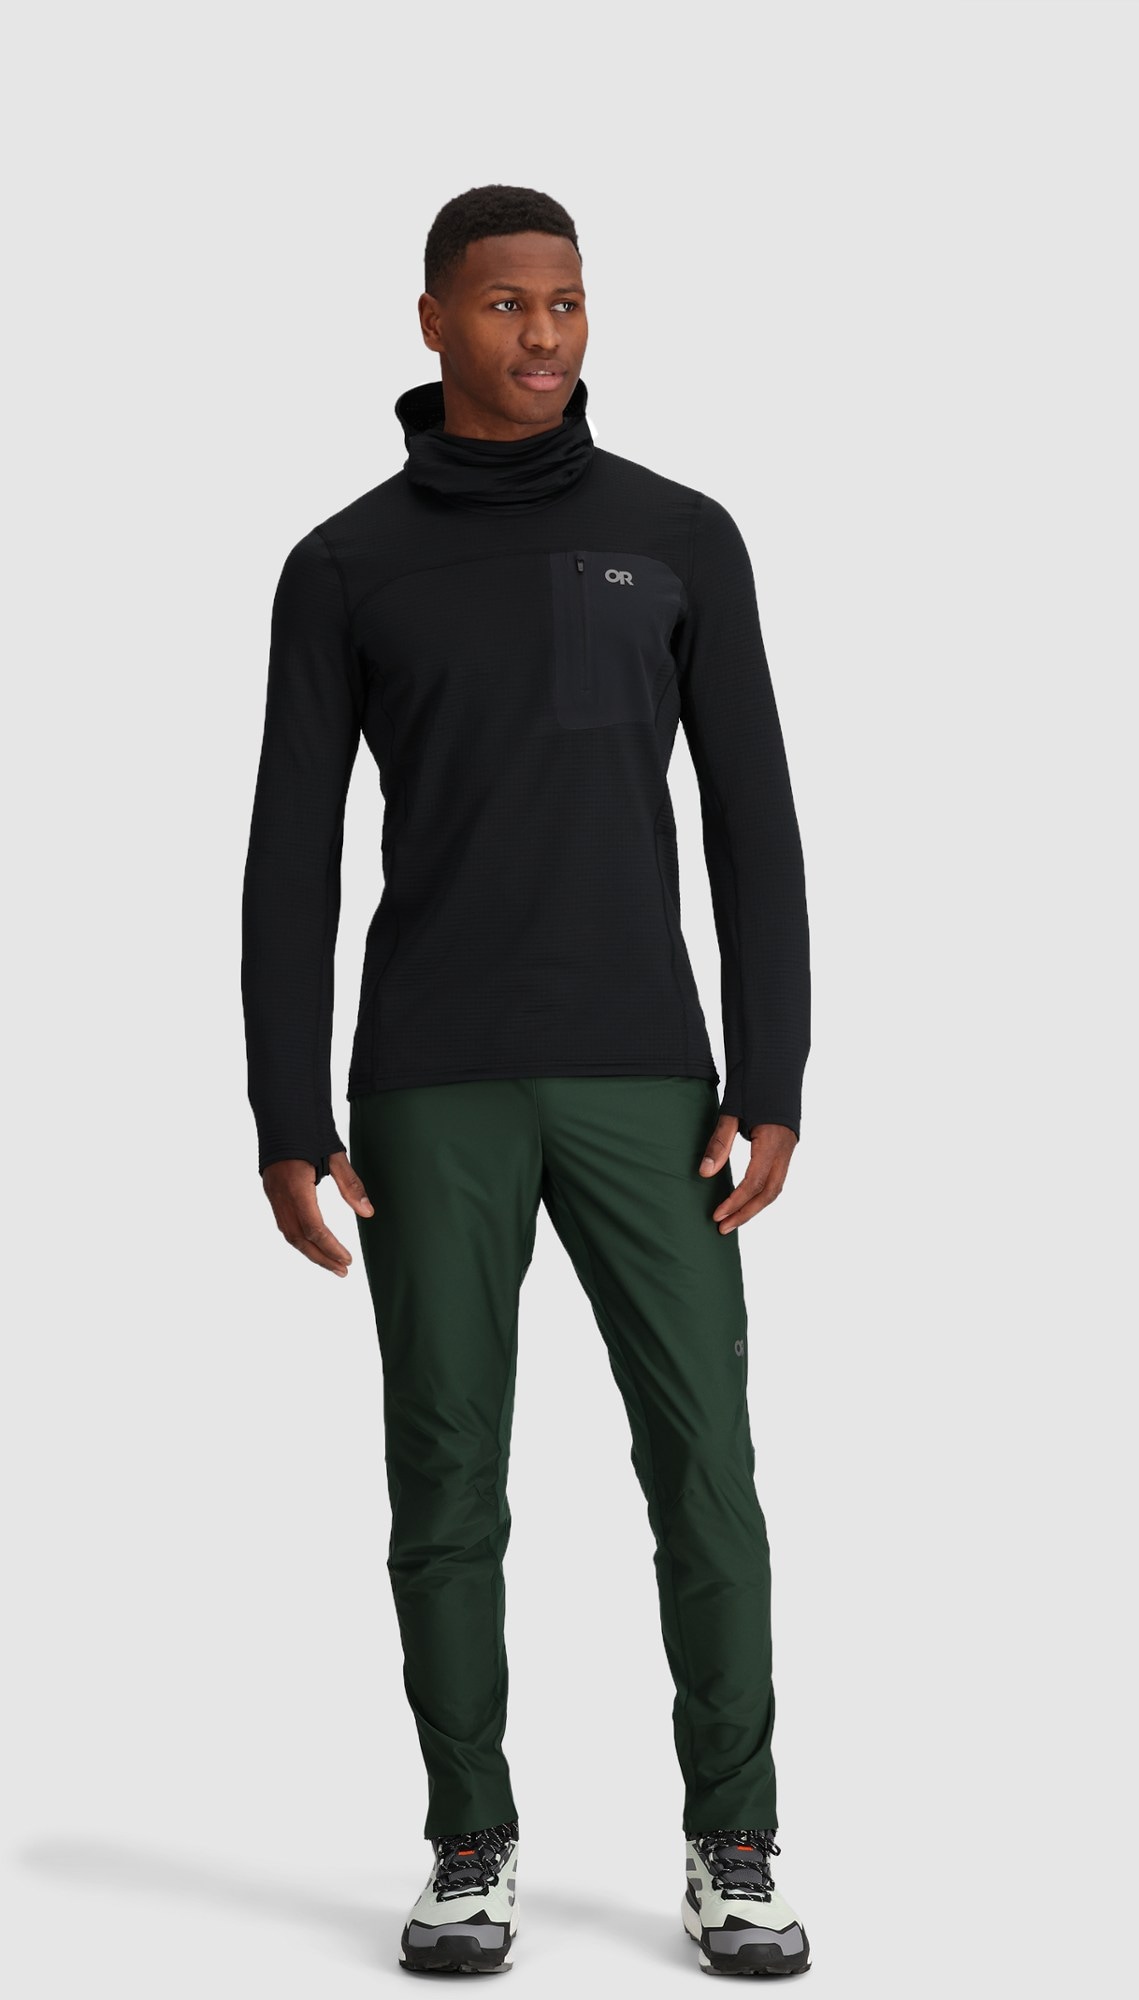
Outdoor Research: Technical Excellence
Outdoor Research brings technical excellence to outdoor clothing, ensuring durability and performance in challenging conditions.Vigor Grid Fleece Pullover Hoodie
Engineered for optimal warmth and flexibility, the Vigor Grid Fleece Pullover Hoodie from Outdoor Research is a technical marvel. Ideal for layering or standalone use, this hoodie offers superior insulation and breathability. With a focus on technical excellence, it's a must-have for those seeking comfort and performance on the trail. Buy Now at REI
Ferrosi Pants
The Ferrosi Pants from Outdoor Research combine rugged durability with exceptional breathability. Ideal for a wide range of outdoor activities, these pants provide freedom of movement and versatility on the trail. With reinforced panels and a weather-resistant build, the Ferrosi Pants are a reliable choice for the adventurous spirit. Buy Now at REI
Conclusion
Choosing the best outdoor clothing for hiking, backpacking, and camping involves a careful balance of durability, functionality, and style. Whether you prioritize sustainability like Patagonia, rugged comfort like Kuhl, cutting-edge performance like Arc'teryx, affordability like REI Co-op, or high-performance essentials like Columbia Sportswear, each brand offers a unique blend of features to enhance your outdoor experience. Remember, the best gear is the gear that suits your adventure style, so gear up and hit the trail with confidence!
Kuhl Renegade Rock Pant Review
Kuhl Renegade Rock Pants - Lightweight, breathable, and durable. Are these the perfect adventure and everyday pants?
Living in the Arizona desert, I need pants that can take a beating without making me overheat.
IIt seems like most things out in the desert were designed to try to poke, scratch, or sting you. I am always on the search for the magic pant combination of protection and keeping cool - not an easy combo for a fabric to pull off. A few months ago I picked up a pair of Kuhl Renegade Rock Pants and think I may have found my new adventure/everyday pant.
(This post contains affiliate links. If you use these links to buy something we may earn a commission. Thanks! - Full Disclosure: I received this product in exchange for an honest unbiased review.)
Lightweight and breathable fabric
Starting from the top: the fabric. These pants rock for the dry heat of Arizona because they are made from a lightweight and breathable material that dries quickly. Listen, I am going to sweat. There's no way around that. The key is to minimize the discomfort and not add any additional heat factors like heavy fabrics. Kuhl even integrated some vented pockets that you can leave open to allow some airflow. I'll talk more about some of the rad features as we go. I wear these guys all day, for multiple days and they never lose their shape or fit. I can stay out in the sun for long periods of time thanks to the UPF 50+ protection. Bonus!
Elastic drawcord at the bottom hem
The magic is in the details. The Renegade Rock Pant has an elastic drawcord at the bottom hem. This lets you cinch them up for more freedom of movement on rough ground and style points. You can leave them undone for better air circulation when the temperature rises. I can't tell you how stoked I am about this! For work days, I leave the hem uncinched so it lays over the top of my show. When hiking or climbing, I cinch it up so there's no drag. Bonus: these look fab with my Chacos!
Fun factoid: these pants are available in 2 fits: Klassik and Tapered. The Klassik Fit is for those who like more of a roomy fit. The Tapered Fit Chino is a slimmer fit and my personal preference. For me, the tapered fit is spot on.
It is roomy enough to breathe without feeling like I'm swimming, but slim enough to still be very stylish and comfy.
Pocket design and options
For all of you pocket lovers out there, the Renegade Rock Pant has you more than adequately covered. In fact, there are 8. Yes, 8. I personally don't carry a lot in my pockets. It's nice to know that they are there if and when I may need them. I try to keep as little weight in my pants as possible. I usually only carry my phone in my front right pocket or slip it into the side leg pocket.
Inseam length options
When standing straight up, I top out at 5'8" on a good day, excluding hair. I have a longer torso, but shorter legs. Finding pants that don't bunch up even with a 30" inseam is a challenge. The Renegade Rock Pants are available in a 28" inseam option for certain colors. Heck to the Ya! This is pretty much unheard of in hiking pants. At least in my experience.
Long-lasting quality and durability
Finally, the long-lasting quality of these pants is noteworthy. They can take a beating on the trail and still look brand new at the end of the day. I have worn these every day, all day for work projects where I am walking 10 miles, constantly crouching, lifting heavy things, and climbing ladders and walls. They perform. I have even hand-washed these in a pinch and was able to wear them the next day since they dry so quickly. Just for reference, I am a professional photographer specializing in hotels and resorts which means I travel all over the world and work in ever-changing environments.
Kuhl Renegade Rock Pant for the Win
I think I can say with confidence that the Kuhl Renegade Rock Pants are one of the best hiking pants I've ever owned. I would definitely recommend them to any adventurer. What's not to love: they are super lightweight, the fabric is ultra-breathable, you can choose the fit, they have 8 pockets, a cinched hem, incredibly durable, they don't lose their shape after multiple wears, and they look super good! Kuhl smashed it with these pants!
Kuhl Renegade Rock vs Prana Brion
Last year, I wrote a review raving about the Prana Brion Pant. I still love these pants, but the main drawback to these was the weight. I find them to be too hot. The Kuhl Renegade Rock Pant edged out the Brion in a couple of areas:
breathability from the ventilated pocket openings
cinched bottom hem
keep their shape better than the Brion after multiple uses
Nemo Dragonfly Osmo 2P Bikepack Tent - Lightweight & Durable
The Nemo Dragonfly Osmo 2P tent is light and durable, with excellent ventilation and waterproof protection - perfect for bikepacking.
The Nemo Dragonfly Osmo 2P Bikepack Tent is an awesome option for those gnarly souls getting into bikepacking. But, let me just throw this out there - this tent is also an excellent choice for backpackers. I will get into the details more as we go. It is lightweight, weighing in at 4.1 pounds, made with durable, high-quality materials and loaded with weatherproof features to ensure comfort on the trails.
Features of the Nemo Dragonfly Osmo 2P Bikepack Tent:
(Almost) Ultralight: With a trail weight of 4.1 pounds, the tent is lightweight, making it light enough to carry along on bikepacking and backpacking trips, but I wouldn't consider that to be ultralight. Especially if you pin it up against the Hornet 2P. (More on that later)
Spacious Interior: Ample space is available to fit two people, as well as additional gear storage. Especially if you take advantage of the vestibule areas, clever pocket designs and use the gear tray.
Simple Setup: With color-coded poles and grommets, the tent can be assembled with ease even in low-light conditions.
Durability: Crafted with 15D ripstop nylon and floor fabric, it is sure to remain secure against wear and tear as well as any potential damage from weather conditions. If you plan on camping in wet weather or on rougher terrain (read: the desert), you should definitely pick up the footprint.
Ventilation: For comfortable temperatures in warmer weather, it has large doors and mesh panels to guarantee great ventilation. The Dragongfly tent body uses a white mesh for privacy around the sides, and black mesh to make sure you can see the night star up above.
Bikepacker-Friendly: Its compact design fits easily in a pannier or bikepacking bag, perfect for the avid cyclist. There are built-in straps on the carrying bag giving options for varying ways of mounting it to your bike.
Accessories: The Nightlight Pocket allows your headlamp to illuminate the inside of your tent, diminishing the presence of blue light to create a soft and consistent ambiance. Equip your vestibule with Landing Zone's waterproof, removable storage tub for extra protection of your gear from dirt and moisture.
Sustainable: This tent is created with recycled materials, making it an eco-friendly choice for outdoor enthusiasts. Win for Mother Earth!
Specifications of the Nemo Dragonfly Osmo 2P Bikepack Tent:
The Nemo Dragonfly Osmo 2P Bikepack Tent is an awesome choice for bikepackers in search of a lightweight, long-lasting tent that is able to endure any kind of weather. It is designed to be set up quickly and its sustainable materials make it a sensible choice for individuals seeking to make minimal environmental impact while enjoying the great outdoors. It's loaded with features, super easy to set up, has some special design features for mounting to a bike, a low profile colorway and a viable option for backpackers as well!
View through the door of Nemo Dragonfly Bikepack Osmo 2P
How Does it Stack up Against the Nemo Hornet 2P
If you've been following along on this site, you know that I am a huge fan of the Hornet 2P. I have used that tent more than any other tent I have ever owned, in many different weather conditions and climates. It's the jam. I will be honest, the first time I set up the Osmo, I knew that this was likely going to replace my Hornet. Why? It's completely freestanding which is something that I love, especially living in the desert where oftentimes the ground is incredibly hard.
The 2 tents are very similar in size and shape, but the Osmo is built to be a bit more durable and easier to setup, breakdown, and carry. However, it comes at the price of weight - not much, but noticeably heavier. So, if you are a stickler for keeping those grams down, the Hornet would be better suited for you.
I built this comparison table so it’s easy to see the differences side by side. I put the spec in BOLD when it is the winner. It’s a pretty tight battle, so choosing which tent works best for each person is going to be a personal preference.
Discovering the Beauty and Adventure of Pinnacle Peak Park
Pinnacle Peak Park is a breathtaking natural park located in Scottsdale, Arizona. It offers scenic views of the surrounding desert landscape and the Sonoran Desert, making it a popular destination for outdoor enthusiasts and tourists alike. The park covers over 1,200 acres of land and features a variety of hiking trails, picnic areas, and scenic vistas.
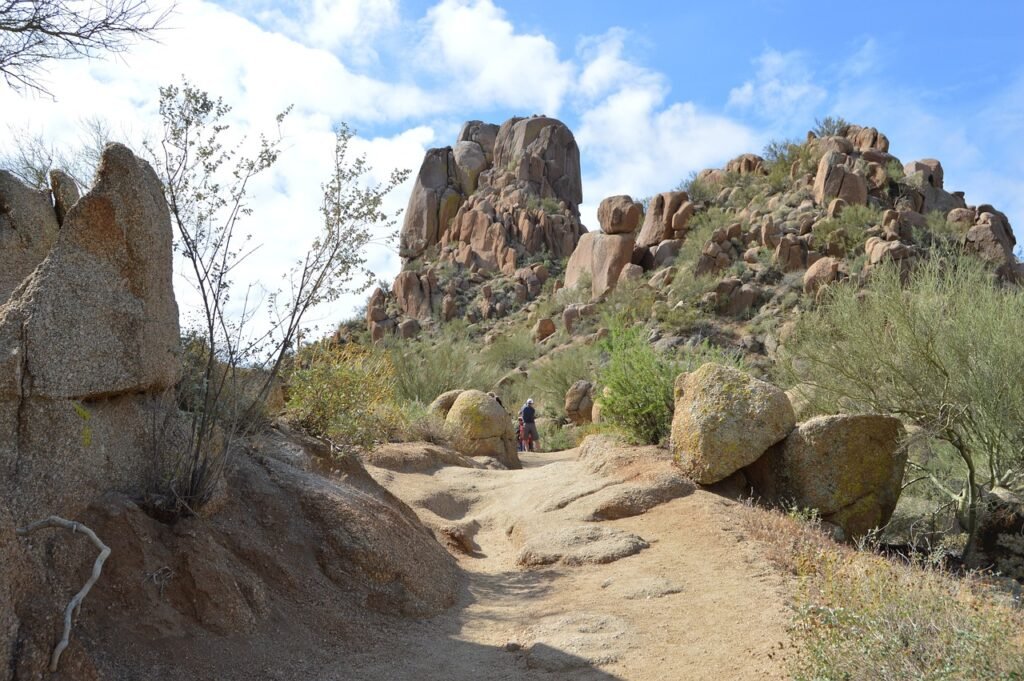
One of the most popular features of Pinnacle Peak Park is its challenging hike to the summit. The Pinnacle Peak Trail is a 2.75-mile round-trip hike that takes visitors to the top of the park's iconic peak. The trail is steep and rocky, but the views from the top are truly breathtaking. On a clear day, visitors can see for miles in every direction, including the city of Scottsdale and the McDowell Mountains. The summit is also a great spot for wildlife viewing, as a variety of animals, including coyotes, snakes, and lizards, call the park home.
In addition to hiking, Pinnacle Peak Park also offers a variety of other outdoor activities. The park is a popular destination for picnics, with several picnic areas available for visitors to use. The park also has several nature trails, including the Nature Trail and the Cactus Trail, which offer a closer look at the park's unique flora and fauna.
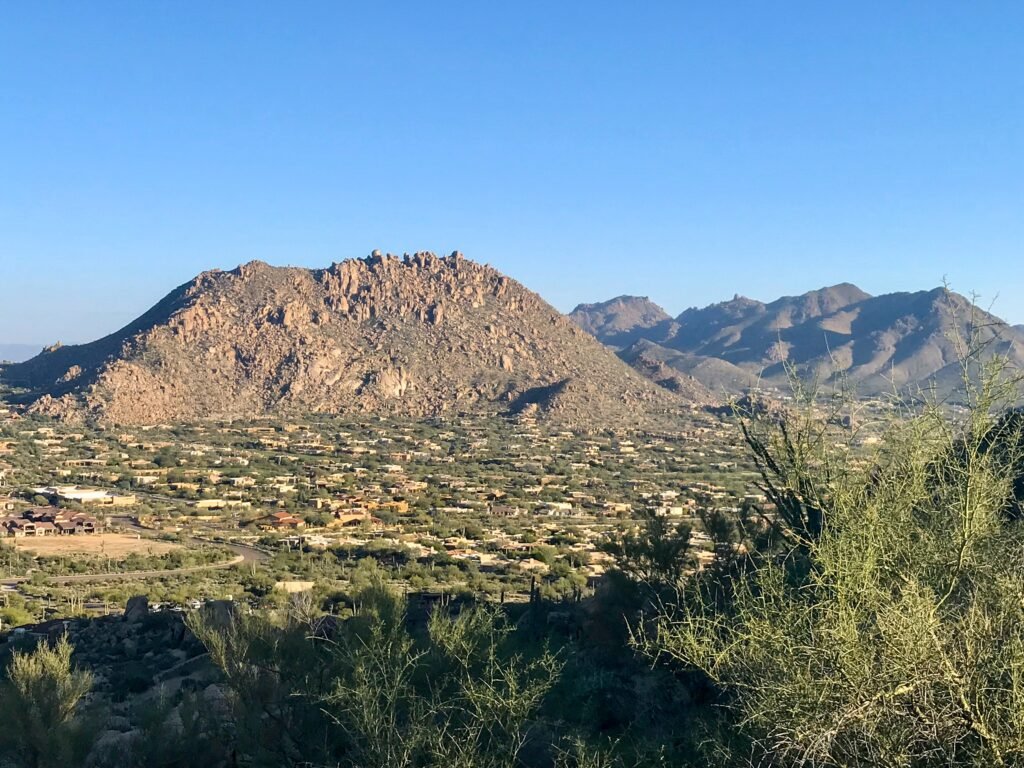
One of the most unique features of Pinnacle Peak Park is its geology. The park is home to a variety of rock formations, including large boulders and unusual rock formations. The park's geology is a result of millions of years of erosion and tectonic activity, and it provides a fascinating look into the history of the Earth. Visitors can also learn more about the park's geology by visiting the Pinnacle Peak Visitor Center, which offers educational exhibits and programs.

In conclusion, Pinnacle Peak Park is a must-visit destination for anyone looking to experience the beauty and serenity of the Sonoran Desert. Whether you're a hiker, a nature lover, or just looking for a relaxing day in the great outdoors, Pinnacle Peak Park has something to offer. With its stunning views, challenging hikes, and unique geology, the park is a true gem in the heart of Scottsdale, Arizona.
In Town for the Super Bowl LVII in Phoenix?
Phoenix, Arizona is a popular destination for tourists during the Super Bowl, and for good reason. The city is known for its warm weather and vibrant culture, making it a great place to visit during the big game. In addition to the Super Bowl festivities, there are plenty of other attractions and activities to keep visitors entertained.
If you're in town for the Super Bowl and looking for a break from the excitement, consider visiting Pinnacle Peak Park. The park is just a short drive from the city and offers a serene escape from the hustle and bustle. Take a hike to the summit of Pinnacle Peak and enjoy breathtaking views of the surrounding desert landscape, or simply relax and enjoy a picnic with friends and family. Whatever your interests, Pinnacle Peak Park is a must-visit destination for anyone visiting Phoenix during the Super Bowl.
Other Hikes to check out Nearby
Exploring the Five Best Hikes Near the Super Bowl in Phoenix
The Super Bowl is one of the biggest events in the world, and this year it is being held in Phoenix, Arizona. If you're a fan of outdoor adventures, then you're in luck! Phoenix is home to some of the most stunning hikes in the country. Here are the top 5 hikes near the Super Bowl in Phoenix.
Top 5 Hikes Near The Super Bowl
Camelback Mountain - Camelback Mountain is a popular hike for locals and visitors alike. The hike is strenuous, but the views from the summit are breathtaking. You can see the entire Phoenix valley from the top, making it the perfect place to enjoy a sunrise or sunset. The Echo Canyon Hike is 2.5 miles round trip and takes about 1.5 hours to complete.
Pinnacle Peak Park - Pinnacle Peak Park is a great hike for families and beginners. The hike is 1.75 miles round trip and takes about 1 hour to complete. The trail is well-marked and easy to follow, making it a safe and enjoyable experience for everyone. The views from the top are stunning, and you can see the entire valley below.
South Mountain Park - South Mountain Park is the largest city park in the country, covering over 16,000 acres. The park offers many different trails, making it a great place for all skill levels. The park has trails for hiking, biking, and horseback riding, making it a great place to spend the day.
Tom's Thumb Trail - Tom's Thumb Trail is a popular hike in the McDowell Sonoran Preserve. The hike is 3.75 miles round trip and takes about 2 hours to complete. The trail is strenuous, but the views from the top are worth it and you can see for miles in all directions, making it a great place for a sunrise or sunset hike.
Papago Park - Papago Park is a great place for a scenic hike. The park offers many different trails, making it a great place for all skill levels. The park has trails for hiking, biking, and horseback riding, making it a great place to spend the day. The park also has a beautiful lake, making it a great place to relax and enjoy a picnic.
Enjoy The Super Bowl and The Desert
In conclusion, Phoenix is home to some of the most stunning hikes in the country. Whether you're a beginner or an experienced hiker, there is a trail for everyone in Phoenix. So, if you're in town for the Super Bowl, take a break from the excitement and enjoy one of these beautiful hikes!
Add To Your Pinterest Board
5 Adventures in Phoenix during the Winter
Spending winter in Phoenix, Arizona is a great experience with its warm climate and wide range of outdoor activities to do.
Here are five amazing adventures to take in Phoenix during the winter:
Hiking - Take advantage of the moderate winter temperatures and explore some of the best trails in the area. Hike through McDowell Mountain Regional Park or along the shoreline of Tempe Town Lake for beautiful views and breathtaking nature.
Horseback Riding - Hop on horseback for an unforgettable ride across one of the nearby desert trails, with stunning views all around you. Spend an afternoon exploring South Mountain Park or embark on a sunrise ride around the Apache Trail Monument Valley.
Rock Climbing - Challenge yourself to some rock climbing at Papago Park’s Sandstone Quarry or Black Canyon National Park and feel like you’re soaring high above the valley floor!
Golfing - Get some practice in before spring golf season by hitting up one of Phoenix’s premier golf courses like Encanto 18, where you can challenge your skills and work on perfecting your game!
Off-Roading - Explore Phoenix's desert terrain on a guided ATV tour! Experience sand dunes, winding trails, and stunning red rock formations all while having a wild time!
Bulletproof Coffee
Want a cup of coffee that will sustain your energy throughout the morning and for all your adventures? Then make it bulletproof.
After traveling to Tibet and trying yak butter tea biohacker Dave Asprey brought home the recipe and coined it “Bulletproof coffee.” So what is it exactly? It's a combination of clean caffeine from coffee beans mixed with healthy fats from unsalted butter and MCT oil. The combination provides a sustained energy throughout the day. No more caffeine crashes!

The Bulletproof Coffee Recipe
- 1 cup of coffee
- 1 tsp - 2 Tbsp MCT OIL (work your way up with this one as you can initially get stomach cramps)
- 1-2 Tbsp unsalted grass fed butter
- For a hint of spice add a sprinkle of cinnamon!
It’s best to blend the three ingredients together in a blender otherwise the oils and fats separate. Blending makes for a very smooth creamy latte.
- Calories: 230
- Fat: 25g
- Saturated Fat: 21g
- Carbs: 0g
- Protein: 0g
- Fiber: 0g
- Sugar: 0g
- Salt: 0mg

So why does it provide sustained energy? Let's break the ingredients down.
THE BULLETPROOF COFFEE
Coffee is a powerful antioxidant. Caffeine keeps you alert and boosts your metabolism. But just like the food you eat, the quality of the coffee you drink matters. Bad quality coffee can make you feel tired and sluggish, reaching for another cup. While a clean quality bean can keep you fueled and energized.
Avoid coffees with molds like ochratoxin. Molds will steal your mental edge and make you weak. For sustained energy it’s best to choose organic coffees that test for molds and toxins like Bulletproof.
We love Bulletproof not only because it’s a clean bean coffee but because they also support sustainability and our environment.
GRASS FED BUTTER
Unsalted grass fed butters are a nutrient dense source of fat providing fuel for energy. We like unsalted Kerrygold.
MCT OIL
A fat burning fuel made from coconuts. This is the key ingredient that helps you feel energized and focused. MCT's don't have to be broken down in the body therefore they give your cells an immediate energy source to pull from.
Keto
If you are interested in learning more about keto and a toxin free lifestyle check out Keto Canary.
Don't forget to save the recipe on Pinterest!


7 Essential Keto Hiking Snacks You Need to Pack
7 Keto Hiking Snacks for you to take on your next adventure to help your metabolism, repair muscles, and boost immune systems.
It is possible to stay in ketosis while hiking. There are a ton of ways to keep your belly full and boots marching along without sacrificing your diet. We have compiled a simple list of keto hiking snacks that could be picked up at most local grocery stores. If not, there is always Amazon to the rescue.
Not only does this list focus on keeping all of the snacks low carb, but it also keeps a prioritized eye on protein which is crucial for a succesful and active hikers diet. High protein hiking snacks not only keep the h-angers at bay, but are super beneficial for your body. Protein helps hikers regulate their metabolism, repair tired muscles, and boost their immune systems. Plus, you're not yourself when you're hungry - I should coin that line. 😂

Keto Beef Jerky
Jerky made from beef is ideal for hiking. It's easy to carry and high in protein and one of the best high protein hiking snacks. The high salt content found in beef jerky is actually beneficial for hiking because it aids with hydration regulation. This keto hiking snack is packed with protein as well. Any other snack option can't compare to the quantity of protein you get from even a little strip. Protein is good for your body and provides an energy boost while also satisfying hunger rapidly.
The question is, is jerky good for you? The quick answer is that it is debatable. Jerky can be healthy if it suits your dietary objectives and the sort of product you select. Dried meat snacks can be a good source of protein when consumed as part of a balanced diet.
Jerky skeptics can be a little out of date. With additional MSG, nitrates, and chemical preservatives, many individuals warn that they're rich in sodium. The truth is that jerky is no longer made in this manner.
Sodium, on the other hand, is a valid cause for concern. Although sodium is a necessary nutrient, it is far too easy to consume too much in the average American diet. According to the FDA, the daily recommended dosage for the average individual is 2,400mg, which is just over a teaspoon of table salt.
How to Choose a Healthy Jerky
- Look for jerky with fewer than 500mg sodium content per serving
- Opt for brands that have no more than 5g of added sugar
Our Favorite Beef Jerky: People's Choice | Country Archer | Tillamook Country Smoker
Alternatives: Salmon Jerky | Turkey Jerky | Vegan Jerky | Mushroom Jerky

Salami or Sausage
Find the hard salami brands with zero carbs and a paper casing. This method tastes better and keeps fresh longer. Summer sausage is another great option.
Our Favorite Picks: Criminelli Whiskey Salami | Dukes Shorty Sausages

Hard Cheese Snacks (k)
Wrap the cheese to keep it from getting too greasy in your bag. You can also find cheese snacks that are freeze-dried and can be eaten like chips!
Another tasty one of our high protein hiking snacks that is easy to consume on the trail is string cheese. String cheese is high in protein and comes in a number of flavors, including Colby Jack, cheddar, and the most popular, mozzarella. It's great on its own or with meat or fish for a quick trail supper that doesn't require any preparation!
Cheese that is good for hiking typically has the following characteristics:
- It is a Firm or semi-firm cheese
- It has been aged
- It has a low moisture content
Our Favorite Picks: Horizon Organic | Mini Babybel

Keto Protein Bars
What hiking snack list would be complete without energy bars? Just keep in mind that some of these protein bars contain a lot of sugar alcohols, which each body processes differently; we've found that eating more than half a bar per day has a significant impact on our ability to hike up the hills we need to. We've identified a handful that keep the sugar alcohols to a minimum and allow us to go on with our hike.
Our Favorite Picks: Perfect Keto Bars | Quest Bars

Fatty's Beef Sticks (k)
There isn't much to say about these hefty sticks o'beef other than they are just what you need and want! They are the O.G. BIG meat snack. Packed with protein. Low in Sugar. Crafted with real ingredients. Cut out all of the marketing lingo and fancy packaging, Faty's serves up a fantastic chunk of meat, that's relatively healthy and keeps you moving on the trail!
Our Favorite Flavors: Jalapeno | Original | Pepperoni

Avocado
These packable veggies provide a much needed bit of green into your daily diet and are such a great source of fat (and low net carbs).
Avocados are another great way to get plant-based healthy fats in your diet. They are crammed with vitamins and minerals, such as vitamin B6, C, and E. Their anti-inflammatory properties will keep your body feeling fresh on mile ten.
To make this a trail-friendly snack, bring a pocket knife and a small spoon. Bring a small garbage bag with you to pack out the pits and peels. Although fruit scraps may appear innocent, they can attract wildlife and disrupt the local environment.
/GettyImages-121168161-58ae00945f9b58a3c90aa163.jpg)
Keto Trail Mix
We put together our own mix of dark chocolates, almonds, and macadamia nuts. It keeps it simple, delicious and nutritious.
– 2 squares (1/6 a bar) Theo's dark chocolate
– 1 oz almonds
– 1 oz Macadamia nuts
This mixture was crunchy, salty, and chocolatey, and it was exactly right. Place this on the outside of your bag to melt the chocolate on hot days, then massage the bag to mix the nuts and coat them in chocolate. You've got a chocolate-covered nuts snack if it cools down! Grab a spoon and dig in if it stays melted.
Keto Hiking Snacks Wrap-up
We hope this helps navigate the grocery aisles with ease when loading up before your next hiking adventure. This is a simplified list of keto hiking snacks that shold serve as a starting point or baseline for any adventures, including backpacking.
If you are not keto, or hiking on a cheat day, check out our 7 High Protein Hiking Snacks artcile to make sure you're still getting the proper nutrients.
Ultimate Guide to Backpacking Santa Cruz Island in the Channel Islands
Printable Santa Cruz Island Backpacking Guide. Everything you need to know to do the ultimate backpack on Santa Cruz Island.
This is the most comprehensive Santa Cruz Island Backpacking Guide. It contains everything you need to know to do the ultimate backpack on Santa Cruz Island in the Channel Islands National Park.
The Channel Islands National Park consists of five islands located just off the coast of sunny California. On these islands, you will find loads of hiking, camping, kayaking, snorkeling, and other recreational activities.
The islands are well-protected, and the National Park Service does an excellent job of minimizing human impact. Due to the fragile ecosystem, if you plan on visiting this National Park, you'll need to plan ahead.

IN THIS GUIDE, WE SHARE ALL THE LOGISTICS FOR PLANNING A BACKPACKING TRIP ON SANTA CRUZ ISLAND LOCATED 25 MILES OFF OF THE COAST OF CALIFORNIA.
You should practice good trail etiquette at all of our shared destinations and remember to Leave No Trace. That means packing out your garbage, being respectful of others on busy trails, and following the established rules.

Getting To The Santa Cruz Islands
From Ventura Harbor, Island Packers offers regular boat ferries and cruises to Santa Cruz and the other islands in Channel Islands National Park.


The trip to Prisoners Harbor or Scorpion Anchorage on Santa Cruz Island takes slightly over an hour. Be aware that the boat ride can be cold and rough, so dress accordingly with layers. If you get seasick, consider taking preventive steps before the ride, such as purchasing anti-nausea bands or packing Dramamine. If you start to feel sick while on the boat, head to the back for fresh air and keep your eyes on the horizon.
[ninja_tables id="7330"]

You must check in at the Channel Islands office at least one hour prior to your departure to pick up your ticket. Before you put your bags on board they will ask you to remove any water containers and gas/fuel. These will be held in a separate, fire-safe container and collected once you get to the island. Be sure to mark your fuel canisters with your initials or name so it is easy to identify.
It's a good idea to call Island Packers at (805) 642-1393 prior to your boat ride to ensure your trip has not been canceled due to rough seas.

Santa Cruz Island Map
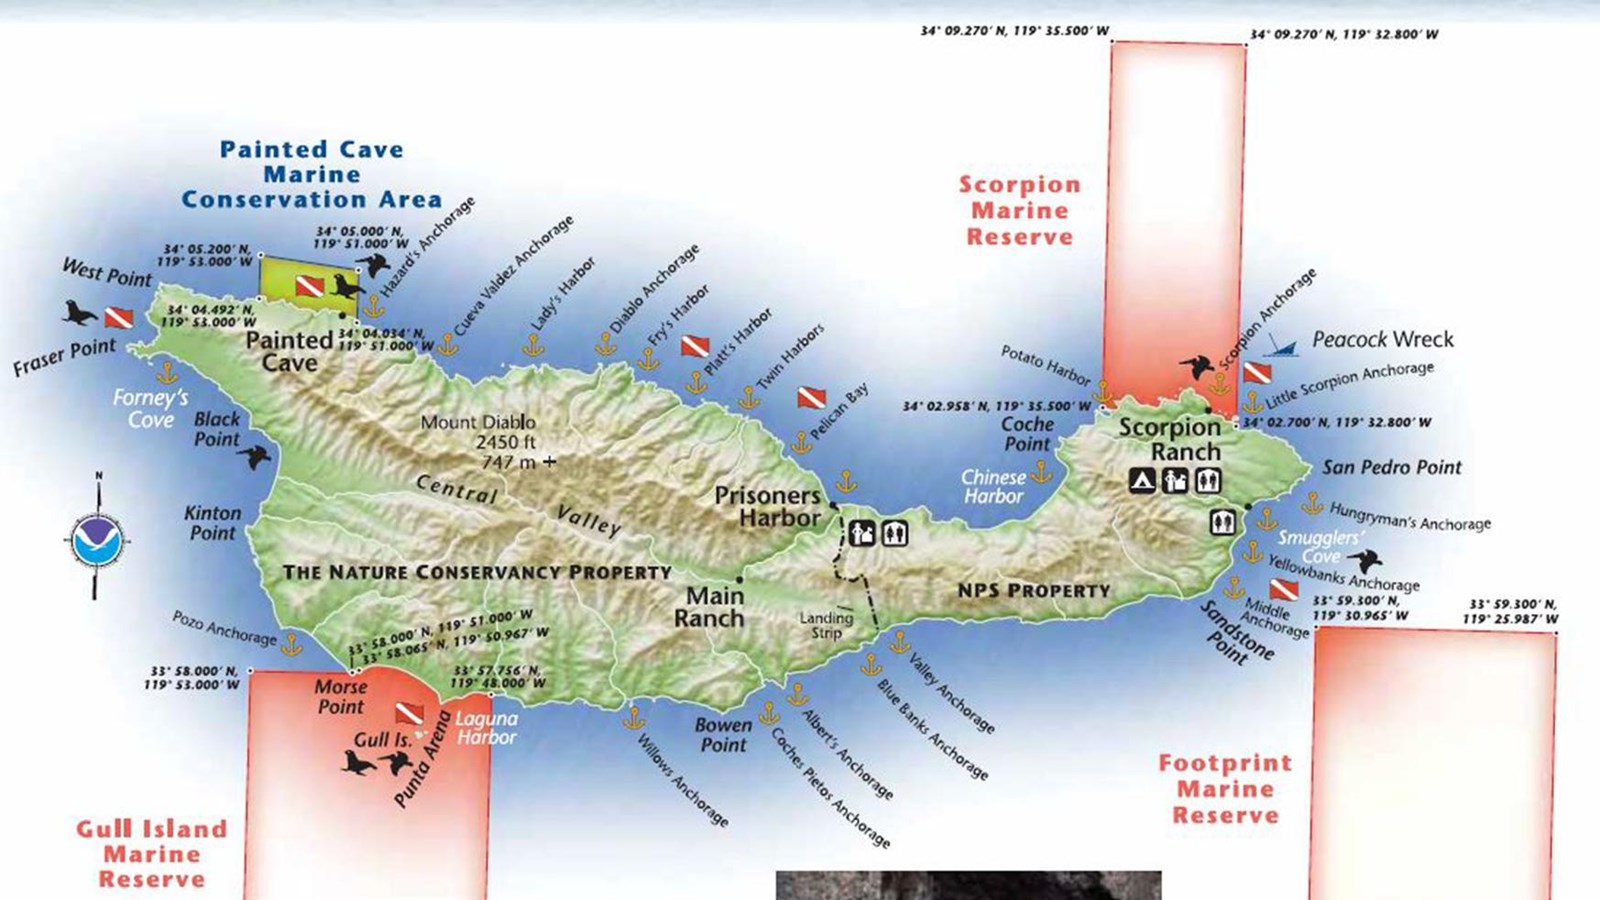
Santa Cruz Island Weather
The best time to visit Santa Cruz is from September to November when the summer tourists have left and the beaches, hiking trails, and other attractions are less crowded.
The warmest month of the year in Santa Cruz is September, where the average temperature gets to around 23℃ (73℉), but temperatures can reach as high as 25℃ (78℉) on the hottest days in summer. The weather in the winter, especially around December, can reach a minimum of 6℃ (43℉).
Here is a link to check the Current Weather and forecast.
Camping Reservations
Del Norte Campground : To camp at the Del Norte Campground, you must have both a boat reservation and a campground reservation. The Del Norte campground, SCI is the smallest campground in the park. There are only four sites each with a four-person capacity for a maximum of 16 total campers at one time. Located 3.5 uphill miles from the pier where you disembark the boat. This is a “backcountry” campground. Rustic and charming with beautiful views of the island coast, this campground is frequented by backpackers and hearty hikers.
Picnic tables and small food storage boxes are in each site. NO fresh/potable water is available at this location and most years no streams or creeks flow to allow for water filtration by campers.


Most Scenic Campsite: Site 1 give you gorgeous views of the water but you are very exposed
Most Private Site: Site 4 gives you some privacy and shelter from the winds.
Scorpion Canyon Campground: To camp here, you must have both a boat reservation and a campground reservation. Scorpion Anchorage offers the most numerous and most-visited campsites in the Park. The campground area has shade in most sites provided by old-growth eucalyptus trees.
There are two campgrounds - Upper and Lower. Lower is closer to the harbor and therefore a bit more exposed to the elements and humidity. If you plan on doing more water activities, stay in Lower Scorpion Campground for quicker pier access. If you plan on doing more inland hiking, Upper Scorpion Campground is the spot for you.


The placement of the campground in Scorpion Canyon provides shelter from the prevailing NW winds. There are no trash cans for the public on the island, so you must pack out all trash when you leave.
You may reserve up to 7 consecutive nights.
Santa Cruz Island Backpacking Trail Map

Water Availability (IMPORTANT)
Drinkable water is VERY scarce on the island. Be prepared to carry extra water, especially in warmer weather. Potable water is ONLY available at the Scorpion Ranch campground on Santa Cruz Island.
Santa Cruz Island Backpacking Itinerary
- Day 1: Hike Prisoners Harbor to Del norte Campground | 4.8 miles
- Day 2: Hike Del Norte Campground to Scorpion Anchorage Campground | 9.5 miles
- Day 3: Optional Exploratory Hike (optional) | Smugglers Road, Scorpion Canyon, Potato Harbor | ~8 miles
- Day 4: Kayak Tour at Scorpion Anchorage | Hike to Scorpion Canyon Ferry | .5 miles
There are a few variations that you could do to this itinerary. We chose to designated Day 3 as a full exploratory day in order to really kick back and enjoy the island. This gave us enough time to explore all the parts we wanted to see. We also like to spice up our trips, so we allotted time on Day 4 to take a guided kayaking tour.
Trip Report
Day 1: Hike Prisoners Harbor to Del norte Campground (3.2 miles, 1182 elevation gain)
- Potable Water Availability: None available
- Best Campsite at Del Norte Campground: #1 (most scenic) | #4 (most private)
I would recommend getting the earliest ferry out of Ventura so that you can get to the island with plenty of time to explore and, if possible, do the Pelican Bay Hike. You will need to fill out a form and submit this to the rangers before doing the hike. Only passengers of Island Packers are permitted to hike on this land, so take advantage of this unique opportunity.
The Pelican Bay Hike is a 4-mile out-and-back trail that gives offers some insanely beautiful views and gives you access to the sandy shores at Tinker Harbor. Do not miss this hike if you are comfortable with tacking on 4 additional miles to your first day. You can leave your big packs in the fox boxes at Prisoners Harbor and just take a day pack with snacks and water.

If you do the entire Pelican Bay Hike, expect to spend about 3 hours exploring. Once you are back at Prisoners Harbor, grab a quick lunch or snack, pack it up, and head out to your first leg of the backpack.
Although the trail does snuggle up against the coastline to give you ocean views at every turn, the majority of the hike is along a road. And it is pretty dang steep. Once you get your boots dug into the actual trail, guess what, it gets even steeper! The trail drops you down into a valley and then straight up the other side a couple of times. However, the rolling hills, blue skies (hopefully) and water views make the hike fly by.

The turnoff for the campground is well marked at a Y intersection, and the sites are only a few hundred feet up the trail. While at camp, make sure to place all of your food, or anything scented inside the fox boxes. The Island foxes are definitely not shy and will start inspecting the new visitors as soon as you arrive. It is recommended to keep all of your gear, socks, bags off the ground and tabletop as these little dudes just may be curious enough to rustle through your goods to try to find some snackies.
Day 2: Hike Del Norte Campground to Lower Scorpion Campground (9.7 miles, 2322 elev gain)
- Potable Water Availability: Water available at both Upper and Lower Scorpion Campground
- Best Campsite at Lower Scorpion Campground: #3 (most private & best access)
Get an early start to give yourself plenty of time to enjoy the views. It is possible to add a side trip down to Chinese Harbor (adds 3.6 miles roundtrip). The average time to hike from Del Norte Campground to Lower Scorpion is about 5-6.5 hours, but trust me, you will want to stop to take some photos. Many, many, many photos.

It is pretty incredible how often and vastly the landscape changes along this trail. Some of the hike cuts its way between high grass valleys, over wide-open hilltops, down into deep, rocky valleys, and around some sketchy edges up to a spine that overlooks the west side of the island.
The turnoff for Chinese Harbor is about 2.3 miles from the Del Norte Campground. You should note that this will take you to an overlook of Chinese Harbor, and not down to the beach. The hike is 1.8 miles each way.
This hike really rakes a turn for the awesome the moment you link up with Montañon Trail at about the 5.2-mile mark. The massive peaks in the distance seem impassable, making you question where in the heck you are even headed. You can make out parts of the trail, but it seems to disappear around a very steep corner. And that's because it does!

What started out as a relatively passive hike, gets gnarly with the quickness as you take a quick ascent up to Montañon Ridge. The terrain gets pretty chunky and narrow as it curves its way around a lower ridge, followed by an incredibly scenic 360-viewpoint on top of the ridgeline. Being that this junction is very close to the highest point on the island, you get massive views of the western coastline on one side and Scorpion Harbor on the other. On clear days, you can see Anacapa Island!

This is the part where someone (there's always that guy) starts saying "It's all down here from here." But, for once, he won't be lying. The next 4 miles wind their way down to Scorpion Harbor. There are two trails you could take to get to the campgrounds. We went for the slightly longer one that drops you into the valley, passing through Upper Scorpion Campground and then into Lower Scorpion. Just passed that is the harbor.
There is a fantastic short hike that will lead you to an overlook of the harbor. Here, you will get sweeping views of the giant kelp forest floating below and the massive rock formations in the distance: Scorpion Rock. This is a killer location to photograph sunset or sunrise.


Day 3: Optional Exploratory Hike | Smugglers Road, Scorpion Canyon, Potato Harbor | ~8 miles
There are many ways to spend the day hiking and exploring all the goods on this side of the island. We compiled an 8-mile loop that hits all of the hot spots. You will cover a couple of miles that you did on the way into Scorpion Canyon on Day 2. If you would like to spend more time along the amazing North Bluff Trail instead, do this shorter loop that starts from the Upper Scorpion Campground.


To do the full loop, start off by heading out of camp towards the harbor and turn right onto Smugglers Road. This will take you right up to the top of the cliffs and over to Scorpion Bluffs. The trail will then lead you back inland on the island, circling back around to the campgrounds.
From Upper Scorpion Campground, turn left onto Potato Harbor Road. This climbs its way up to intersect with the North Bluff Trail. Head west on the North Bluff Trail until you reach the most beautiful part of the island: Potato Harbor Overlook.

Day 4: Kayak Tour at Scorpion Anchorage | Hike to Scorpion Canyon Ferry | .5 miles
We scheduled our return ferry for 4 pm so that we could sleep in and enjoy a group breakfast. In the early afternoon, we headed out on a kickass guided kayak tour to see the island from the water!

The Adventure Sea Cave Kayaking experience was incredible! TBH, we tend to stay away from guided tours. We like the freedom to roam freely and get our own take on the experience. But, that's not an option here because it is a protected preserve.


Now, I will be the first to admit - we were dead wrong! The $169 price tag was well worth it! We were shown a lot of really rad sea caves, paddled through tunnels, and got soaked by explosive blow spouts. Our guide kept us entertained and talked about the super interesting history of the island. We learned the names of the birds that live exclusively on the island and tasted kelp fresh from the ocean. Yes, that is correct. We ate kelp.
You can book your adventure in advance here - which is highly recommended during the busier seasons.
Cell Phone Reception
Don't expect really any cell phone service on your Santa Cruz Island backpacking trip. The reception will be very sporadic and unreliable. It's a good idea to turn off or put your phone on airplane mode. Otherwise, your phone will roam about looking for a signal, draining your battery. How else are you going to get those banger IG boomerangs?!
We found that the only place we reliably had any reception at all was on the pier at Scorpion Anchorage.
Santa Cruz Backpacking: What Gear Do You Need?
Make sure to Download our 3 Day Backpacking Checklist. By adding in a couple more meals, snacks and a little more clothing, you could easily adapt this to 4 days.

Below you will find a list of the gear that we took on this trip. It includes almost every piece that we had with us in our backpacks. This was the first time we used the Gregory Backpack Combo, and it worked out perfectly. I would argue that this combo may be the perfect backpacking duo for the adventurous couple.
His
- Backpack: Gregory Baltoro 75
- Tent: Nemo Hornet 2p
- Sleeping Bag: Nemo Kayu 15
- Sleeping Pad: Nemo Tensor Wide
- Shoes: Hoka One One Anacapa Mid GTX and Chacos
- Headlamp: Petzl Reactik
- Sunglasses: Rheos Coopers
- Hiking Poles: Black Diamond Trail Ergo
- Clothing: Marmot Knife Edge | Eddie Bauer Guide Pro Pant | Vuori Trail Shorts | Outdoor Research Echo Hoodie | Arcteryx Atom LT Hoody | Smartwool Performance Hike Light Socks
- Food Stuffs: Jetboil Zip | Fatty Meat Sticks | Ultima Electrolytes | Mountain House Meals | Starbucks VIA | Nalgene 32oz Water Bottle
- Camera Gear: Canon R, Canon 24-105 lens, GoPro Hero 9
Hers
- Backpack: Gregory Maven 55
- Sleeping Pad: Nemo Tensor Regular
- Sleeping Bag: Marmot Trestles 15
- Sleeping Bag Liner: Cocoon Silk Mummy
- Pillow: Klymit Pillow X
- Shoes: Hoka One One Tennine GTX
- Sunglasses: Rheos Wyecreeks
- Clothing: Marmot Knife Edge
- Food Stuffs: Wild Zora Paleo Meals | Wild Zora Snacks | Wild Zora Grain Free Hot Cereal | Four Sigmatic Mushroom Coffee Mix |
A note about Ticks
Ticks are present on the islands and can carry bacteria and viruses that can cause diseases in humans, including Lyme disease. Now, you see this sign oftentimes at trailheads and they advise you to check yourself. I never take it too seriously, but the ticks on this island are aggressive! Seriously, if you literally step a foot off the trail to snap a quick photo, there's a good chance one of these suckers will get on you.
Periodically check yourself throughout the hike and again when you get to camp. They are harmless if you swat them off before they dig in. If they have latched on, make sure you know how to remove them safely and completely. The Clever Hiker wrote a fantastic article covering ticks that I suggest you check out.
Backpacking the Trans-Catalina Trail (TCT) - Everything You Need to Know
The Trans-Catalina Trail is a 32-mile trail that runs from end-to-end of Catalina Island. This is the essential guide to hiking this epic trail.
Catalina Island is an inhabited island located 22 miles off the coast of Southern California. There are amazing hiking, camping, and backpacking adventures along the Trans-Catalina Trail. The island also offers fantastic kelp forest diving and a diverse wildlife population, including Bison!
The Trans-Catalina Trail is a 40-mile trail (commonly referred to as the TCT Trail) that runs the length of the island. The hiking has its fair share of tough climbs complimented by never-ending views at every turn. There are some of the most amazing beachside campsites that offer unbeatable seclusion, and get this - there are even a few restaurants along the trail!
We would highly recommend doing this adventure in the fashionable way that we like to call Backpack-to-Bourgeois. WTF is that? Simple: do an epic grind of a backpack, and end it with a pampering hotel stay where you treat yourself like the king or queen you are.
Backpacker on the Trans-Catalina Trail
All smiles on the TCT Trail
In this Trans-Catalina Trail Guide, we share all the logistics for planning a backpacking trip on the Trans-Catalina Island Trail.
You should practice good trail etiquette at any destination you visit and remember to Leave No Trace. That means packing out your garbage, being respectful of others on busy trails, and following the established rules.
Get a Free PDF of This Guide!
We'll send you a PDF of this guide for offline reading along with future backpacking, camping, hiking, and photography tips to support all of your outdoor adventures.
[wpforms id="7102" title="false"]
Trans-Catalina Trail Stats
Total Distance: 37.5 miles
Total Elevation Gain Loss: +/-7950 feet
Difficulty: Moderatly Challenging
Dogs Allowed: On the trail and at camp, yes (except for Two Harbors Campground)
Advanced Reservations Required: Yes (see CampgroundsReservations section)
Number of Recommended Nights: 4 nights / 5 days
Cell Service: Sporadic.
Getting to Catalina Island
One of the things that makes this one of the most unique backpacks in the world has a lot to do with just getting there. In order to get to the island, you have to take a 60-90 minute boat ride via the Catalina Express. If you’re lucky you might spot some marine wildlife on this gorgeous ferry ride across the Pacific Ocean.
Be aware that the boat ride can be cold and rough, so dress accordingly with layers. If you get seasick, consider taking preventive steps before the ride, such as purchasing anti-nausea bands or packing Dramamine. If you start to feel sick while on the boat, head to the back for fresh air and keep your eyes on the horizon.
You must check in at the Catalina Express office at least one hour prior to your departure to pick up your ticket.
It’s a good idea to call Catalina Express at (800) 613-1212 prior to your boat ride to ensure your trip has not been canceled due to rough seas.
TCT Backpacking Overview
The Trans-Catalina Trail runs east-west along Catalina Island which is part of the Channel Islands Archipelago.
Now to be Uncle Frank, this hike should not be underestimated. Even though you are in Southern California under a beautiful sunny sky surrounded by gorgeous blue waters, rolling hills, and fuzzy Bison, this hike is a bit of a beast. There is actually considerable elevation gain (about 8k feet), a lot of very exposed sections which can be downright brutal in the hotter months, and minimal water sources. This means you will need to carry more water weight than you would probably like to. This is actually a common scenario when hiking the Channel Islands - see Santa Cruz Island Backpacking.
Unlike most backpacking adventures, you are able to get your fill of civilization/humanity every single day. That means actual bathrooms, cooked food (pizza!), and even a general store. Parts of the hike follow a dirt road where are you will encounter the occasional vehicle or guided jeep tour. But come on, being able to be in the middle of a backpack and stop off to have a slice of pizza and a cold beer before you continue on is pretty f*cking epic.
Catalina Island Weather
On average, Catalina Island receives more than 260 days of sunshine every year. For the most comfortable weather and the best chance of seeing the sun, it is recommended to plan your backpack from September to early November. Just note that the landscape and foliage may not be as vibrant green this time of year. If you prefer the greenery and are willing to chance rain, late winter, early spring would be the best.
Check the current weather conditions for Catalina island here.
Campground Reservations
Each campsite requires its own reservation and they may be booked up to a year in advance. Visit Catalina Island is a great source of information about each campsite, so I would recommend looking through this page before reserving. This is a very popular destination for backpackers, day hikers, bird watchers, and more so make sure to Book Early - the spaces fill up quickly!
Here are links for each of the campgrounds on the Trans-Catalina Trail:
BlackJack Campground | Little Harbor Campground | Two Harbors Campground | Parson’s Landing Campground
Permits for Backpackers
Carry a copy of your camping reservations with you when hiking the Trans-Catalina Trail. I recommend having them downloaded to your phone because the cell reception is very unreliable. If you plan on doing some day hiking on the island, you will need to apply for a free permit.
Trans-Catalina Backpacking Trail Map
After you pop off the ferry in Avalon, stop by the Catalina Island Conservancy shop to pick up a detailed Trans-Catalina Island Trail map (free). Even though it is extra weight, it's always recommended to have a hard copy map on hand just in case when backpacking. This map shows the location of water sources, restrooms, food, and other services are located along the trail.
Trans-Catalina Trail Backpacking Itinerary
Day 1: Avalon toBlack Jack Campground | 8.75 miles
Day 2: Black Jack to Little Harbor Campground | 8.35 miles
Day 3: Little Harbor toTwo Harbors Campground | 7.2 miles
Day 4: Two Harbors to Parson’s Landing Campground via the TCT | 7.24 miles
Day 5: Parson’s Landing to Two Harbors via the road and Lion’s Head | 7.2 miles
There are many variations that can be done to this itinerary. Many people opt to cut the last portion of the hike off and finish up with a kayak rental after some pizza and beer at Two Harbors. Well maybe not many people, but we did! It's your adventure, so make sure you make it yours!
Here is a very detailed trail map on Alltrails:
Water Availability
Water is accessible in Black Jack, Little Harbor, and Two Harbors, but there is no potable water on the route between the campgrounds. Your campground reservation at Parsons includes 2.5 liters of water for the final night which will be waiting for you at your site.
Try to get your gear weight down so that you can manage to carry at least 3 liters of water each day. We love using the 4L MSR Dromedary Bag for water hauls like this. Though it can add a bit of a flavor to the water, the bag is incredibly tough and trustworthy.
Cell Phone Reception
Don't expect really any cell phone service on your Trans-Catalina Island backpacking trip. The reception will be very sporadic and unreliable. It's a good idea to turn off or put your phone on airplane mode. Otherwise, your phone will roam about looking for a signal, draining your battery. How else are you going to get those banger IG boomerangs?!
Leave No Trace
Due to its sensitive ecosystem, backpacking the Trans-Catalina Trail comes with its own set of guidelines to keep in mind on top of practicing Leave No Trace.
Catalina Island is home to a variety of species, including the island fox, bison, and some aggressive ravens. Always keep an eye on your meal. The majority of campgrounds feature fox boxes (also known as bear bins) where you may store your food and drink safely.
Please read this twice: Bison are really dangerous! They have a top speed of 35 mph and can change behavior very rapidly of they feel threatened. Do not approach them for photos or any other reason. You will find them right on the trail and in the campgrounds. It's common to have to wait until the herd moves on before continuing your hike. Always be on the lookout for any signs of aggression if they are present.
We were stopped for a mid-trail snack for about an hour because the bison had decided that was the perfect place to graze. While waiting, we were joined by 2 other groups who also took the opportunity to take a rest.
At the campsites, in town, or at the airport, there are restrooms available so please take advantage of them! If you have to go when not near a bathroom, make sure to observe Leave No Trace guidelines and pack out your toilet paper.
Trans-Catalina Backpacking Gear
Make sure to Download our 3 Day Backpacking Checklist. By adding in a couple more meals, snacks, and a little more clothing, you could easily adapt this to 4-5 days. Below you will find a list of the gear that we took on this trip. It includes almost every piece that we had with us in our backpacks.
Note that in the late fall, winter, and early spring, evenings can be quite cold. Make sure to pack a beanie, long pants, and a warm jacket for the evenings.
HIS
Backpack: Gregory Baltoro 75
Tent: Nemo Hornet 2p
Sleeping Bag: Nemo Kayu 15
Sleeping Pad: Nemo Tensor Wide
Shoes: Hoka One One Anacapa Mid GTX and Chacos
Headlamp: Petzl Reactik
Sunglasses: Roka
Hiking Poles: Black Diamond Trail Ergo
Clothing: Arcteryx Beta SL | Eddie Bauer Guide Pro Pant | Outdoor Research Echo Hoodie | Arcteryx Atom LT Hoody | Smartwool Performance Hike Light Socks
Food Stuffs:Jetboil Zip | Fatty Meat Sticks | Ultima Electrolytes | Mountain House Meals | Starbucks VIA | Nalgene 32oz Water Bottle
Camera Gear: Canon R, Canon 24-105 lens, GoPro Hero 9
HERS
Backpack: REI Traverse 65
Sleeping Pad: Nemo Tensor Regular
Sleeping Bag: Marmot Trestles 15
Sleeping Bag Liner: Cocoon Silk Mummy
Pillow: Klymit Pillow X
Shoes: Hoka One One Tennine GTX
Clothing:
Food Stuffs:Wild Zora Paleo Meals | Wild Zora Snacks | Wild Zora Grain Free Hot Cereal | Four Sigmatic Mushroom Coffee Mix |
Share on Pinterest
How to Hike to Cathedral Rock in Sedona, Arizona
So you're thinking of visiting Sedona? You're about to go on an incredible journey. The red pillars are among the most spectacular sights I've seen while hiking. It's one of the most beautiful spots I've ever seen. One of the best things to do in Sedona is hike Cathedral Rock which is why it made our Top 6 Hikes in Sedona.
Sedona is a place where you simply must go outside. Cathedral Rock Trail is one of my favorite Sedona hikes due to it's challenges.
Everything you need to know about climbing Cathedral Rock in Sedona is right here!

WHEN IS THE BEST TIME TO HIKE THE CATHEDRAL ROCK TRAIL?
The greatest time to hike Cathedral Rock Trail is without a doubt in the hours leading up to dusk. There are great views of Sedona from the top, and it is even more magical at sunset.

If you plan on lingering at the summit until sunset, carry a headlamp to assist you in descending the trail. You'll need your hands to get down the trail's steeper sections.
The best time of year to hike cathedral rock is fall to early spring for cooler temps and less crowds.
HOW TO GET TO THE CATHEDRAL ROCK TRAILHEAD IN SEDONA
Cathedral Rock is one of the most popular Sedona hikes. There are multiple trailheads that lead to Cathedral Rock but we found Cathedral Rock Trailhead No. 170 to be the closest.
Cathedral Rock Trail Head Coordinates: 34°49’30.7″N 111°47’18.3″W
The parking lot is a lot busier during the more popular hiking times. Typically, the earlier you are there, the easier parking will be.
There is overflow parking further down on Back O’Beyond Road.
DIRECTIONS TO THE CATHEDRAL ROCK TRAILHEAD
Head south on the junction of 89A and 179. Drive 179 south for about 3.5 miles until you reach Back O’ Beyond Road on the right. Then go approximately .6 miles. The parking lot turnout is on the left.
Note: There is a $5 cost for the Red Rock Pass for parking. The America the Beautiful Pass is also a valid parking pass.
CATHEDRAL ROCK VIA THE BALDWIN TRAILHEAD
There is an alternate way to get to Cathedral Rock if you want a longer and more scenic hike. It starts from the Baldwin Trailhead. The trail is 3.7 miles round trip, and it takes about 1.5 hours to get to the top of Cathedral Rock.
This route will have wonderful views of the west side of Cathedral Rock as you start your hike.
CATHEDRAL ROCK HIKE

HOW LONG DOES IT TAKE TO HIKE CATHEDRAL ROCK IN SEDONA?
Cathedral Rock in Sedona will take 30-40 minutes if you hike at a moderate to fast pace. It will take roughly 60 minutes to hike to the top if you hike slower, if you are hiking with children, if you take some breaks along the route, or if you stop to take photos.
I would recommend planning for about 3-4 hours for the entire adventure.
TRAIL STATS –
- Length: 1.2 miles
- Elevation Gain: 744 feet
- Route Type: Out & Back
- Difficulty: Moderate
CLIMBING CATHEDRAL ROCK IN SEDONA
In general, the Cathedral Rock route is simple to follow. Along the trail, there are basket cairns packed with rocks to direct you. The trail begins with a dried-up creek, followed by a short ascent to a plateau.
The plateau region offers stunning views over the Sedona area and is an excellent location for photographing Cathedral Rock in the background.
You'll climb up through the scramble from there. It's a little crag that you'll have to climb on your hands and knees to get to. This is the most difficult section of the hike, but if you go slow and steady, you'll be OK. The crack is about 40 feet long and has a 45-degree incline.
After the scramble, you'll come to another plateau, which is an excellent area to pause and snap photos if you want to. You'll continue climbing Cathedral Rock from there. There are few stone steps at the summit that will lead you to the top.
The end of the trail has a sign saying, “End of Trail”, but the views alone will tell you that you are there!
HOW DIFFICULT IS THE CATHEDRAL ROCK HIKE?
Although the hike to the summit of Cathedral Rock is short, it does include some steep sections. The Cathedral Rock Trail has certain sections where you must scramble over the rocks using your hands and feet.
For most people, it is not too much of a challenge to climb over the boulders, but this could be difficult depending on the physical abilities of those you are hiking with. The trail is well broken in with places for hand and footholds in the rock making the climb a little easier. Make sure you are wearing sturdy shoes or even better ---> CHACOS!!!
AT THE TOP

At the summit, there is a ledge that wraps around the top making a lot of places to explore and room for everyone. There is a very large drop-off at the top, but the ledge is pretty wide to have safe places for kids to sit.
The highlight and favorite viewpoint is off to the far right after you have reached the summit viewing area. There is a fun ledge that is a great place to take pictures and enjoy the views. It is known by some as the Edge of the World. There is a high and steep drop-off here so be careful.

HEADING DOWN THE TRAIL
There are some spots you will need to slide down on the rocks, but overall, the hike down is pretty easy going and simple to follow - just keep an eye out for the baslets of rocks that you passed by on the way up.
As you head down Cathedral Rock be sure to notice the beautiful views in the distance. Courthouse Butte will be visible as well as Sedona.

SEDONA GUIDED TOURS
Sedona is a lovely destination with plenty of options for independent exploration. However, with so many energy vortexes and gorgeous sites to visit, it can be tough to determine where to spend your time and easy to overlook many of Sedona's unique attractions.
If you want the best Sedona tour with a lot of flexibility, I suggest booking a guided tour with Sedona Spirit Journeys.
During this highly recommended tour, an experienced guide will teach about the area’s sacred nature and energy vortexes as well as the history and geology of the area. This is a great way to see everything Sedona has to offer.
The best part of it all? You pick your stops and then sit back and relax!
HIKING TIPS FOR CATHEDRAL ROCK IN SEDONA
- PLAN TO HIKE EARLY IN THE MORNING OR AT SUNSET - These two times of day will give you the best lighting and will help you beat the crowds.
- CHECK WHAT TIME SUNSET IS - Check to see what time sunset is expected for that day if you want to be there for sunset. To reach to the summit, you'll want to give yourself plenty of time. Depending on how quickly you hike, it normally takes 30-60 minutes.
- If you are planning on staying at the top of Cathedral Rock until sunset, make sure to bring some sort of flashlight to get down. Headlamps are the best so you can have your hands-free climbing down the rock.
- USE YOUR AMERICAN THE BEAUTIFUL ANNUAL PASS - The American the Beautiful Pass is honored for the daily pass for parking for all the Sedona trails. If you do not have a pass, you can purchase a pass for $5.00 at the fee machines at designated trailheads.
- BE PREPARED - This includes sunscreen, plenty of water, and snacks. Don’t be fooled into thinking the hike is only a mile. The pathway is steep and narrow in places making it more difficult. There is also little to no shade on the trail.

CAN YOU SEE CATHEDRAL ROCK IN SEDONA WITHOUT HIKING?
Whether you can see Cathedral Rock without hiking depends on what you are wanting to see. You can see the Cathedral Rock formation from below. Hikers will not be able to see the panoramic valley views or cradle of Cathedral Rock. You can only get to those by hiking to the top.
If you want to see Cathedral Rock from a distance, the Templeton Trail is a good alternative. Also, you can climb to the first plateau for a great picture area without making the steep ascent through the crack.
IS CATHEDRAL ROCK TRAIL DOG FRIENDLY?
Cathedral Rock is dog-friendly if the dogs are kept on a leash. There are some big steps and boulders to climb through, so it is recommended that your dog have hiking experience. In my opinion, once you get to the rock-climbing portion it really is not an ideal hike for dogs unless your dog has a high level of physical abilities.
LET'S TALK ABOUT THE VORTEX
Sedona is a lovely destination to visit where you can easily connect with nature. Some visitors travel to Sedona in search of powerful vortex encounters. Cathedral Rock is said to be one of Sedona's four vortexes.
This vortex energy is one of many reasons why people hike the Cathedral Rock Trail. This energy is meant to calm, inspire and ground you.
No matter what your beliefs, Cathedral Rock is a place that will make you feel something. Whether it is outer-worldly spirits or awe and appreciation for the beautiful world we live in, a climb to the top is well worth your time.
OTHER HIKING TRAILS IN SEDONA
Hiking Cathedral Rock in Sedona is my favorite trails in the area but there is still plenty of other fun and beautiful hikes to explore in the area. We recommend picking a hike or two every day because it is such a beautiful area to enjoy.
BIRTHING CAVE
- Hiking the Birthing Cave in Sedona is another family-friendly hike that we enjoyed. The trail is pretty flat until the final descent into the cave. The cave is a fun place to play and has beautiful views of the Sedona area. Be sure to download the coordinates of the cave before heading out before cell coverage is limited.
BELL ROCK TRAIL
- This is a fun area to explore, especially if you’re hiking with kids in Sedona. The Bell Rock Loop is about a mile long with lots of fun places to explore along the way. You can climb all over Bell Rock with great views of the Sedona area.
DEVILS BRIDGE
- The Devils Bridge hike is another great and popular photo opportunity in Sedona. It is a natural sandstone bridge with great views of Sedona. The trailhead is easy to access with an easy hiking trail. The only downside is the trail is about 4.2 miles roundtrip.
SOLDIERS PASS
- This is a relatively easy trail until the final descent into the cave. It is a heavily trafficked trail with plenty to see along the way like the Seven Sacred Pools and sinkhole. This is a popular hike for families.
MORE TO SEE!
Also, don’t forget that Sedona is only a two-hour drive to the Grand Canyon. You could easily add this in as a day trip during your time in Sedona! Visiting the Grand Canyon is a must-see in Arizona!
If you are going to be exploring the area around Sedona, Page is a fun city to visit. The Horseshoe Bend overlook and Antelope Canyon are fun places to explore.
How to Visit Horseshoe Bend in Arizona
Lower Antelope Canyon – Visiting the Famous Slot Canyon
Pin for Later –

WANT MORE ARIZONA INSPIRATION? FOLLOW OUR VISIT ARIZONA BOARD ON PINTEREST!
The 6 Best Hikes in Sedona You Need to Do
Here is a list of the Top 6 hikes in Sedona. Beautiful hikes can be found all throughout Sedona.
On my list of the top 6 hikes in Sedona, you'll find everything from a simple walking route to a heart-pumping hike up a mountain.
Check out this Web Story!
Top 6 Hikes in Sedona
Let's Get Into it

Cathedral Rock Hike (SEE TRAIL GUIDE HERE)
One of the best hikes in Sedona is Cathedral Rock. This hike is short and quick, and it's a lot of fun from start to end, with some rock scrambling and jaw-dropping views.
Expect no solitude on this trail due to its popularity. The hike to Cathedral rock and the reward of panoramic vistas are the highlights of this adventure.
On a much greater scale, it's very similar to the bell rock climb. You'll hike and scramble your way up to Cathedral rock from the trailhead until you reach the saddle between the sandstone massive spires.
Pro Tip: This is one of the most popular hikes in Sedona and getting a parking space can be a real challenge, so get there early.

Devils Bridge
In Sedona, this is a very popular hike. Hundreds of people hike to the bridge every day to take photos of the vistas and even propose.
Devils Bridge is only a 2-mile round-trip hike from the trailhead. It's largely level and fast, with a few series of inclines and stone steps right before reaching the bridge.
Getting to the trailhead is the tricky part. The Devils Bridge Trailhead is located on a dirt road that requires a high clearance vehicle to access. If you don't have a 4x4, you'll have to walk down Dry Creek Road from the Mezcal Trailhead.
Devils Bridge is the largest natural sandstone arch located in the Sedona area of Coconino National Forest.

Broken Arrow
The Broken Arrow Trail is one of the busiest short hikes in the area, because to its convenient location on the south side of Sedona, just off Highway 179, and its proximity to a popular jeep track.
Both routes rise gently up a large valley with colorful, jagged, eroded red cliffs and buttes on both sides, terminating at a low pass (Chicken Point) with good views south to Oak Creek Canyon and north to Sedona and the high mountains beyond.
The standard $5 Red Rock Pass is required for all parked vehicles.
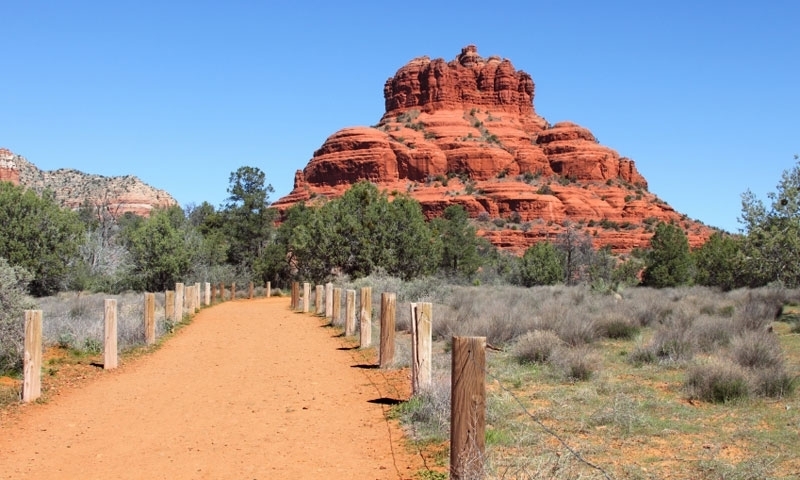
Bell Rock
One of Sedona's most well-known features is Bell Rock. Hiking up to Bell Rock is a lot of fun, which is why it's one of Sedona's most popular climbs.
The ascent begins with trail signs and wire baskets filled with boulders for the first.25 miles. The wire baskets vanish as you go further up Bell Rock, but you can continue hiking higher by figuring out your own route.
Rock scrambling up to the top levels of bell rock is part of the fun of this hike. It's entirely up to you how far you want to go. You won't be able to climb all the way to the summit of the rock, but you can get quite close.
It is quite clear how it received its name; it looks like a giant red bell melting into the landscape.

Soldiers Pass
There are a number of reasons why the Soldier Pass Trails is one of Sedona's top hikes. For one thing, it's a short and simple hike. But it also passes along some rad features like the seven sacred pools, the Devil's Kitchen Sinkhole, and if you can find it, the famous Soldier Pass Cave.
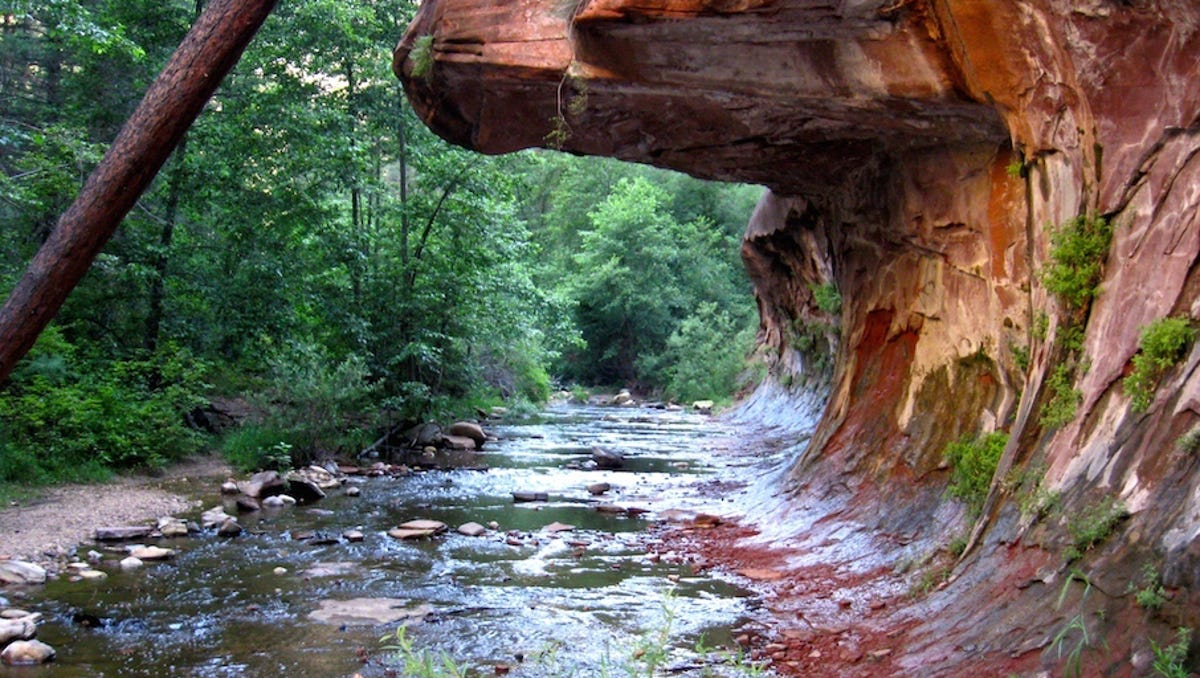
West Fork Trail
The super-easy and insanely picturesque hike follows Oak Creek. Because of its shady route and tranquility, this hike in Sedona is unlike any other in the area.
You stroll along the creek for virtually the entire hike and get to see how the creek chiseled away the canyon walls. It resembles the subway in Zion National Park in a lot of ways.
This is a nice hike to do on a hot day in Sedona because you're in the shade of the trees.
What to Bring on your Top 6 Hikes in Sedona Adventures
- Footwear – Chacos
- Hydration – Camelback Hydration Backpack (Bring lots of water!)
- Camera – Canon EOS R
- UV - Sunglasses / Hat / Sunscreen
Share these Top 6 hikes in Sedona on Pinterest


Echo Canyon Trail on Camelback Mountain - What You Need to Know
Echo Canyon Trail on Camelback Mountain is one of the most popular hikes to do around Scottsdale and Phoenix, AZ. Here's Why!
Hike Echo Canyon Trail - Camelback Mountain
Camelback Mountain via Echo Canyon Trail is a 2.5 mile heavily trafficked out and back trail located near Scottsdale, Arizona that offers scenic views and is rated as difficult.
Getting There:
The parking lot is off Squaw Peak drive and leads to many more hiking trails in the Phoenix Mountain Preserve. The route starts on a short connector trail and then goes straight up to the summit.
The Trail:
The trail begins from the top of the parking lot, just beyond the restrooms and benches. An easy incline at first, the path passes a smaller rock formation, then approaches the base of a larger one known as the “Praying Monk”. If you look up from the Echo Canyon trail, you may see roped-up rock climbers scaling the face above you. And if you turn around and look the other way, you can see Piestewa Peak rising up behind you.
At around 0.4 miles the trail picks up with a set of wooden stairs. Soon after this, the route becomes so steep that there are metal railings anchored into the mountain to safely assist hikers in this potentially dicey situation.
At first, a metal pole will only be on your left-hand side but soon after there will be a pole in the middle and then to the right. From my experience, the pole on your left (as you are going up) is the best pole to hang onto. There are carved out foot notches in the rock that will help your feet up. The other poles will not have these little notches, so it feels a little uncertain to walk on since it’s so steep and smooth you can easily slide on it, even with good gripping shoes.
Once at the top of this steep section, you might think the tough part is over — but it’s only just begun! The trail now will require scrambling pretty much up all the way to the top. For this reason, you might want to consider bringing gloves along, although it isn’t completely necessary.
There are steep piles of bigger rocks that you will need to hike up. At times, it feels as if you’re back in that aquarium climbing up big pieces of gravel to get the relief of freedom up at the top. There is a small dip just before the one mile mark, then the trail rises steady and even steeper as it nears the summit. It’s easy to get a little off track in the last section – just keep looking for the path of least resistance.
The trail makes one final bend to the left as it leads you to the top! Take in the awesome 360-degree view of the valley, with Piestewa close by to the northwest. But make sure you pay attention to which way you came up – it’s easy to mistakenly go down the wrong trail. When you are done soaking in the views, return down the way you came up.
Echo Canyon Trail Map:
Nearby Adventures
Hike Pinnacle Peak
Mountain Bike Pemberton Trail
SHARE THESE TOP 5 HIKES IN PHOENIX ON PINTEREST
Camelback Mountain Hiking Resources
Overview of the Camelback Mountain Trails from Phoenix Parks and Recreation. Best resource for the latest information on closures, maintenance and other official notices.
Please #RecreateResponsibly and Leave No Trace
The 5 Best Hikes In and Around Phoenix
Here is a list of the best 5 hikes in and around Phoenix. Everything from a simple walking route to a heart-pumping hike up a mountain.
Here is my list of the Top 5 hikes in Phoenix. Beautiful hikes can be found all throughout Phoenix. You don't even have to leave the city boundaries!
Within a short drive of the Greater Phoenix area, there is a terrific trail for every skill level.
On my list of the top 5 hikes in Phoenix, you'll find everything from a simple walking route to a heart-pumping hike up a mountain.
Check out this Quick Web Story!
Top 5 Hikes in Phoenix - Let's Get Into it
Echo Canyon Summit
Echo Canyon Summit
Echo Canyon - Camelback Mountain
This short yet picturesque hike in Scottsdale is the most well-known and popular hike in the Phoenix area.
This trail is an intense and difficult anaerobic hike the entire 1.23 miles to the summit. It ascends approximately 1,280 ft, from 1,424 ft above sea level to 2,704 ft.
Bring lots of water, and if you're not a seasoned hiker, enlist the help of a local guide or a buddy to show you the ropes. The trek will take around 2 to 3 hours round trip.
Only experienced hikers or those in the company of someone who understands what to anticipate should undertake this trip. It's steep, with portions where you'll have to rely on your hands and feet. On the harder/steeper sections, there are handrails. These help many hikers but also add points of congestion.
The initial part of the trek is a moderate ascent to a saddle. The next section is a hard ascent up rocks that follows a wall up a series of stairs. To aid hikers, a handrail runs along the length of this stretch.
The Echo Trail is regarded as extremely tough. This hike has the highest number of rescues and deaths per year of any hike in a major urban region in the United States.
Top 5 Hikes in Phoenix - Piestewa Peak
Summit Trail - Piestewa Peak
Piestewa Peak Park has a variety of trails that range from simple to brutal. Serious hikers go for the Summit Trail. It is considered the cousin to Echo Canyon on Camelback, though they have a very different "feel" to the trail and, obviously, views.
Piestewa Peak is nearly in the heart of Phoenix, and it can be viewed from almost anywhere in the city. As a result, the path to the top is quite popular, so expect large crowds of walkers, hikers, and trail runners.
You'll be rewarded with views of Camelback, the Superstitions, the White Tanks Mountains, and the red slopes of Papago Park.
The route is well-designed, with handrails in certain places to assist with the numerous stairwells. On the way back, you should expect a sequence of knee-jarring steps down.
Parking for the trails is limited. Arrive early in the day. At the trailhead, there are restrooms and drinking fountains.
Top 5 Hikes in Phoenix - Siphon Draw to Flatiron
Siphon Draw Trail - Superstition Mountains
The Flatiron Summit via Siphon Draw is recommended for experienced hikers in good physical condition who want a challenge.
If you're thinking about taking on this hike, keep in mind that it's a 6.2-mile round-trip adventure with nearly 3,000-foot elevation gain, and much of it is in direct sunlight. The roundtrip usually takes 4-6 hours.
At the summit, you'll be rewarded with breathtaking 360-degree vistas and a profound sense of accomplishment.
White and blue dots indicate the main trail. The path is rough in places, with gravel, and some boulder climbing is necessary.
Lost Dutchman State Park is home to the Flat Iron Summit Trail. There is a daily charge to park here. Camping in the park is a practical alternative if you want to get an early start on this adventure.
Pinnacle Peak - McDowell Mountains
This hike is one of Scottsdale's most popular and busiest. It is filled with beautiful surroundings and relative simplicity. No list of the Top 5 hikes in Phoenix could exist without it!
A slow rise up a boulder-covered ridge studded with Sonoran Desert vegetation, marked by tiny signposts, leads to a breathtaking perspective of the surrounding region. Tom's Thumb, Troon North Golf Club, and the Four Seasons Resort can be seen from the summit.
This is a 3.5-mile out-and-back trek with a 1,300-foot elevation gain. This path attracts a diverse range of hikers, from fully equipped trail runners to those out for a stroll in their flip flops, and even some pausing to practice yoga postures along the way. Depending on the season, you may see some rock climbers attempting to reach the summit.
This trek has almost no shade. It is best to start early in the day to avoid the heat and congestion.
A fully-staffed tourist center with washrooms and information is located at the base.
Top 5 Hikes in Phoenix - Tom's Thumb Trail in the McDowell Mountains
Tom's Thumb Trail - McDowell Mountains
The Tom's Thumb Trailhead is used by a wide range of people as a starting point for their adventures. Explorers enjoy the aerobic exercise that comes with climbing over 1,300 feet in just 2.4 miles (each way). They're rewarded with panoramic city views at the summit, which give them well-deserved bragging rights for months.
This route is 4.9 miles long and has an elevation gain of around 1,374 feet.
Set out early in the morning to beat the heat. A facility with bathrooms, a big covered outdoor space, and information is located at the trailhead.
What to Bring on your Top 5 Hikes in Phoenix Adventures
Footwear – Chacos
Hydration – Camelback Hydration Backpack (Bring lots of water!)
Camera – Canon EOS R
UV - Sunglasses / Hat / Sunscreen (there is no shade on this entire trail for the majority of the day)
NEARBY ADVENTURES
Hike Pinnacle Peak
Mountain Bike Pemberton Trail
Share these Top 5 hikes in Phoenix on Pinterest
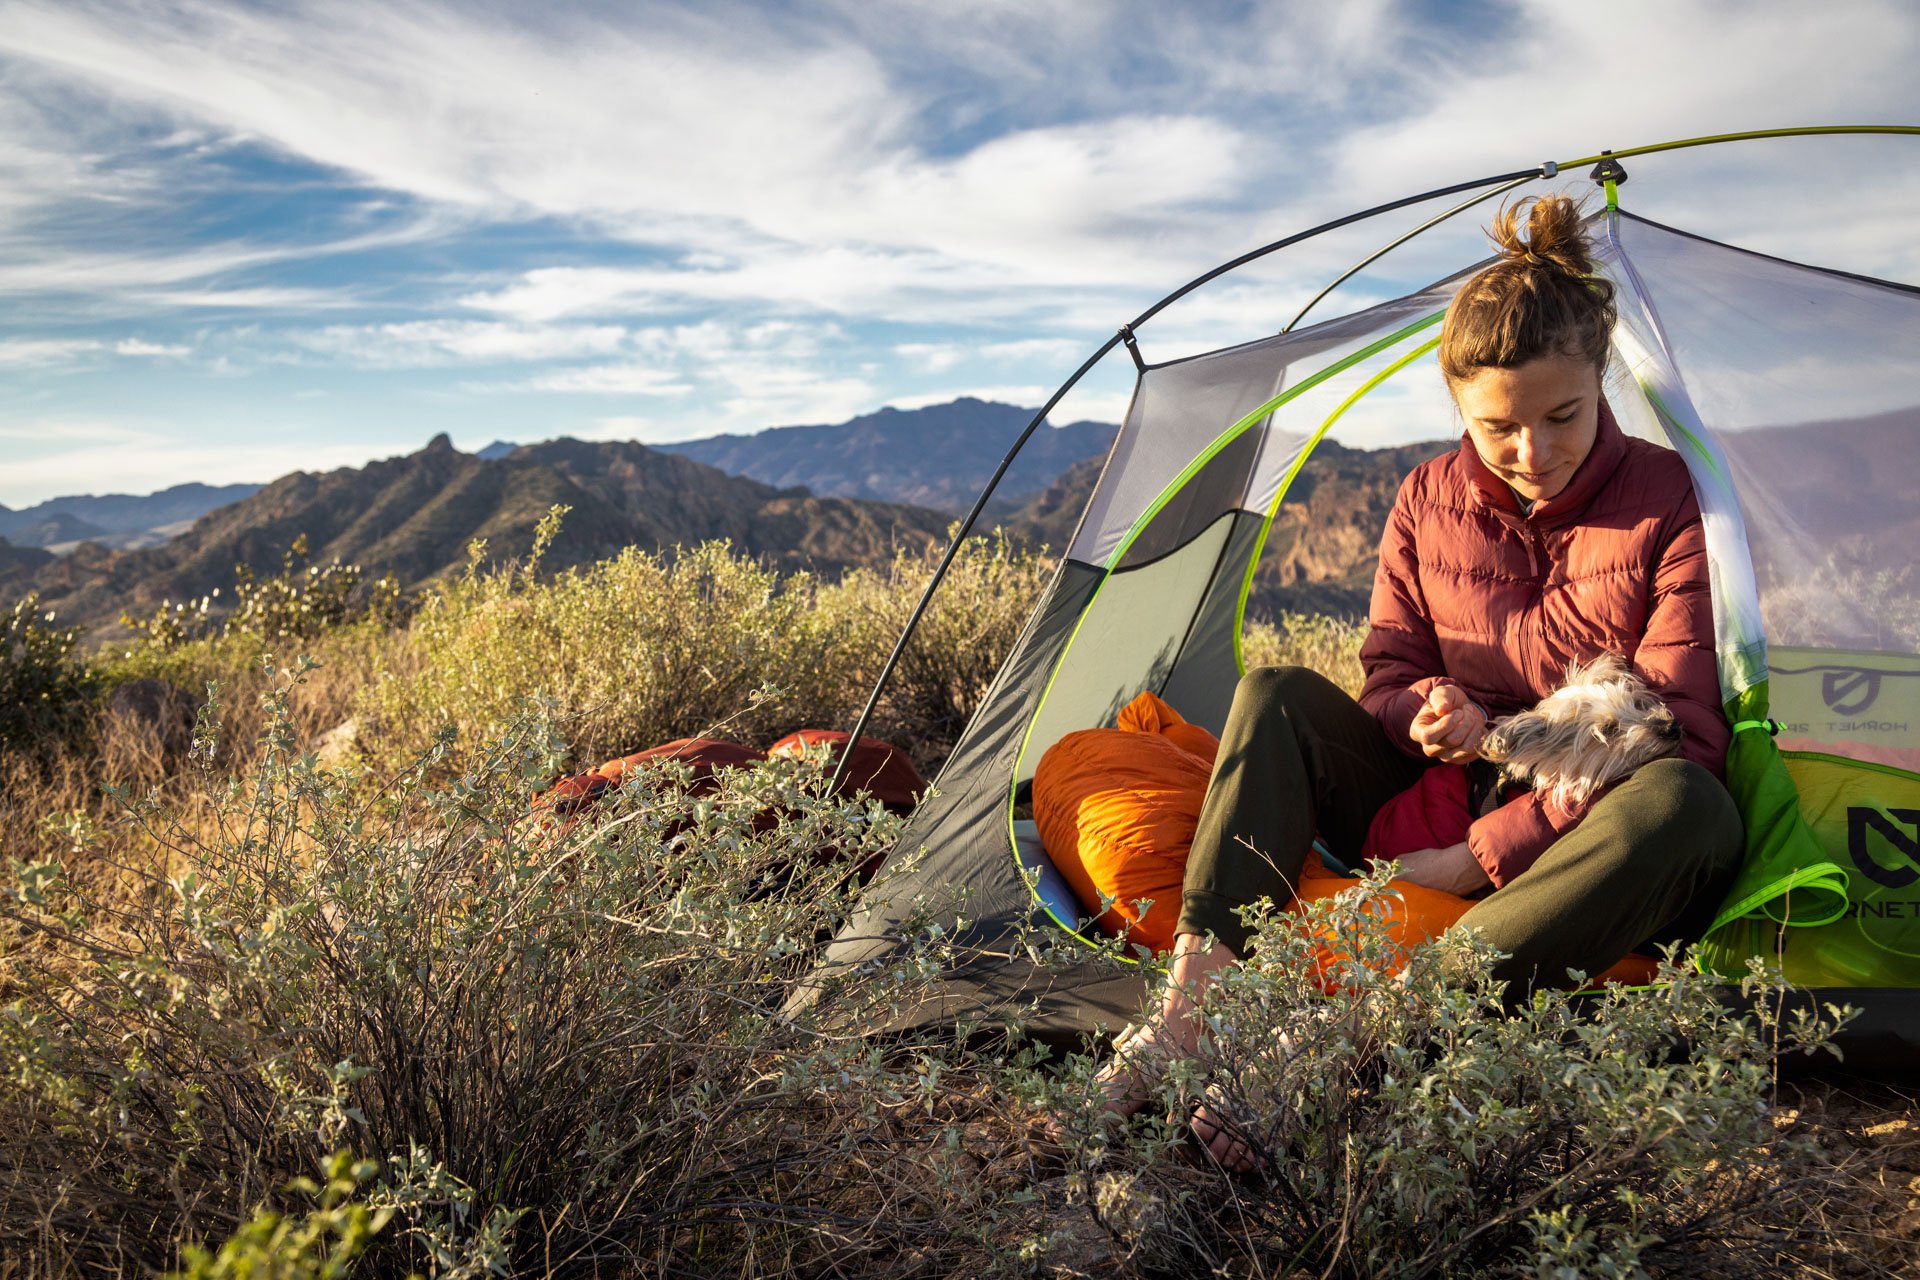
OUTDOOR
ADVENTURE
Featured Posts
HIKING
|
FLY FISHING
|
CAMPING
|
BACKPACKING
|
GEAR REVIEWS
|
HIKING | FLY FISHING | CAMPING | BACKPACKING | GEAR REVIEWS |
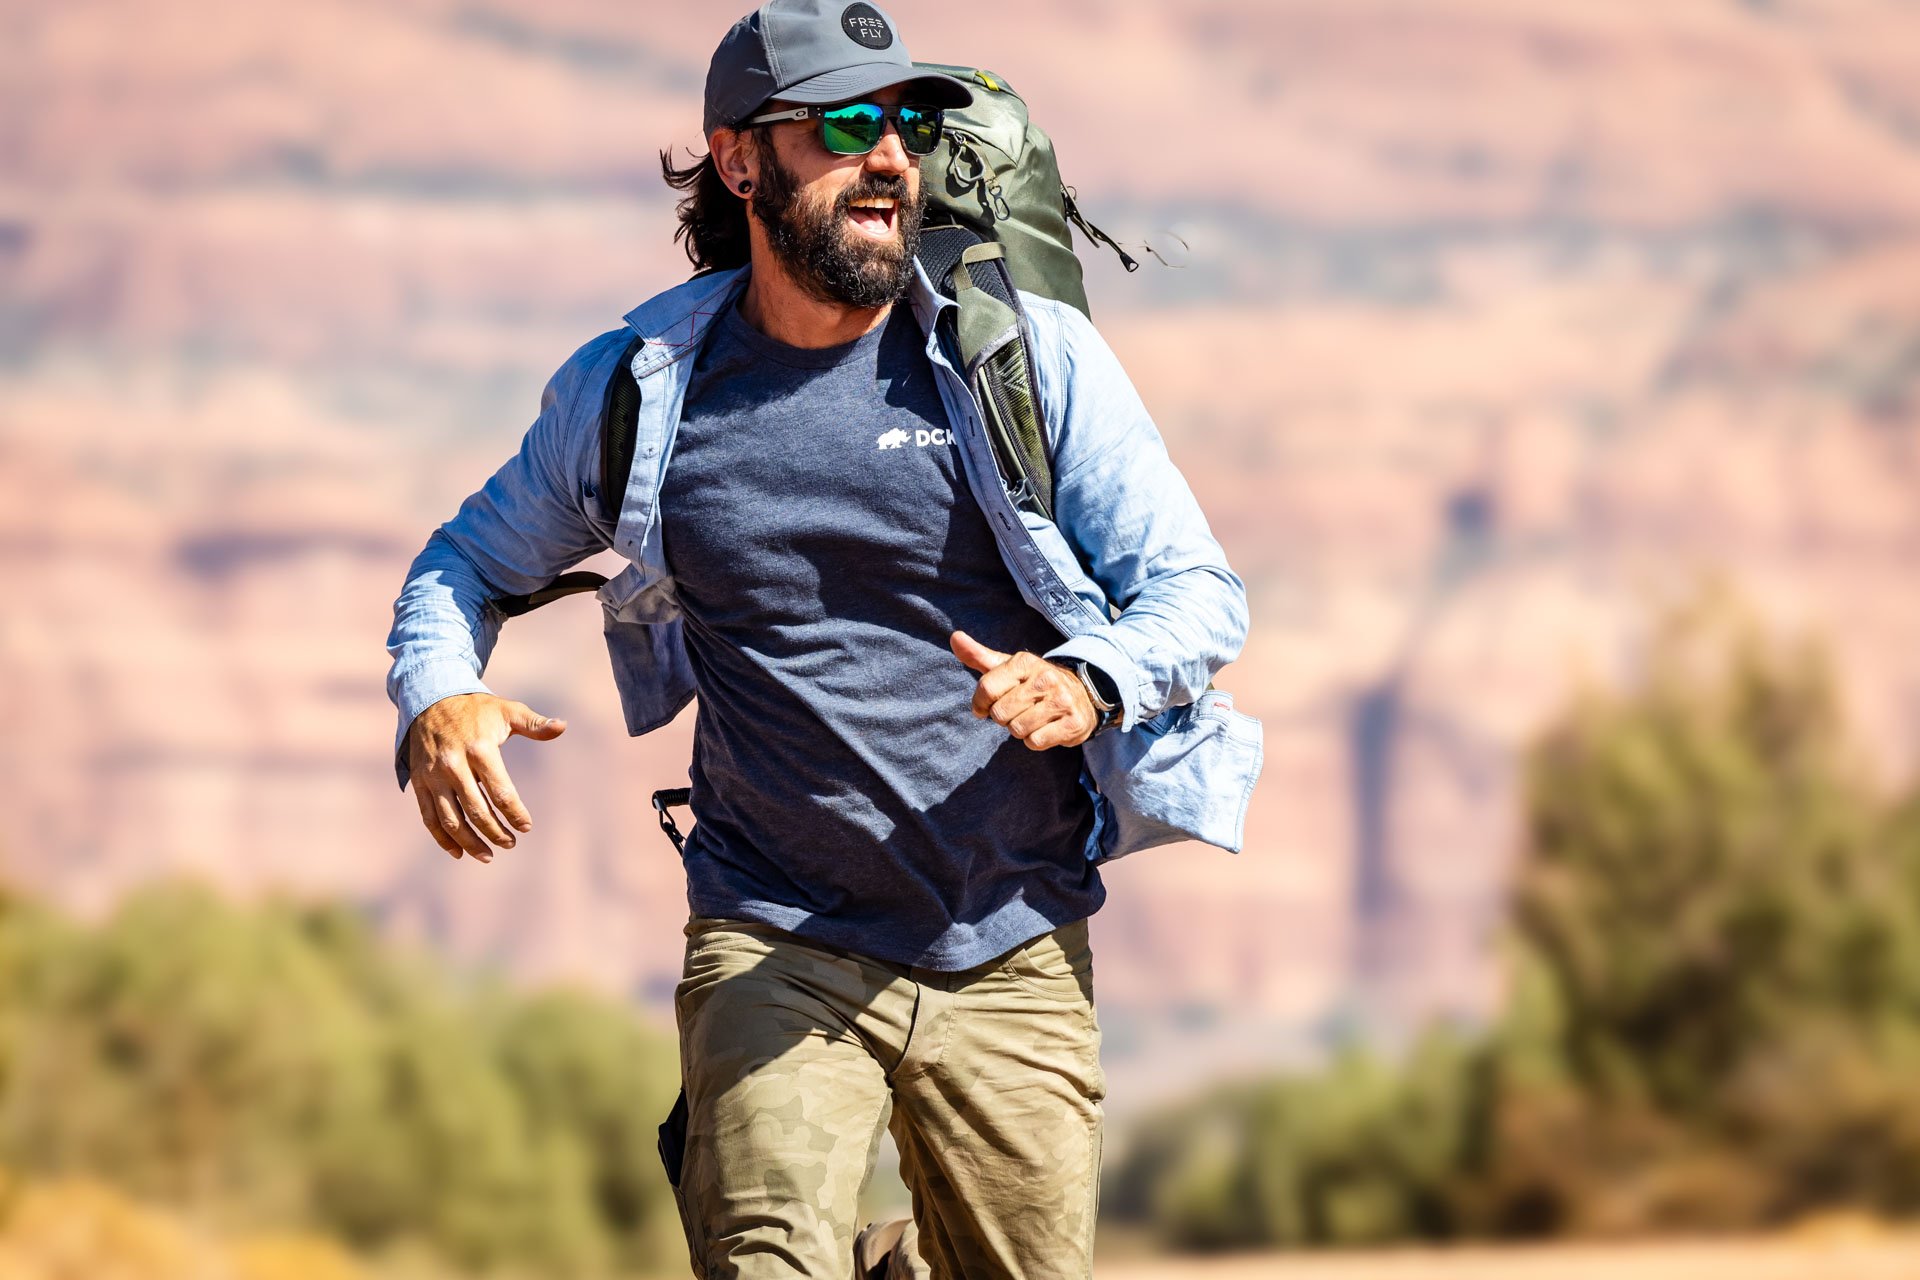
Best of
Top Clothing Brands of 2023
Discover unbeatable deals on Patagonia winter essentials at the REI Outlet sale! Get up to 40% off on jackets, parkas, and more.
Subscribe to Our Newsletter
Sign up with your email address to receive news and updates.
Get in touch.
Just like in a hardcore round of intense pickleball, communication is key! Reach out with any questions, comments, beer recommendations, inquiries, critiques and jokes.


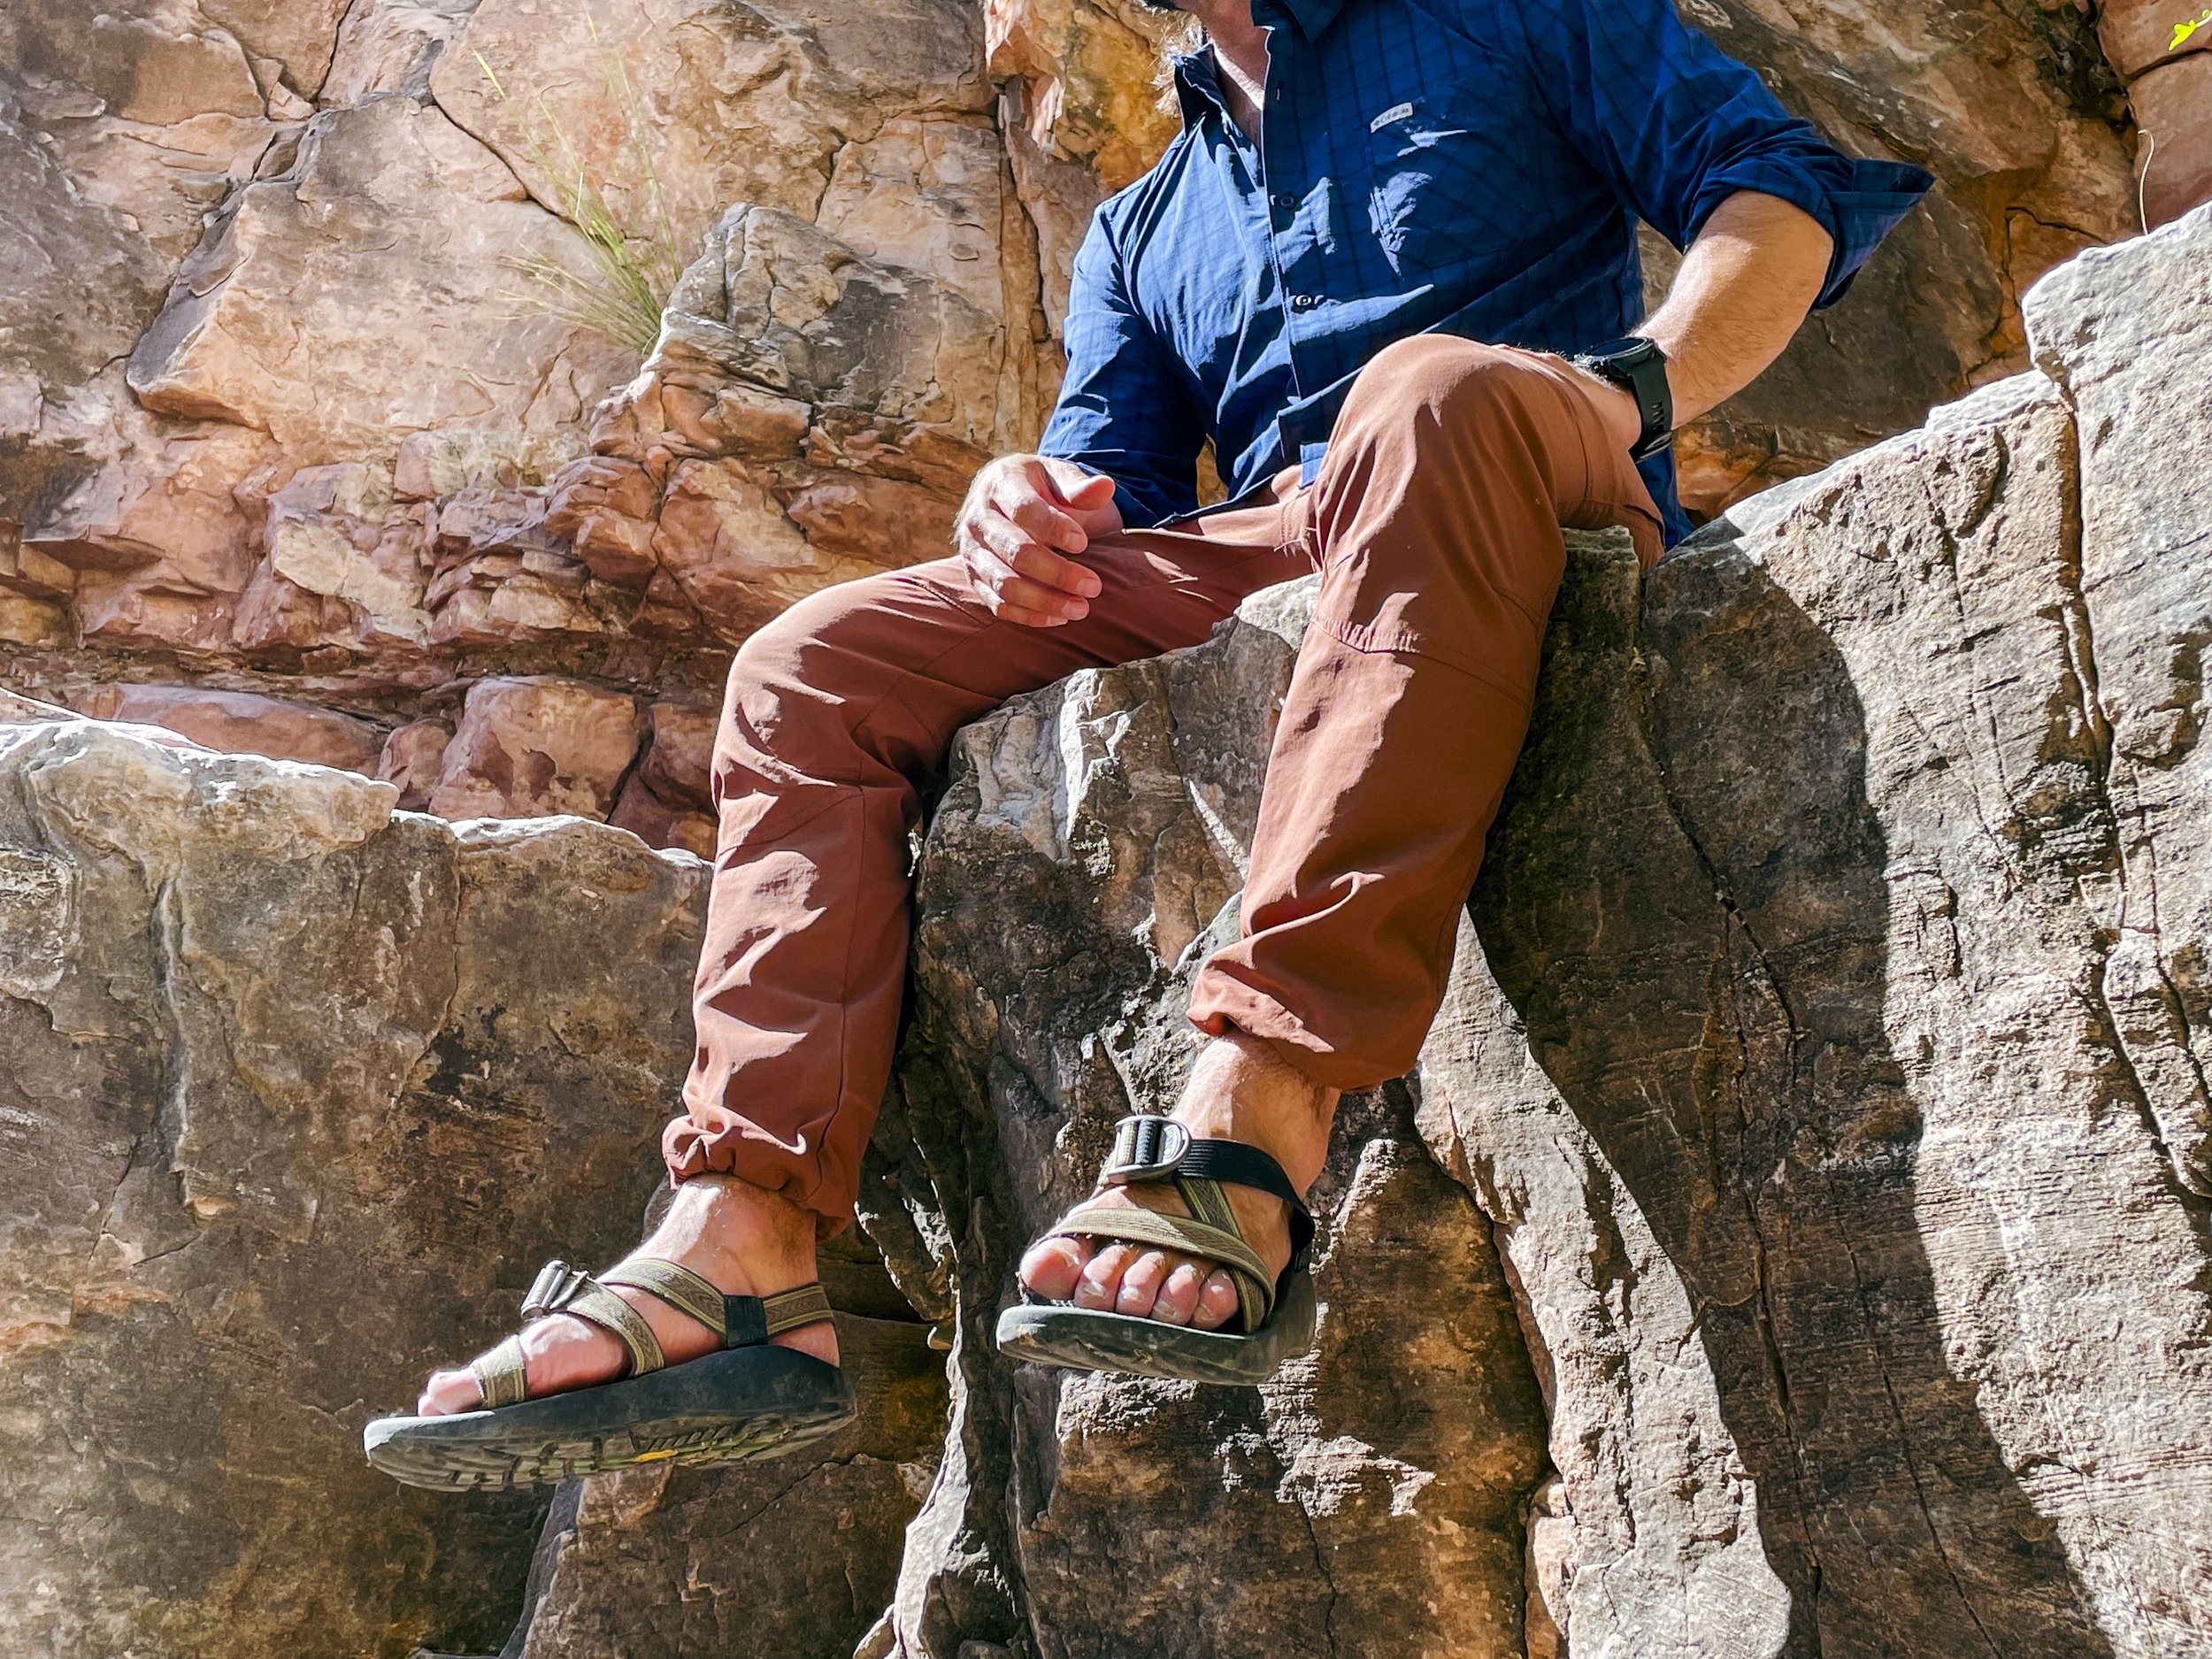


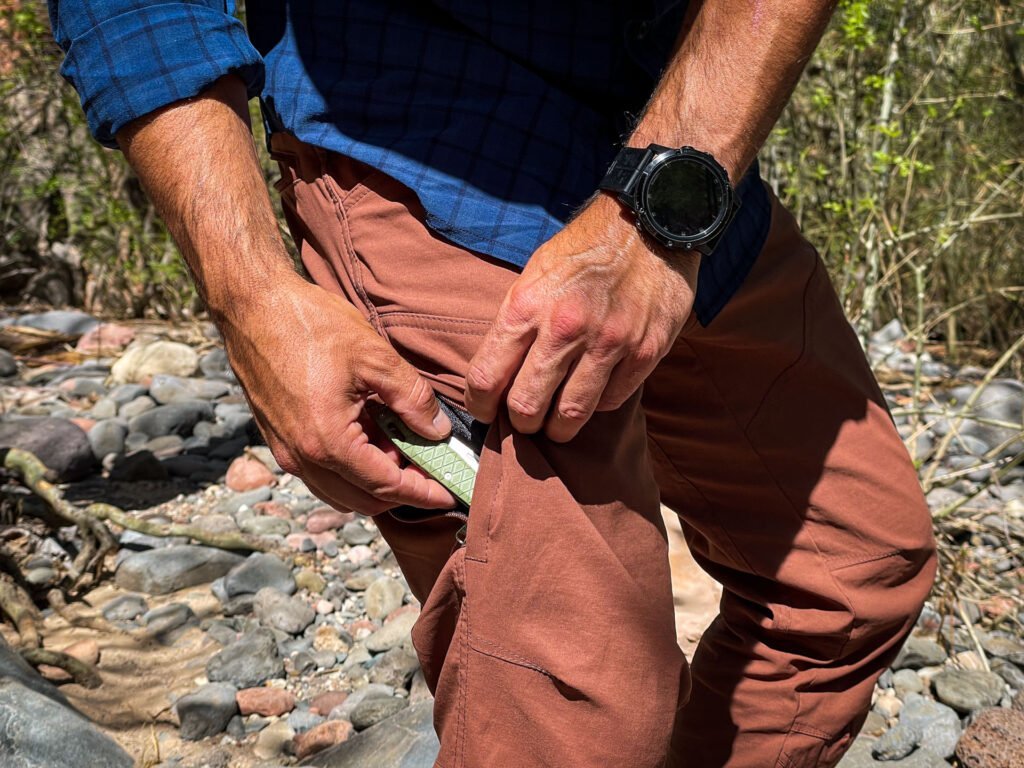
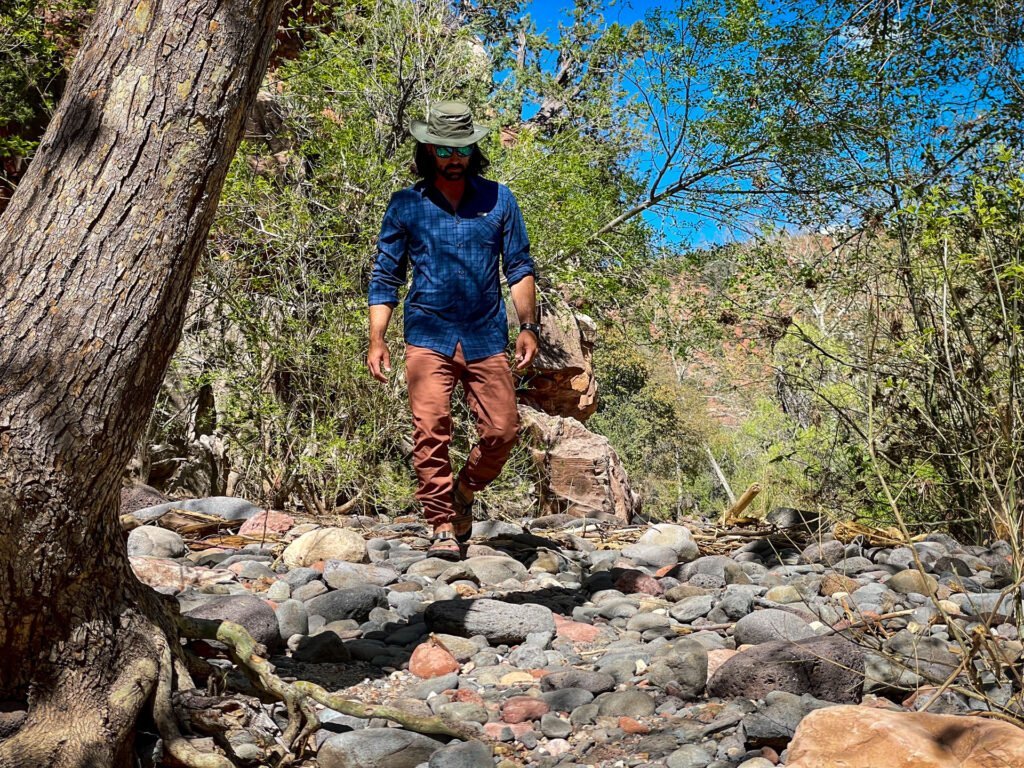


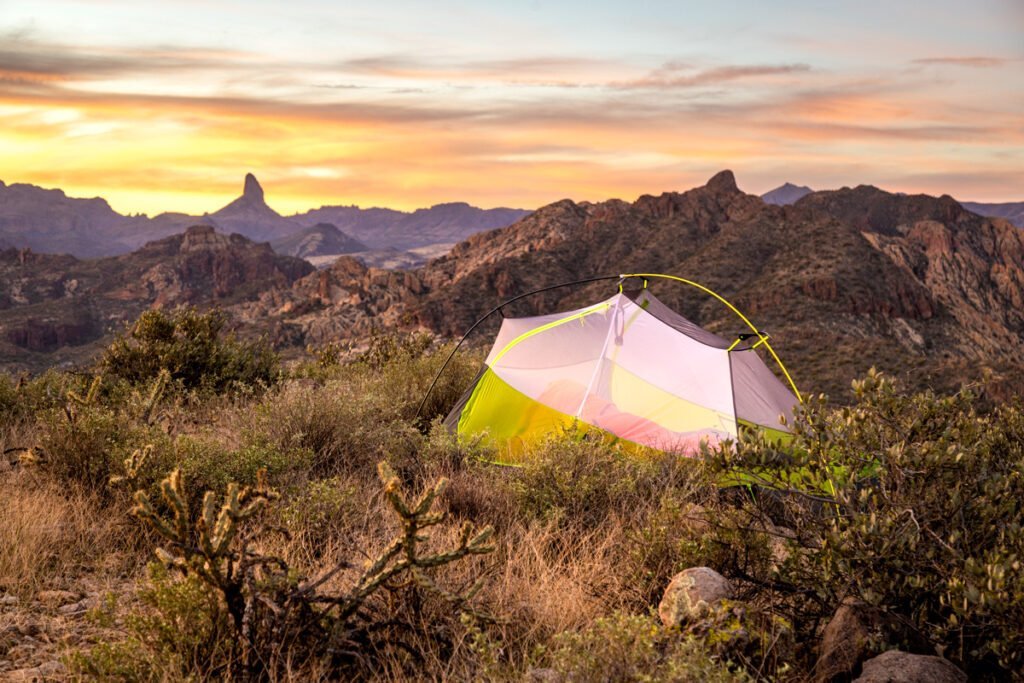


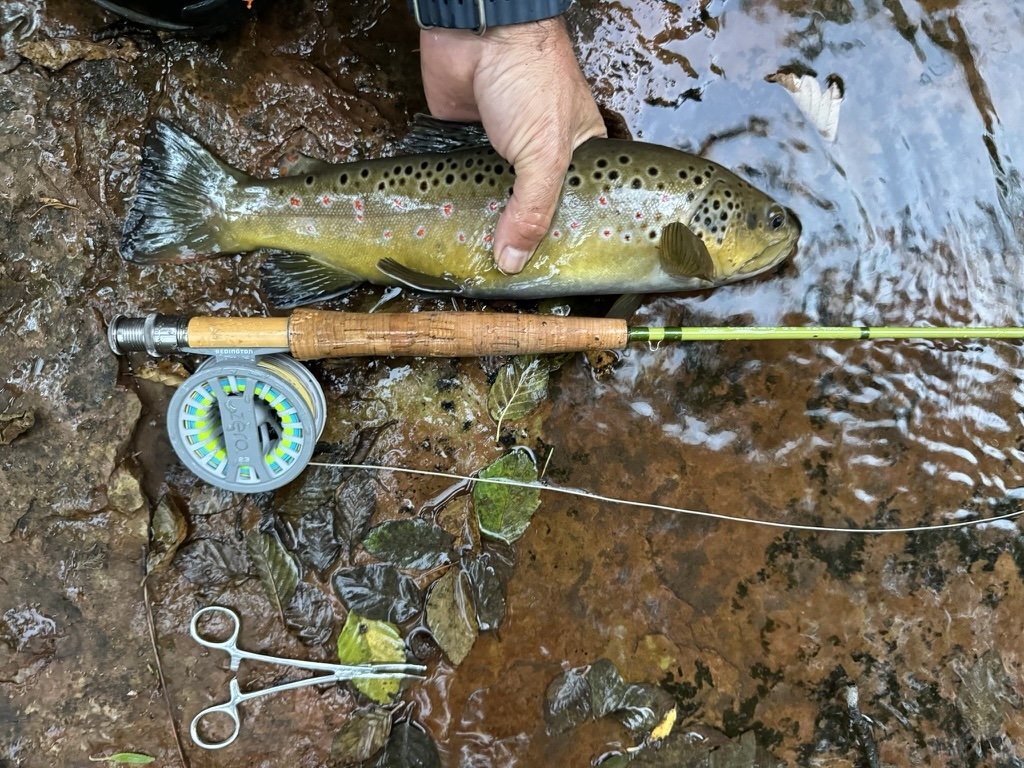

A well-equipped car camping kitchen setup makes outdoor cooking effortless. Here’s my essential gear list—powered coolers, Jetboil stoves, storage solutions, and more—to help you cook like a pro on the road.