the feed
Nemo Dragonfly Osmo 2P Bikepack Tent - Lightweight & Durable
The Nemo Dragonfly Osmo 2P tent is light and durable, with excellent ventilation and waterproof protection - perfect for bikepacking.
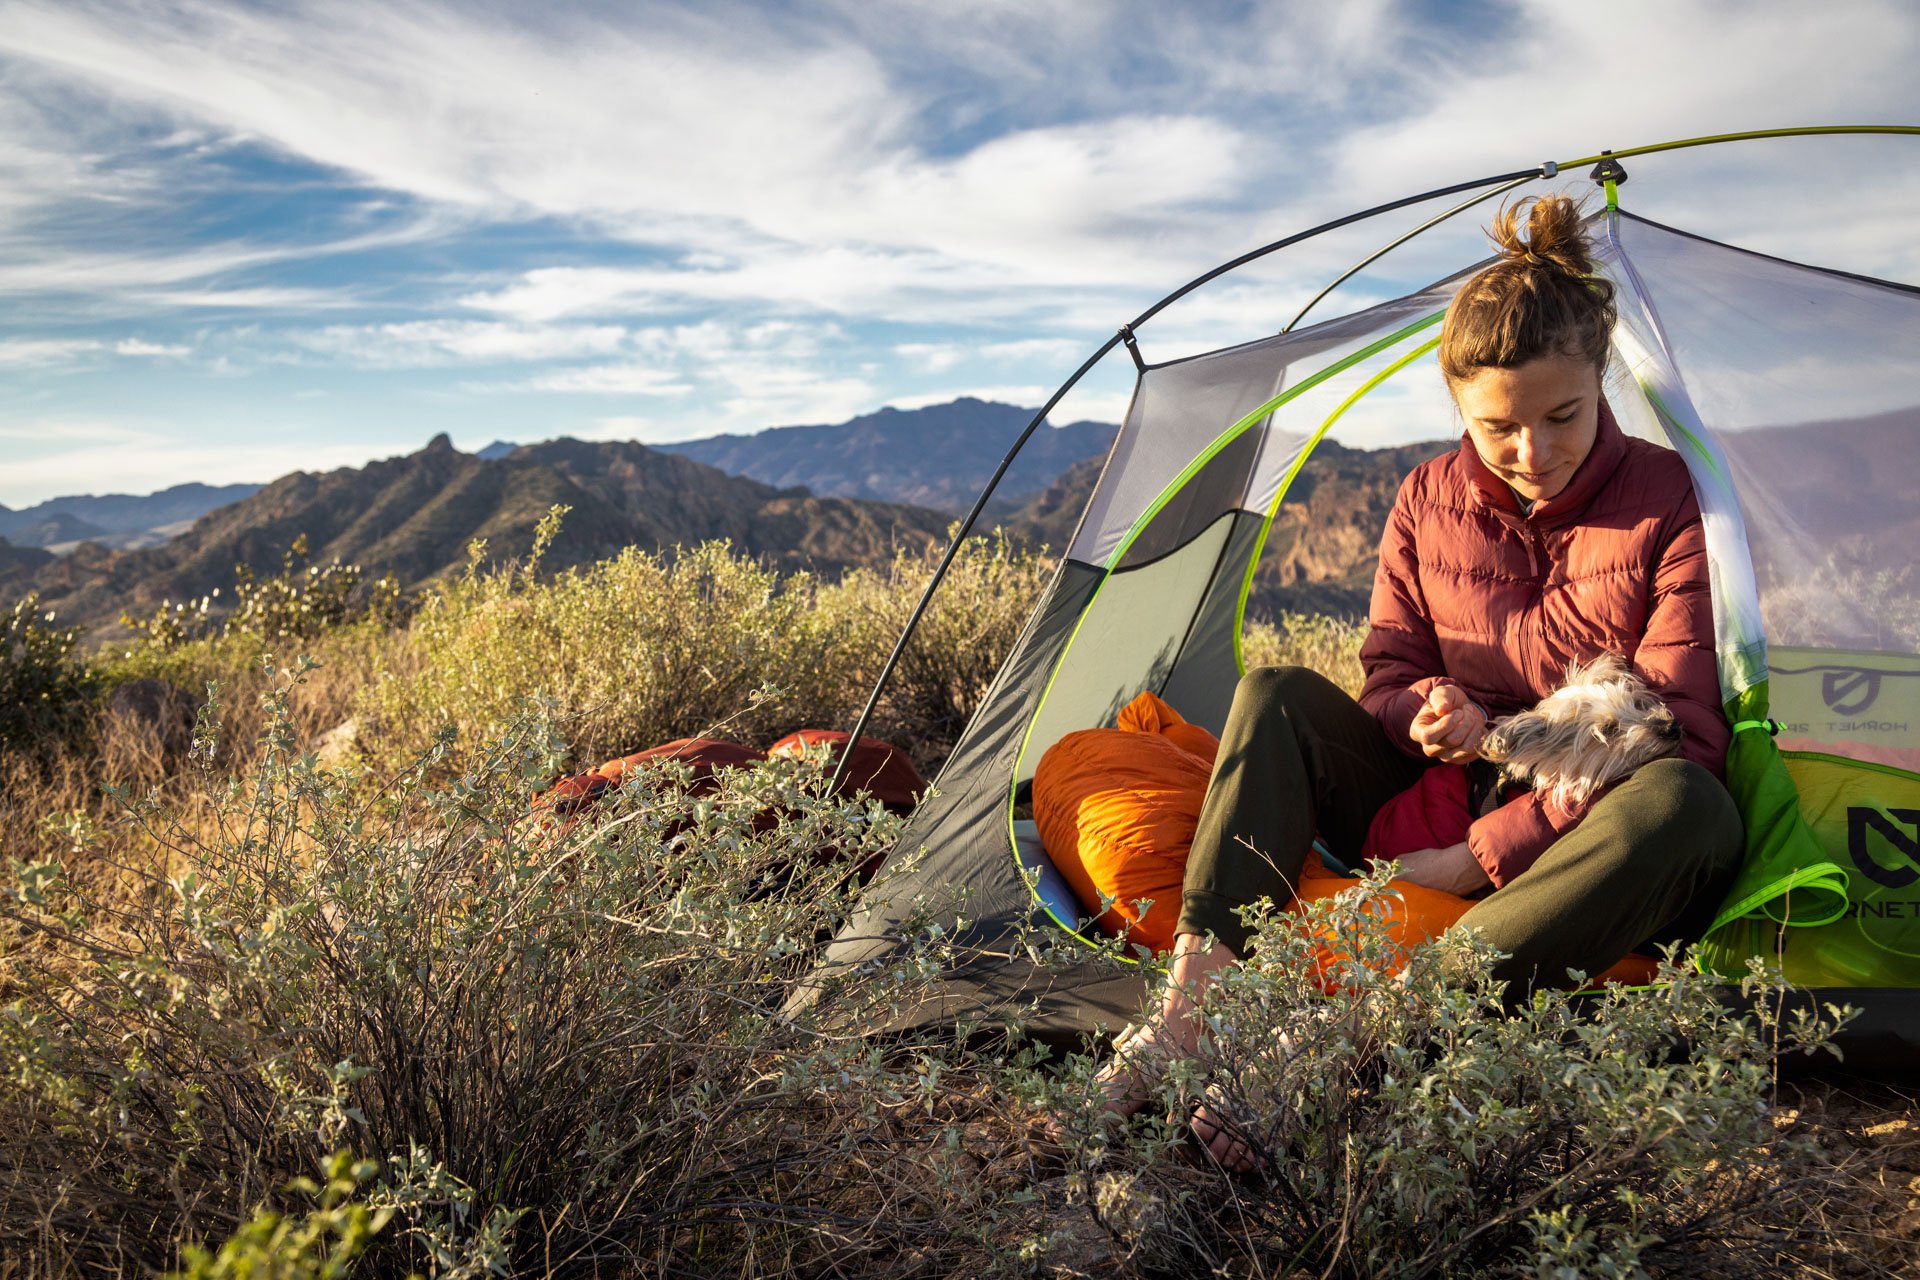
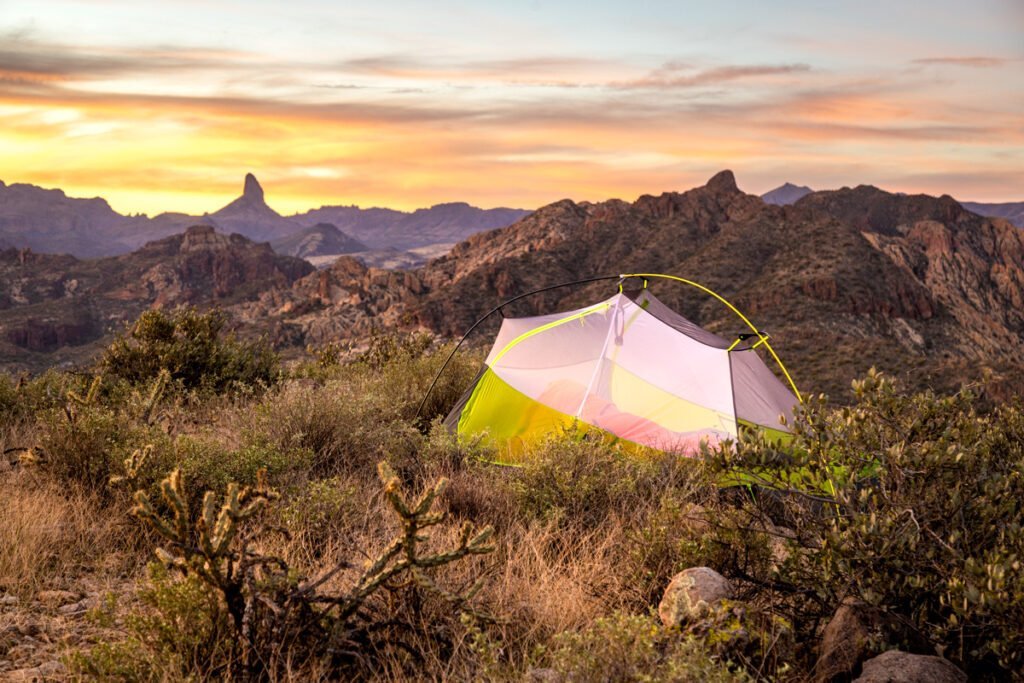
The Nemo Dragonfly Osmo 2P Bikepack Tent is an awesome option for those gnarly souls getting into bikepacking. But, let me just throw this out there - this tent is also an excellent choice for backpackers. I will get into the details more as we go. It is lightweight, weighing in at 4.1 pounds, made with durable, high-quality materials and loaded with weatherproof features to ensure comfort on the trails.
Features of the Nemo Dragonfly Osmo 2P Bikepack Tent:
(Almost) Ultralight: With a trail weight of 4.1 pounds, the tent is lightweight, making it light enough to carry along on bikepacking and backpacking trips, but I wouldn't consider that to be ultralight. Especially if you pin it up against the Hornet 2P. (More on that later)
Spacious Interior: Ample space is available to fit two people, as well as additional gear storage. Especially if you take advantage of the vestibule areas, clever pocket designs and use the gear tray.
Simple Setup: With color-coded poles and grommets, the tent can be assembled with ease even in low-light conditions.
Durability: Crafted with 15D ripstop nylon and floor fabric, it is sure to remain secure against wear and tear as well as any potential damage from weather conditions. If you plan on camping in wet weather or on rougher terrain (read: the desert), you should definitely pick up the footprint.
Ventilation: For comfortable temperatures in warmer weather, it has large doors and mesh panels to guarantee great ventilation. The Dragongfly tent body uses a white mesh for privacy around the sides, and black mesh to make sure you can see the night star up above.
Bikepacker-Friendly: Its compact design fits easily in a pannier or bikepacking bag, perfect for the avid cyclist. There are built-in straps on the carrying bag giving options for varying ways of mounting it to your bike.
Accessories: The Nightlight Pocket allows your headlamp to illuminate the inside of your tent, diminishing the presence of blue light to create a soft and consistent ambiance. Equip your vestibule with Landing Zone's waterproof, removable storage tub for extra protection of your gear from dirt and moisture.
Sustainable: This tent is created with recycled materials, making it an eco-friendly choice for outdoor enthusiasts. Win for Mother Earth!
Specifications of the Nemo Dragonfly Osmo 2P Bikepack Tent:
The Nemo Dragonfly Osmo 2P Bikepack Tent is an awesome choice for bikepackers in search of a lightweight, long-lasting tent that is able to endure any kind of weather. It is designed to be set up quickly and its sustainable materials make it a sensible choice for individuals seeking to make minimal environmental impact while enjoying the great outdoors. It's loaded with features, super easy to set up, has some special design features for mounting to a bike, a low profile colorway and a viable option for backpackers as well!
View through the door of Nemo Dragonfly Bikepack Osmo 2P
How Does it Stack up Against the Nemo Hornet 2P
If you've been following along on this site, you know that I am a huge fan of the Hornet 2P. I have used that tent more than any other tent I have ever owned, in many different weather conditions and climates. It's the jam. I will be honest, the first time I set up the Osmo, I knew that this was likely going to replace my Hornet. Why? It's completely freestanding which is something that I love, especially living in the desert where oftentimes the ground is incredibly hard.
The 2 tents are very similar in size and shape, but the Osmo is built to be a bit more durable and easier to setup, breakdown, and carry. However, it comes at the price of weight - not much, but noticeably heavier. So, if you are a stickler for keeping those grams down, the Hornet would be better suited for you.
I built this comparison table so it’s easy to see the differences side by side. I put the spec in BOLD when it is the winner. It’s a pretty tight battle, so choosing which tent works best for each person is going to be a personal preference.
Some Not So Basic Car Camping Tips
The weekend is coming and you have an epic car camping trip lined up. Check out these car camping tips to make sure it's the best one yet!
I love car camping. You get to bring all the luxuries and still get to enjoy the best of nature. You know what I don't love - the packing, forgetting things, FOMO. We put together this list compiled of mistakes we have made in the past so that you don't have to go through the same thing. After all, we are heading out to the wilderness for some peace, quiet and relaxation, right?

Before you hit the road
1. Fill the tank
Don’t be that guy. There’s nothing worse than getting out on the Forest Service roads and watching the ominous gas light turn on. Start your trip off with a full tank of gas. You may also want to top it off before heading into the wilderness. Stay stress free, my friends. I carry a Rotopax 2 gallon tank that I fill with extra fuel on longer trips, but my Tacoma doesn’t get the best mpg.
2. Bring Lots of Water
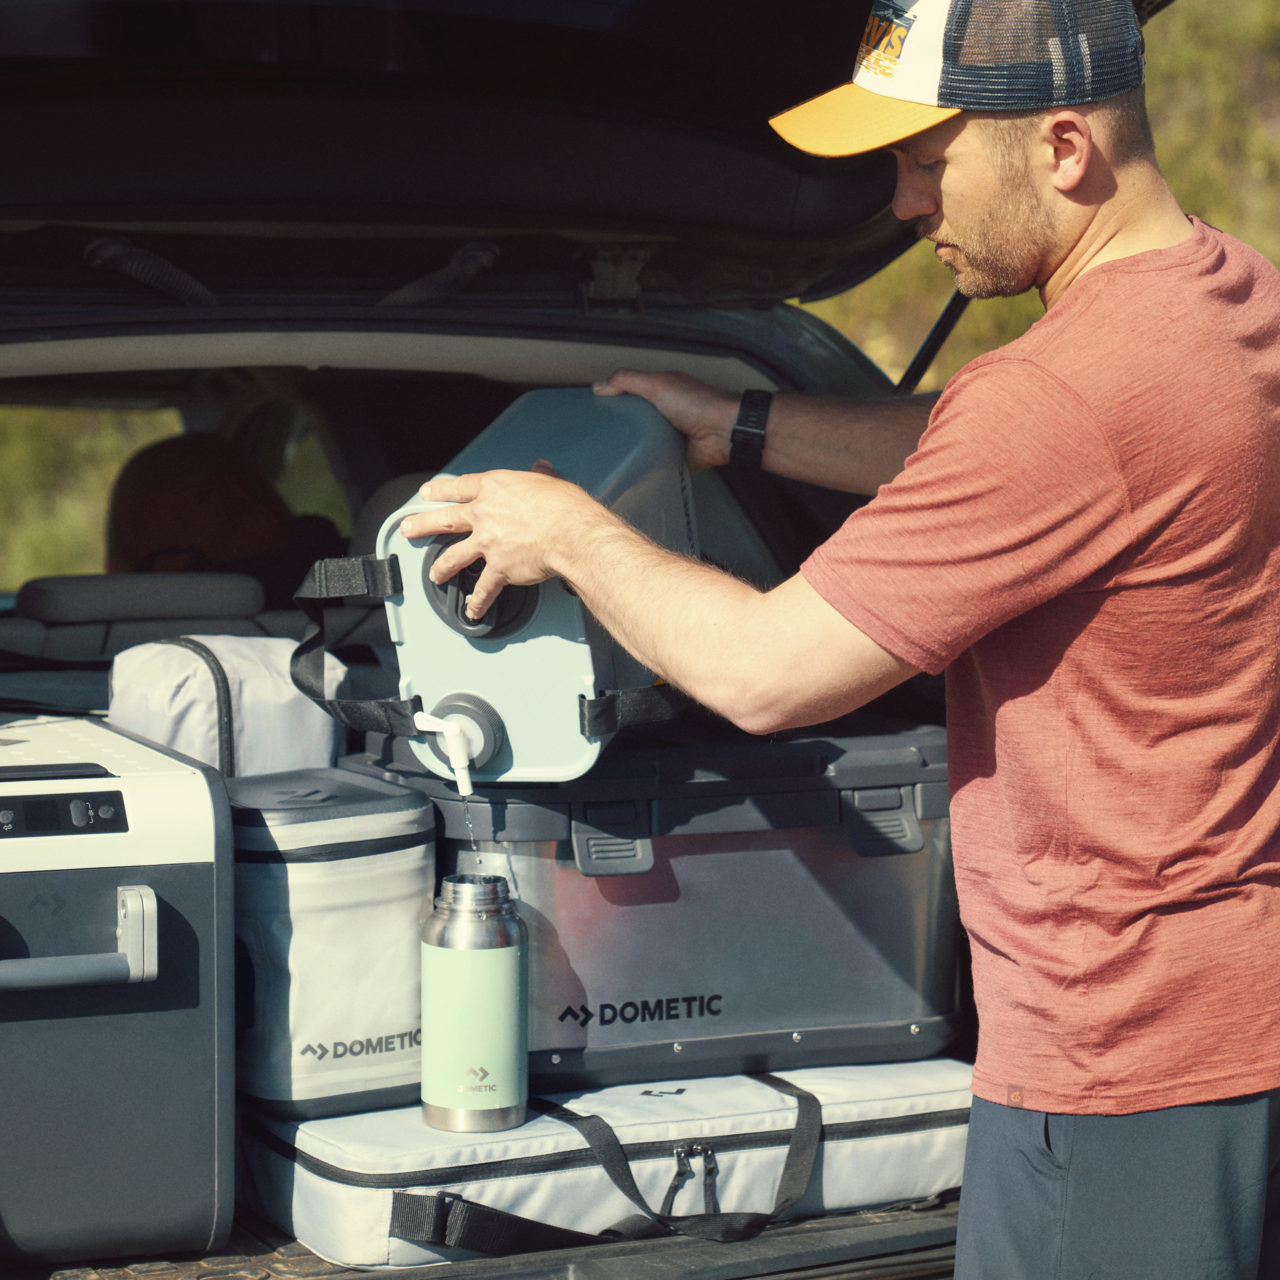
Start your weekend with as many full water bottles and bladders as possible. Weight isn’t an issue since you won’t be lugging it around on your back, and having lots of water gives you peace of mind. Use every gas station, visitor center and restroom as an opportunity to top off. Part of my road-tripping kit is a Dometic Go Hydration Water Jug paired with their Faucet. At camp, this also serves as my Hand and dishwashing station.
3. Sleep like a king or Queen
Don’t skimp on the luxuries. You’re not backpacking here! Bring a thick air mattress, or a heated blanket, and maybe your favorite pillow. Bust out your favorite book before bedtime. Heck, hang an iPad and snooze off to an episode of Ozark.

How to Pick Out the Perfect Campsite When Car Camping
4. Don’t Limit Yourself to Paid Campgrounds
The states are loaded with beautiful free campsites - you just need know where to look. One of the beauties of public land is that you can camp for free, right near your car. Follow these guidelines to choose a site, and be sure to check with the local land management agency for specific regulations.
5. Check if you need a Fire Permit
If you think you’ll want to make a fire, get a permit in advance from your local land management agency. Just because the campsite has a fire pit doesn’t necessarily mean fires are allowed. Know how to properly start, maintain and make sure your campfire is dead out.

When you get to your perfect campsite
6. Save your car battery
You’ll probably be opening the doors frequently, so save your battery by keeping the indoor lights in the “permanently off” position, and carry jumper cables in case of a dead battery. I always have a car jumper kit stowed away. This thing has saved my butt more times than I would like to admit.
7. Don’t make your campsite a yard sale
No need to unpack every last item: leave some things, like your daypack, extra food, and extra clothes, in the car. This helps you stay organized and ensures you have some reserve supplies in the rare event that critters steal your food or weather jacks up some of your gear.

Car Camping Tips for Setting Up Camp
8. Pick a Safe Spot for Your Tent
Scan the site for dead or overhanging branches and trees - you don’t want to pitch your tent underneath these things. Set up your tent in a flat, well-drained area. Bonus points if you can have your opening facing some epic scenery. Even though many tents have 2 vestibules, I usually only use one side to minimize the chance of debris or rain getting inside the tent.
9. Be The camp chef
Find a flat, sheltered spot 150 feet from your tent to pitch a tarp or canopy like the Kelly blah (if you’re expecting rain) and set up your stove. I set my kitchen under my FRO awning up against the truck. Use a proper kitchen table, chill your beer or wine in the stream (check alcohol restrictions for the land management agency), and get ready for a gourmet dinner.

Some Bomb Car Camping Tips
10. Don’t be a Litterbug
It’s important to practice Leave No Trace (LNT) by packing out all of your garbage. we started using the Litter Gitter by Kelty which helps to stay clean and organized as well as cutting down on tic garbage bags. If you’re in a place with access to waste bins, like trailheads or visitor centers, take the opportunity to chuck some in here. This will keep your car from getting stanky.
11. Store Food in the Car
Storing food and cooking equipment in the car prevents hungry critters from setting up shop on your site. Bring a cooler and sealed containers for opened foods: this keeps them fresh and lowers the stink factor. We have started using reusable storage bags and food storage containers by hydra flask. They help keep the food fresh, are super durable and come in some pimp colors for photos. If you really want to go all in, check out a portable camp freezer like the Dometic CFX45. We are big fans of outdoor cooking and having one of these is a game changer over using a traditional cooler. It is way cleaner, and cheaper in the long run - plus you never have to worry about water getting into any of your foods.
12. Tetris TF out of your car
Develop a mental map of where everything is in your car. You don’t need to be overly meticulous and annoying, but using proper bins or bags goes a long way. for soft items, I use Gregory Duffel Bags like the Supply Duffel 60 or Alpaca 60. For other items, I use the Rubbermaid Action Packer bins. A lot of people swear by this REI packing cube system but I personally haven't used them yet. Because I have a pickup truck, it’s rad that these can be locked with a quick combo master lock. Starting and staying organized as you go allows you to spend more time enjoying the outdoors and less time rummaging around for that spork that you swear is under the driver’s seat, but come to think of it, it might be in the glove compartment…

Car Camping Tips for packing up your site
13. Leave it as Clean or cleaner than you found it
Pick up all trash left behind by previous hooligans (especially in the fire pit). I agree, it’s no fun, but people will sometimes just be people. if you love the outdoors, be the better person and pick up what can. I thank you on behalf of all of the a-holes.
14. Spread some love
On your way out, stop by the visitor center or ranger station to tell the staff how much you enjoyed your visit and to thank them for all the work they do to keep these areas open and accessible. To do their jobs they sacrifice a lot. a small gesture of appreciation can go a long way!
Top 10 Must-Know Tips for Campfire Safety
Top 10 Must-Know Tips for Campfire Safety that you need to know before heading out on your next camping adventure.
One of the most enjoyable parts of camping is enjoying a glowing campfire-not to mention the light and warmth it provides. Building a campfire, however, comes with a lot of responsibility. A campfire can quickly become dangerous for the people, animals, and land around it if it is not built correctly, maintained, and extinguished. Nearly 9 out of 10 wildfires in the United States are started by people. Campfires can be enjoyed safely and responsibly if you know how.
These are the Top 10 Must-Know Tips for Campfire Safety.

1. Know the Rules
Check the fire regulations of the campground or wilderness area where you are planning to build a fire before striking a match. Campgrounds may temporarily ban campfires if there is a high risk of wildfires, even if they have previously allowed them. Check the ranger's station for current campfire regulations and pay attention to posted signs.
2. Use the Campfire Pit
In most campgrounds, there is a fire pit or fire ring where campfires can be built. A campfire should only be built in the provided pit if one is provided. In a remote area where campfires are permitted but fire pits are not provided, dig a fire pit in an open area away from power lines, overhanging branches, and other hazards that could catch fire. After the pit has been dug, surround it with rocks, clearing a ten-foot radius of anything that could catch fire around the pit.
3. Building a Safe Campfire
Once your fire pit is built, build a safe campfire. Start the campfire with grass or dried leaves that will catch fire quickly. Then, add kindling, small branches and sticks smaller than an inch in diameter. Keep adding larger pieces of wood to the fire as it builds. In addition to providing heat, they will keep the fire burning for a longer period of time. Remember, you do not have to have a raging fire. In a small fire surrounded by rocks, you'll have plenty of heat for cooking and warmth.
4. Mind the Match
Light your campfire with a match, and make sure it is completely extinguished before disposing of it. Wet the match or throw it directly into the fire to burn it. Never start a fire with lighter fluid, gas, kerosene, or any other flammable liquid.
5. Use Local Firewood
Even if they are not visible to the naked eye, tree-killing insects and diseases can live on firewood. You can inadvertently introduce insects and diseases into forests where they wouldn't otherwise be found by bringing firewood from home. That's why it's important to use local firewood. Local means the closest convenient source of firewood available. Pick up firewood from the campground camp store or a nearby location, if possible.
6. Keep Water Handy
You should always have water and a shovel nearby when you start a campfire. Use the water to douse any runaway flames and the shovel to throw dirt or sand on any flames that jump the perimeter of your fire ring. It's also smart to keep a few feet of ground outside your fire ring watered down, so if an ember or flame flies outside, it won't gain any traction.
7. Pay Attention to the Wind
Your fire can spread in seconds if the wind is strong. Any flammable materials, such as unused firewood, should be kept upwind and at least 15 feet away from a campfire in case of a sudden gust of wind.
8. Be Careful with Kids and Pets
Campers need to be aware of more than just the risk of forest fires. The most common cause of camping injuries for children in the United States is fire. Keep your children and pets away from campfires unless they're on an adult's lap and teach them about fire safety. In the event that their clothes catch on fire, teach them how to stop, drop, and roll.

9. Never Leave a Campfire Unattended
Even for a minute, a campfire should not be left unattended. There should be at least one person watching the fire at all times because even a small breeze can quickly spread the fire. Even if you're leaving the fire for a short period of time, like to take a quick hike, you should extinguish it completely. It can be restarted when you return.
10. Put the Fire Out Completely—Every Time
When you're finished with your campfire, make sure you extinguish it properly. Dump water on the fire, stir the ashes with a shovel, then dump more water on it. The fire should be completely cold before you leave it unattended. If it's too hot to touch, then it's too hot to leave.
If you have large logs, make sure you soak them in water before attempting to put them out. Move the stones around the campfire to look for hidden embers. Never bury coals from the fire - they can smolder and start to burn again.
OUTDOOR
ADVENTURE
Featured Posts
HIKING
|
FLY FISHING
|
CAMPING
|
BACKPACKING
|
GEAR REVIEWS
|
HIKING | FLY FISHING | CAMPING | BACKPACKING | GEAR REVIEWS |
Best of
Top Clothing Brands of 2023
Discover unbeatable deals on Patagonia winter essentials at the REI Outlet sale! Get up to 40% off on jackets, parkas, and more.
Subscribe to Our Newsletter
Sign up with your email address to receive news and updates.
Get in touch.
Just like in a hardcore round of intense pickleball, communication is key! Reach out with any questions, comments, beer recommendations, inquiries, critiques and jokes.





A well-equipped car camping kitchen setup makes outdoor cooking effortless. Here’s my essential gear list—powered coolers, Jetboil stoves, storage solutions, and more—to help you cook like a pro on the road.